• Skip to primary navigation
  • Skip to main content
  • Skip to primary sidebar
  • Skip to footer

The Nourishing Gourmet

Nourishing. Satisfying. Gourmet.

  • THM Coaching
  • About
    • Privacy
    • Contact
  • Recipes
  • Cookbooks
    • Everyday Nourishing Food
    • Salad Cookbook
    • Soup Cookbook

Fermentation

The Health Benefits of Naturally Fermented Foods

January 13, 2014 by KimiHarris 21 Comments

The many health benefits of fermented foods

Traditional cultures didn’t have canning jars or supermarkets. The food they harvested in one season often had to be kept for the upcoming seasons, and their survival often depended on its preservation. Thankfully, they had a simple and effective method of preservation – lacto-fermentation. (By the way, lacto-fermentation doesn’t refer to the use of any milk products, but rather to the lactic acid fermentation responsible for culturing.)

Through fermentation, foods are preserved through the work of healthy bacteria. In a process that seems almost magical, but is easily explained through science, yet with roots going back far into history, not only does fermentation preserve food, but it also transforms food into a probiotic supplement and increases digestibility and vitamin content! It’s no wonder that we find fermented foods all over the world in traditional cultures!

There were so many life-changing things I learned from Nourishing Traditions, by Sally Fallon Morrell, and high on the list was learning the value of fermented foods As part of our 21 steps to a nourishing diet series, I wanted to give an introduction to the topic, and give a couple resource suggestions. Look for new, upcoming fermented recipes as well!

Fermented foods are an excellent source of probiotics

While most of our ancestors’ diets would have been brimming with live probiotic bacteria, ours are often devoid. With more and more research showing the importance of a healthy gut, the importance of eating foods that will aid our gut health is becoming more prominent. I personally think that lacto-fermented foods are high on the list of gut-healing foods.

Studies showing health benefits of probiotics

In fact, there are now studies linking specific probiotics to a wide variety of health benefits.

  • For example, Bifidobacteria has been linked to decreased cases of neonatal necrotizing enterocolitis.
  • Many strains of probiotics have been directly linked to reduced bouts of digestive complaints (including diarrhea).
  • Lactobacillus plantarum has been linked to reduced inflammatory bowel, small bowel bacterial overgrowth in children, reduced problems for sufferers of irritable bowel syndrome, and had a positive effect on the immune systems of those suffering from HIV.
  • Lactobacillus acidophilus in animal studies has shown a preventative effect for polyps, adenomas, and colon cancer. Source

And those are just a few of the many studies showing benefits!

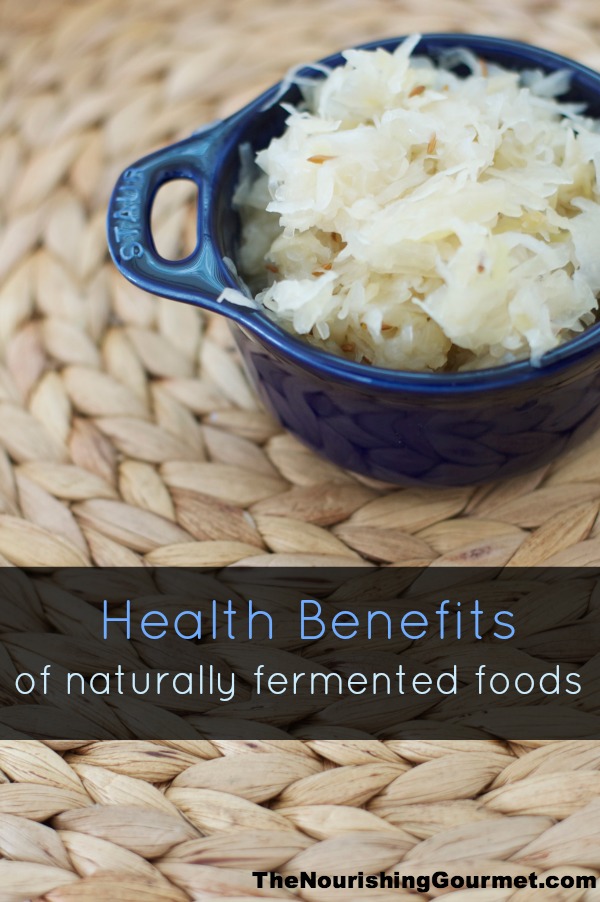
I personally take probiotics, but I don’t like depending on them solely, as it is believed by some that probiotics in the form of fermented foods are better used by our bodies and are a more effective means to “take probiotics”, if you will. Some studies have zeroed in on specific fermented foods. Sauerkraut, for example, has been shown specifically to be cancer fighting, a digestive aid, and, in one animal study, even a flu fighter! Source

Fermented foods have increased nutritional value

One of the reasons fermented foods are so great is because the fermentation process increases certain nutrients. For example, sauerkraut has an increased vitamin C content. Other traditional fermented food products show a big jump in vitamin content. One example is traditional fermented plant sap ferment by the name of Pulque. During the fermentation process, the thiamine increases from 5 to 29 and the niacin content creases from 54 to 515! All to say, there is a lot of evidence that the fermentation process actually enriches foods with higher amounts of nutrients. Source

Fermented foods are more digestible

I at first assumed that fermented foods were more digestible because of the probiotic content, but that is only part of the benefit! The fermentation process actually makes the food more digestible to us by breaking down hard to digest cellulose in food. This plays an important role in impoverished countries where young infants are fed fermented cereal gruels as a first food. Without the fermentation process, their bodies would have a hard time getting adequate energy from the food. Because so many of us have digestive issues, fermenting our foods could give our bodies a head start in the digestion of our food, while feeding our healthy gut bacteria at the same time.

Fermented foods are safer than raw vegetables to eat

I think that most of us, when first starting to experiment with home ferments, wondered if we were going to do something terribly wrong and kill off our family with the results of our experiments. We just are no longer used to the idea of fermenting things in our home.

But I found it very reassuring that eating fermented foods is safer than eating raw vegetables. The reason is that while yes, raw vegetables can have E.coli on it, once the fermentation process starts, the lactic acid and the E. coli are in direct competition with each other, and lactic acid is a serial killer of E. coli.

Fred Breidt from the USDA’s Food Science Research Unit at North Carolina State University published a paper on this subject specifically in regard to lactic acid fermented cucumbers.

He says, “The presence of live growing cells of lactic acid bacteria, which are the ones that ferment pickles and cheese and a lot of things, actually in competition cause E. coli to die off rather quickly, because they produce things other than just the acid, that’s in the fermented foods. Lactic acid bacteria are highly efficient killers of other bacteria, and they do a marvelous job. This is why vegetable fermentations pretty much always works. It’s been working for thousands of years. It’s one of the oldest technologies known to man and it always works, and the reason is these lactic acid bacteria are very good at what they do, and we take advantage of that as a technology.” Source

While obviously you should follow proper food handling advice and I do think that longer ferments are safest, overall, it appears that you are more at risk getting sick from eating a salad than your lacto-fermented vegetables!

How to make fermented foods practical

I think the most important step to making cultured foods part of your everyday eating lifestyle is to figure out what fermented food is well liked by you (or your family), what is inexpensive enough to eat daily, and what is easy to make. Adding in just one fermented food is a great start, especially if you consume it on a regular basis. Adding in several will help ensure that you are getting the benefits from a wide variety of probiotic sources, as each has its own benefits –  but that should be your long term goal, not your first goal.

We have often found it helpful, in really busy times, to simply buy locally made, raw, fermented vegetables. This is hardly the cheapest option, but it has allowed us to continue the practice of eating fermented foods when it was hard to keep my kitchen ferments up and running.

Fermented Vegetable Recipes

  • Sauerkraut (this is made using the traditional Russian method also used in the Wild Fermentation book. It’s pretty salty, so you can consider trying to cut down on the salt a little).
  • Dilly Carrots
  • Lacto-Fermented Roasted Tomato Salsa
  • Lacto-Fermented Escabeche 
  • Indian Kraut 
  • Lacto-Fermented Garlic
  • Lacto-Fermented Cortido 
  • Mexican Fiesta Cortido 

Other Resources:
Why I like Continuous Kombucha Brewing

Books you may find helpful (affiliate links):
Wild Fermentation
The Art of Wild Fermentation
Nourishing Traditions
The Body Ecology Diet

Filed Under: Health, Nourishing Practices, Nutrient Dense Foods Tagged With: Fermentation, Fermented Foods, Fermented Vegetables, Gut Health, Healing Foods, Health Benefits Of Probiotics, Lactic Acid Bacteria, Lacto Fermented, Lactobacillus, Probiotic, Sauerkraut, Vitamin Content

Water Kefir – A Simple & Refreshing Probiotic Soda (With a Step-by-Step Guide)

January 13, 2014 by Natalia Gill 69 Comments

Water Kefir - A Refreshing, Simple-to-Make Probiotic Soda (With Step-by-Step Photos!) at The Nourishing Gourmet

By Natalia Gill, from An Appetite For Joy

Water kefir is a lightly sweet and refreshing tonic, bubbling over with healthy bacteria (You can read about the health benefits of fermented foods here) .  The taste is pleasant on its own or it can be elevated with an endless combination of flavors.  Spicy lemon ginger and cultured grape soda are pictured here (our current favorites!)

As part of the 21 Steps to a Nourishing Diet Series, water kefir can be a nice segue into home fermentation.  This cultured drink is very inexpensive to make, virtually fail-proof and packs a healthy wallop of probiotics.  I can’t think of an easier, more instantly rewarding way to start fermenting.

Basic water kefir is made by dropping water kefir “grains” (which are not really grains at all but a symbiotic culture of bacteria and yeast or SCOBY) into sugar water and allowing it to ferment on the counter for a few days.  The grains (which look like small, clear jellies) can be used over and over indefinitely, and usually multiply, allowing them to be passed on to others.

Our experience with water kefir

My family started drinking water kefir about a year ago.  At the time, I was getting into home fermentation in an effort to get a wider range of probiotics into our diet.  Probiotic-rich foods not only create a more favorable balance of gut flora, but amazingly, the bacteria work to physically repair the gut lining.

After purchasing a crock, I successfully (and to my surprise, quite easily) made this No-Pound Old Fashioned Lacto-Fermented Sauerkraut.  I was preparing to embark on Continuous Kombucha Brewing when some water kefir grains dropped into my lap at the playground of my son’s school.  Not literally, although wouldn’t that be something!  They came freshly prepared by a friend in a wide-mouth quart-sized mason jar (as pictured in “step 1” below).

Several days later, I nervously strained the finished water kefir and reused the grains to make my first new batch.  Within hours it started coming to life.  I relaxed as the mixture bubbled away happily in a dark and formerly stagnant corner of my kitchen counter.  It was fun to check in now and then, giving the mason jar a little twist to encourage bubbles to surface (I read later that this is a good thing to do if you think of it.)  Plus, the taste was quite pleasant!

My children and I benefited right away.  My 2-yr old daughter had recently snubbed her nourishing diet for a phase of picky eating that was starting to affect her digestion.  Her digestion normalized after the first round of water kefir.  I was also thrilled to be getting probiotics into my son again, who at the time did not like soured milk products or sauerkraut.

My husband obliged but never really noticed any benefit.  If anything, he felt better without it, so he gave it up after a while.  Lately though as I’ve been experimenting with new flavors, he’s been giving it another try.  I’m wondering if the added complexity of flavored water kefir (the tang of cultured grape or the sour-spicy combo of lemon-ginger) will allow his body to receive it better.  Taste does impact digestion.

Follow these step-by-step photos to brew your own water kefir 
(see recipe for exact measurements and variations)

  • If you receive grains from a friend, they will likely come mid-ferment as shown in Step 1.
  • If you purchase dehydrated grains from a place like Cultures for Health, you will receive detailed instructions on how to rehydrate them, which will probably be very similar to the diagram below, but it may take a few rounds for the grains to recalibrate before your water kefir is enjoyable.

How to Make Water Kefir

Questions and Answers about Water Kefir 

What types of sugars can I use?  What about coconut palm sugar, honey and maple syrup?

  • Unrefined cane sugar is recommended with molasses (added and/or still intact) to provide minerals that the grains need.  Lately I have been use sucanat (#affiliatelink) and my grains are thriving.  However, I started with organic cane sugar (fine granulated) and that also worked well and is more cost effective.  *With sucanat, I use a generous 1/4 cup + 1t molasses and ferment for 48 hours.  With organic cane sugar I use a level 1/4 cup + 1t molasses and ferment for 72 hours. 
  • It is possible to use coconut palm sugar, honey and maple syrup as well (substituting equally) but over time the grains will weaken as the sugar makeup isn’t optimal.  This should only be done when you your grains have multiplied and you have extra to experiment with.  I recently experimented with honey and it made a nice drink, though the grains did not multiply as they usually do.  Maple syrup may work better because it is typically not as antimicrobial as is honey.

How much should I drink?

As you might imagine, there are no hard and fast rules.  We started out drinking an ounce or two after each meal.  This was a good way to see how our bodies responded to it.  You may want to start with even less if your diet doesn’t include a lot of fermented foods.  Now we are a little more erratic, but I’d say we have about 2-6 ounces on most days.  We sometimes take breaks by putting it into hibernation.  It’s always wise to listen to your body and practice moderation, even with the good stuff.

Can I take a break from making it?

Yes!  Grains can be put into hibernation mode or dehydrated.  To hibernate, just mix up a new batch (as pictured in “step 6”) and stick it in the fridge instead of leaving it out to ferment.  I’ve left mine there for almost a month with no problems but I’d suggest checking on them after 1-2 weeks as all grains are different.

I have yet to dehydrate our grains, but here is how to do it from what I understand.  Rinse the grains with filtered water and spread them out between two sheets of parchment and leave in a safe, but ventilated place to dry out at room temperature for 1-4 days.  You want them to be very dry.  You can also use a dehydrator.  They should keep for several months.

What is the alcohol content and is it safe for kids?  

The alcohol content is very low – well below 1% which is less than overripe fruit.  It climbs a little if using straight juice or when doing a second fermentation (as described in the recipe notes) but it would be a challenge to get even mildly intoxicated by drinking water kefir.

My children might drink it once or twice a day, in small 2-3 ounce glasses (less if it’s a second fermentation).  It is an individual judgement call as there are no strong warnings against giving it to children.  I did read once, in a book by Maria Montessori, that she did not recommend giving fermented drinks to children.  I assume she was referring to alcohol, but it did make me take pause.

How much sugar remains after fermentation?

This is taken from the Q & A section about water kefir grains from Cultures of Health. “The sucrose is converted to glucose+fructose. The glucose is used by the kefir grains for grain-building and reproduction, and the fructose remains in the drink at about 20% of the original level. The longer the finished kefir sits, the less sweet it will be, so some fructose is apparently converted in that process as well.”

Where did kefir grains originate? 

Water kefir is truly cosmopolitan.  From Italy to the Far East to Mexico, various names and twists exist.   It’s origins are unclear, but it is speculated to have originated in Mexico, where, according to research, “tibicos” culture forms on the pads of the Opuntia cactus (read more here).  Milk kefir grains, which have a different composition, likely originated in the Caucasus Mountains region.

Do you have any questions or an experience to share?  We would love to hear!


Basic Water Kefir Instructions (see notes for variations)
 
Author:
Natalia Gill
Recipe type: Beverage
Print
 
Light and bubbly, water kefir is a simple and delicious way to balance and strengthen digestion.
Ingredients
  • ¼ - ⅓ cup unrefined sugar
  • 1t unsulphured blackstrap molasses (or your chosen source of minerals)
  • 2.5 - 3 cups spring water (leave enough room for your grains and extra space at the top for fermentation gas)
  • ¼ - 1 cup of water kefir grains
Instructions
  1. Shake up the sugar, molasses, and spring water in a wide-mouth quart-sized mason jar until dissolved. (You don't want your grains getting stuck in a bottleneck on their way out!) Leave an inch or two at the top to allow for the build-up of carbon dioxide.
  2. Add in rinsed grains and close the lid. Some people use cheesecloth with the mason jar band in lieu of the lid, but I've always sealed it. (If you purchased dehydrated grains, follow instructions for rehydration. The directions are similar, but it will take a few rounds to get them going before the water kefir is palatable.)
  3. Leave the grains to ferment at room temperature for 48-72 hours (2-3 days). It's good to taste a spoonful of the drink at 48 hours. If it is too sweet for your liking, let it go another day. It isn't recommended to go beyond 72-96 hours because the grains will weaken.
  4. Strain your finished water kefir and store it in the fridge. I use old juice jars or swing top bottles for this.
  5. Rinse your grains (filtered water is best, but tap is ok) and repeat. Again. And again...
Notes
Once you are comfortable with your grains and if they are multiplying well, split some off for experimentation and let the fun begin! There is no limit to what you can create.

Cultured juice sodas: take your finished water kefir (pictured in step 3) and add about ¾-1 cup of juice. I love using a quality, not-from-concentrate grape juice for this. Cherry would be wonderful as well. It is critical to leave even MORE room at the top because it is going to get VERY fizzy! Do not add the grains back in. Leave it to ferment on the counter for another 12-24 hours. (Sometimes I let it sit for only a few hours.) The longer it goes, the less sweet it will be. Refrigerate when you're happy with how it tastes. This is called a second fermentation.

You can also add juice straight to your finished water kefir (after straining the grains) without a second ferment. Pop it into the fridge, and enjoy as is. Try the juice of one lemon and a tablespoon of finely grated ginger for a beautiful probiotic lemonade! I've even heard of making cultured mojitos this way, by adding the juice of a lime and muddling some fresh mint.

Dried and/or fresh fruit: It's common to add dried and/or fresh fruit into the batch either before it ferments, or into the finished, strained water kefir. Pineapple, lemon slices and dried unsulphured figs are popular choices. Tepache is a traditional drink of Mexico made with pineapple, brown sugar and cinnamon.

Coconut Water Kefir: follow the instructions using coconut water instead of spring water. You will not need any sugar or molasses. Add the grains right in. The fermentation is MUCH faster. Check it in 6 hours and don't let it go for much longer than 12-15. Some may like the taste, but many will not. It is dry (unsweet) and quite yeasty. But this could be a great option for those avoiding sweeteners.

Cultured Herbal Teas: Steep herbs and/or spices in your spring water and let cool before following the basic recipe. Rosehip and/or hibiscus is delightful!

Dairy Kefir: Water kefir grains will weaken when used in milk (milk grains are best), but if you have extra grains and want to experiment just add the grains to milk with no sugar or molasses. Alternatively, you can add an ounce of finished, strained water kefir directly to milk. Check it after 24 hours or so.

Coconut Milk: This is also a fun thing to experiment with although it will weaken the grains over time. Transfer half a can of coconut milk into a glass container and add 2 tablespoons of grains. Taste it after 24 hours and keep it going if it's not tangy enough for you. The coconut milk can thicken during the process, especially after it is refrigerated and could be used to make cultured coconut whipped cream.
3.2.2265

Filed Under: Beverages, Dairy Free, Gluten Free, Nourishing Practices, Vegan, Vegetarian Tagged With: Beverages, Fermentation, Grain Free, Healthy beverages, Kefir, Kefir Grains, Nourishing Frugal Recipes, Vegan, Vegetarian, Water Kefir

Primary Sidebar

ConvertKit Form

Get Every Recipe

And the insider's view from our kitchen

Success! Now check your email to confirm your subscription.

There was an error submitting your subscription. Please try again.

We won't send you spam. Unsubscribe at any time. Powered by ConvertKit

Follow Me

  • Facebook
  • Google+
  • Instagram
  • Pinterest
  • RSS

Search

Please Read:

The information you find here at The Nourishing Gourmet is meant to help you become a better cook! This site is primarily for sharing family friendly recipes. It's not meant to give medical advice or to make any health claims on the prevention or curing of diseases.This site is only for informational and educational purposes. Please discuss with your own, qualified health care provider before adding in supplements or making any changes in your diet. Also, any links to sponsors or affiliates (including Amazon) may give me a percentage of the sale or a pay per click. Thank you for supporting this site.

Categories

  • $10 Main (42)
  • $5 Dishes (43)
  • 52 ways to save money on a healthy diet (53)
  • AIP (23)
  • Baked Goods (83)
  • Beverages (72)
  • Breakfast and Brunch (61)
  • Condiments (8)
  • Dairy Free (492)
  • Desserts (184)
  • Dietary Needs (6)
  • Egg Free (11)
  • Egg Free (86)
  • For the Kids (66)
  • For the Love of Food and Books (18)
  • Gluten Free (484)
  • Grain Free (95)
  • Health (75)
  • Kitchen Tools (4)
  • Main Dishes (126)
  • Nourishing Frugal Recipes (167)
  • Nourishing Frugal Tips (70)
  • Nourishing Practices (56)
  • Nutrient Dense Foods (70)
  • Q and A (15)
  • Salads (39)
  • Sides (101)
  • Snacks (124)
  • Soups (50)
  • The Healthy $1 Menu (21)
  • The Low Energy Guide to Healthy Cooking (18)
  • THM (2)
  • Trim Healthy Mama (2)
  • Uncategorized (846)
  • Vegan (241)
  • Vegetarian (361)

Recent Posts

  • 2 Ingredient Peppermint Bark
  • Herbal Hibiscus Lemonade (Keto, THM)
  • Creamy Curry Red Lentil Soup
  • One-Pot Gluten-Free Mac and Cheese
  • Healthy Pumpkin Spice Granola
  • Crispy Pumpkin Spice Granola (oil-free)
  • Why I Use THM Principles Now
  • Vietnamese Beef Noodle Salad
  • Coconut Flour Pancakes
  • Instant Pot Mexican Shredded Chicken

Recent Comments

  • Dorene St G on Cracker Toffee (Easy Peasy Christmas Candy)
  • Nadia Kriston on Finding a Toaster Oven Without Nonstick
  • KimiHarris on How to make heavenly coconut milk whipped cream (with an isi dispenser)
  • KimiHarris on Autumn Beef Stew (Tomato Free)
  • KimiHarris on How to make heavenly coconut milk whipped cream (with an isi dispenser)

Fresh: Nourishing Salads for All Seasons

Get Every Recipe

And the insider's view from our kitchen

Success! Now check your email to confirm your subscription.

There was an error submitting your subscription. Please try again.

We won't send you spam. Unsubscribe at any time. Powered by ConvertKit

Footer

Privacy

Copyright © 2023 · Foodie Pro & The Genesis Framework