• Skip to primary navigation
  • Skip to main content
  • Skip to primary sidebar
  • Skip to footer

The Nourishing Gourmet

Nourishing. Satisfying. Gourmet.

  • THM Coaching
  • About
    • Privacy
    • Contact
  • Recipes
  • Cookbooks
    • Everyday Nourishing Food
    • Salad Cookbook
    • Soup Cookbook

Dairy Free

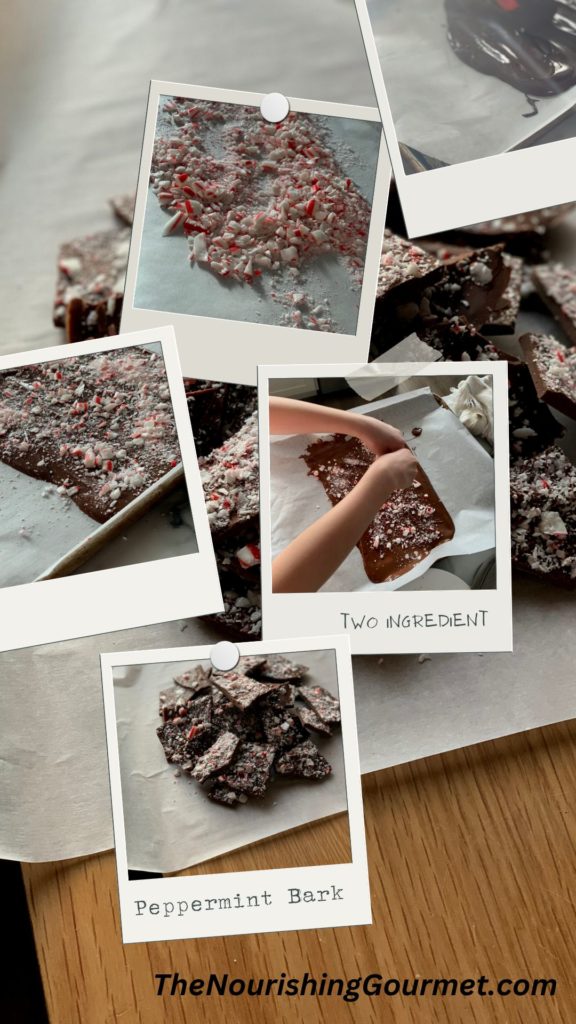
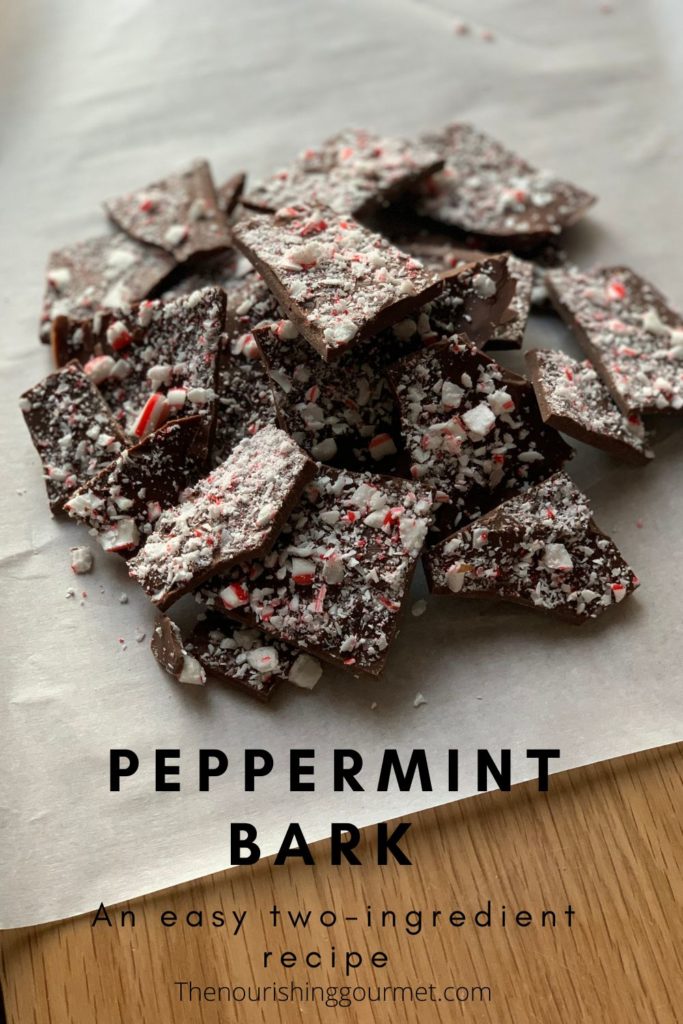
2 Ingredient Peppermint Bark

December 21, 2022 by KimiHarris Leave a Comment

One of my favorite flavor combinations is chocolate and peppermint. This easy, two-ingredient recipe explodes with flavor yet takes just a few minutes to throw together. 

It makes a wonderful last-minute gift or a treat to eat while watching a Christmas movie. 

(Save some candy canes so you can make it again later in the year, as this is delicious any time of year!) 

Because you are only using a couple of ingredients, make sure you pick chocolate that you especially like, as well as flavorful candy canes. 

We’ve made this with super dark chocolate for our family and with smooth milk chocolate for gifting. Enjoy Life is a great, allergen-friendly chocolate. Just use chocolate you like, and it will be good!

There are some delicious candy canes out there. We’ve made it using a more typical candy cane as well as the YumEarth brand (which uses organic ingredients and natural coloring from fruit). 

If you use a dark chocolate, this treat is also lower in sugar, especially in comparison to most Christmas cookies and treats. If you have allergens, such as dairy or gluten, it should be easy to find chocolate and candy canes that meet your needs.

Do you love peppermint and chocolate together? Here are some other recipes: 

  • Chocolate Peppermint Fudge
  • Hot Peppermint Carob (or use cocoa powder for hot cocoa!)
  • DIY Mint Chocolate Lip Balm

Peppermint Bark

Ingredients: 

  • 11.5 ounces chocolate chips (dark, super dark, or milk) 
  • 5 regular sized candy canes 

Directions:

  1. Unwrap candy canes and put them between sheets of parchment paper. Using a mallet, crush the candy canes into small pieces. We like there to be some pieces about the size of a large pea, and some of it finer. 
  2. Lay a new piece of parchment paper out on a jelly roll pan. 
  3. Put the chocolate chips into a medium-sized dry microwaveable bowl. Melt using 15 to 30 second intervals, stirring in between, until the chocolate is just melted. *
  4. Using a spatula, scrape the melted chocolate into the center of the parchment paper on the pan, and smooth out to about ¼ inch thickness 
  5. Sprinkle the crushed candy cane evenly over the melted chocolate. Let the chocolate harden (you can put it into the refrigerator or freezer for a faster approach). When hard, break into smaller pieces. Keeps well. 

Recipe Notes:

  • * You can also melt the chocolate by putting it in a double boiler over low heat, and gently stirring it until just melted. 
  •  This method is really so simple, you can use varying amounts of chocolate and candy canes.
Filed Under: Dairy Free, Desserts, Egg Free, Snacks, Vegan, Vegetarian

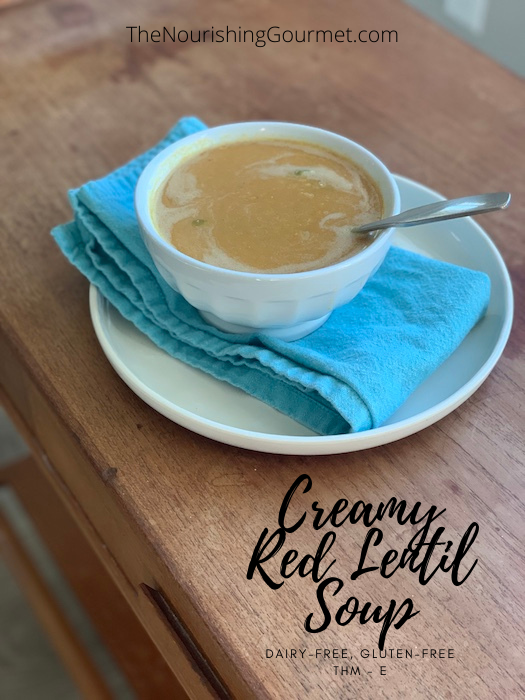
Creamy Curry Red Lentil Soup

December 8, 2021 by KimiHarris 4 Comments


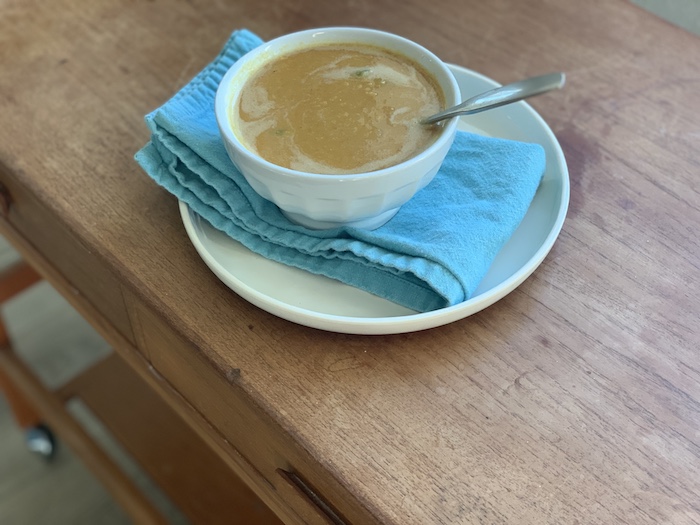
This creamy, dairy-free soup is frugal and comforting on a cold winter’s night. Cumin, garlic, ginger, and curry powder all help give this soup a robust flavor profile, while the balsamic vinegar provides just the right tang. 

Red lentils cook up in a hurry, making this a wonderful last-minute meal. I love lentils as they are full of essential nutrients, a frugal source of protein, and are delicious too! 

I add gelatin to the soup to add more protein, but that’s optional. This soup is easily made with broth or water, vegetarian or not. 

Serve with muffins, bread, or over brown rice, and a large salad for a complete meal. For those on THM, this makes a wonderful “E” Meal.

Tips

For easy blending, use an immersion blender.

For more protein and collagen, use the optional gelatin. This is a good brand.

I like to keep all of the ingredients for this soup on hand. They are easily made into a variety of dishes, and I can also make this soup for last-minute meals!

Other Soup Recipes 

  • Egyptian Red Lentil Soup with Caramelized Onions
  • Simple Thai Broth
  • Golden Turmeric Sipping Broth

Creamy Curry Red Lentil Soup

  • 1-2 tablespoons fat or oil of choice 
  • 3 carrots, peeled and thinly sliced 
  • 1 onion, peeled and chopped 
  • 3 celery, thinly sliced 
  • 3-6 garlic cloves, peeled and minced 
  • 2 cups red lentils, rinsed in a fine sieve (remove any small pebbles, if there are any)
  • 8 cups broth or water 
  • 1 heaping teaspoon cumin 
  • 1 heaping teaspoon dried ginger or one tablespoon finely grated fresh ginger 
  • 2 teaspoon curry powder 
  • ¼ cup of gelatin in 1 cup of cool water, optional
  • Around 1 – 2 tablespoons of salt 
  • 2 tablespoon balsamic vinegar 

1. In a large pot, add the fat/oil (just enough to lightly cover the bottom of the pot) and turn on medium heat until the fat is just hot. Add the carrots, onion, and celery, and lightly sprinkle with salt. Stir here and there, and cook until the vegetables start to soften (about five minutes) and add the garlic and cook for one or two more minutes. 

2. Add the red lentils and broth/water, turn heat to high, and bring to a simmer. Turn down to keep at a gentle simmer. Remove with a large spoon any foam that may come to the surface of the soup. 

3. Add the spices. Simmer for around twenty minutes, or until the lentils are soft. 

4. Stir together the gelatin and the water, soften for a few minutes. Stir into the soup, along with salt (to taste, you will need more if you used water) and balsamic vinegar. 

5. For a creamier texture blend part or all of the soup. The easiest way to accomplish this is to use an immersion blender, which you can put right into your pot for easy blending. OR, carefully scoop out some of the soup, and blend in a blender (follow procedures for your specific blender for how to do this safely. For my blender, I vent it, and only fill halfway, and blend on low to start). For blending in a blender, you will need to do at least several batches. I blend about half of the soup. 

6. Check the flavor, and adjust with salt, vinegar, or pepper, and enjoy!

Filed Under: $10 Main, Dairy Free, Egg Free, Gluten Free, Grain Free, Nourishing Frugal Recipes, Soups, The Low Energy Guide to Healthy Cooking, THM, Trim Healthy Mama

Crispy Pumpkin Spice Granola (oil-free)

September 22, 2021 by KimiHarris Leave a Comment

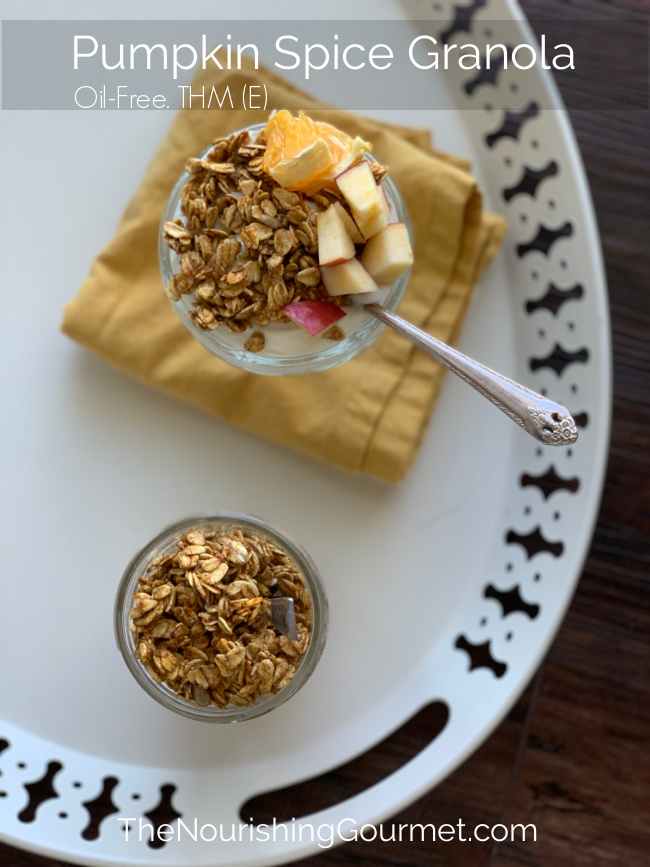
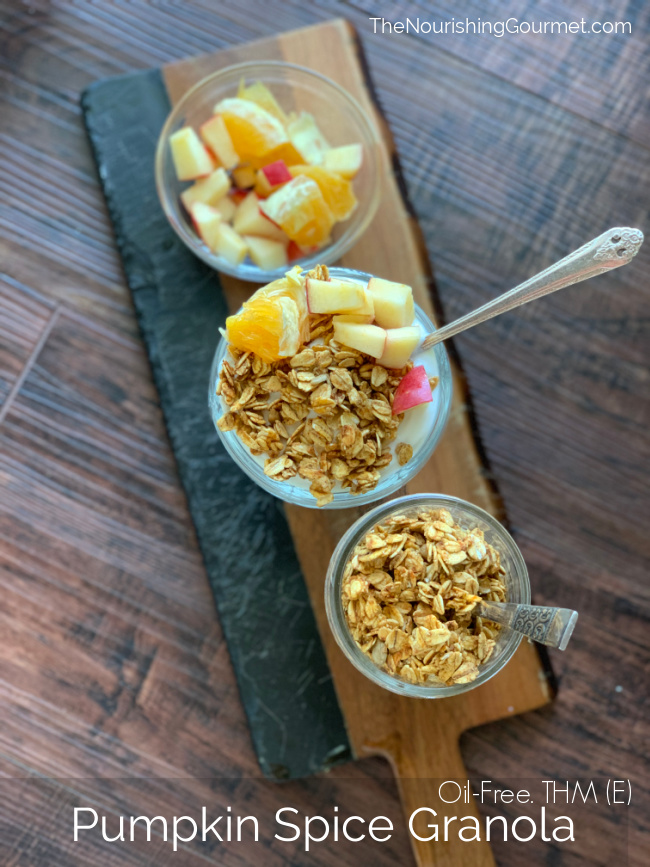
This low-fat, THM, yet delicious granola recipe is bursting with spice and pumpkin, and is sure to make your house smell heavenly while it bakes. I LOVE it especially on top of yogurt. I’ll make myself a yogurt bowl with diced apples (or whatever other fruit I desire) and granola. 

It’s a lovely snack or breakfast. It’s perfect for a “E” meal on Trim Healthy Mama (THM), or for those of you looking for a lighter granola recipe. For a THM snack or meal, serve this with fruit and Nonfat Greek Yogurt. If you use a higher fat yogurt it will be a XO (crossover) meal. 

I first learned about this little trick of using egg whites instead of oil from THM recipes. It’s a clever trick, because with the right recipe, they will crisp up in a way that I didn’t think possible without oil. It’s not quite as crisp as with oil, but perfectly lovely all the same. 

I save this version of granola for me, and make this version for my family. They love it! I will make both of these types at the same time, and cook them on separate plans. 

One quick note: For a recipe to be a pumpkin spice recipe, you technically don’t have to use the pumpkin, as it’s really referring to the spice. However, we actually liked the pumpkin puree version better. It’s not quite as crunchy as when we left it out, but it adds so much flavor that it’s worth it. Feel free to leave it out though! I tested this several times without it, and it was great. 

For other THM granola recipes, here’s a shortlist from other bloggers: 

  • Oatmeal Cookie Granola
  • Crunchy Granola: (This version was helpful in my own recipe adaptation!)
  • Chocolate Nut Stove-Top Granola 
  • Apple Cinnamon Stove-Top Granola 

Crispy Pumpkin Spice Granola (oil-free)

  • 2 cups rolled oats (not quick, gluten-free and organic, if desired. You can also use sprouted))
  • ¼ cup erythritol or xylitol, OR 1 tablespoon of THM Super Sweet Blend 
  • ½ teaspoon cinnamon 
  • ½ teaspoon pumpkin pie spice 
  • Sprinkle of salt 
  • 1 teaspoon vanilla 
  • 2 egg whites (4 tablespoons) 
  • 2 tablespoons of pumpkin puree (optional)
  1. Preheat the oven to 300F degrees, and line a sheet pan or cookie sheet with parchment paper. 
  2. Combine the oats, sweetener, spices, and salt, in a medium bowl and give a stir. 
  3. Combine the egg whites, pumpkin puree, if using, and vanilla, whisk together, and then pour over the oat mixture. Gently mix until it is coated. If it’s super dry, you can add a little more egg white, but the mixture will be dryer than oil-based granola recipes. 
  4. Scrape onto prepared pan, and place in oven (near the middle). Cook for twenty minutes, gently stir, then cook for another 10-20 minutes, or until the oats are dryer. They will continue to crisp up after they cool. 
  5. Store in an airtight container once done.

Filed Under: Breakfast and Brunch, Dairy Free, Egg Free, For the Kids, Gluten Free

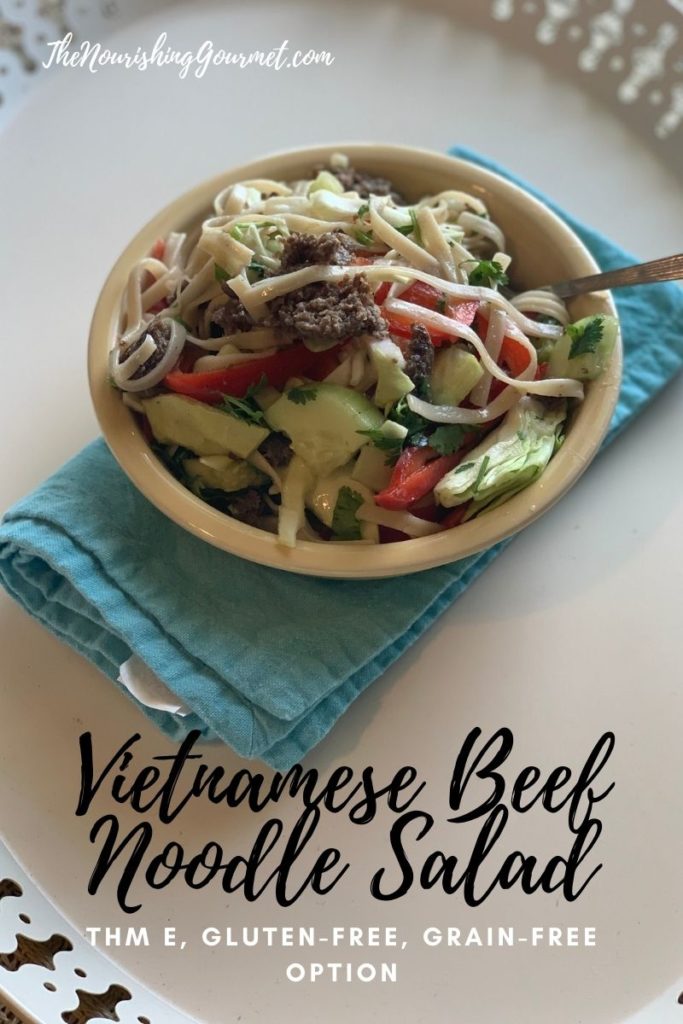
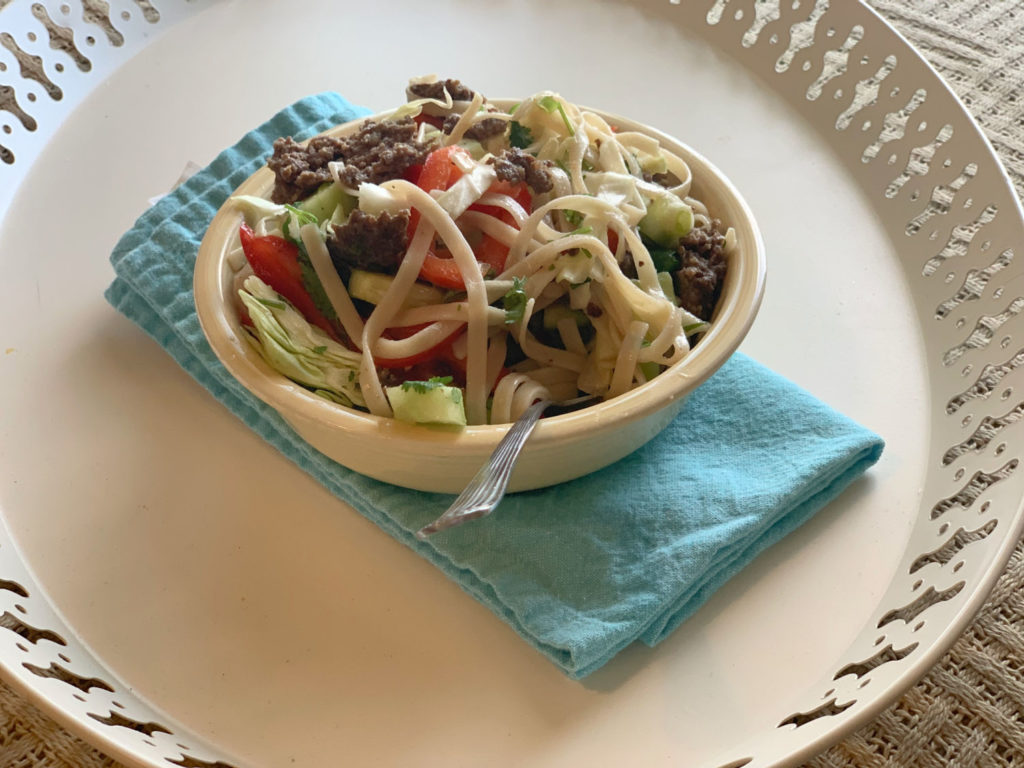
Vietnamese Beef Noodle Salad

July 15, 2021 by KimiHarris 2 Comments


This refreshing, gluten-free salad is full of flavor with the punch of rice vinegar, the saltiness of fish sauce, the sweetness of honey or sweetener of choice, and the herby savoriness of cilantro and/or basil. It also happens to be one of my favorite meals right now. Not only is it delicious, but it is packed with nutrients!

While, yes, I eat this just because it’s so good, I also aimed to get a rainbow of produce in this recipe, which adds not only more flavor but also important nutrients, antioxidants, and a wide variety of fiber sources. Win-win! 

The other aspect I love about all of the added vegetables is that it helps you stay with an appropriate amount of noodles. We often want a huge plateful of pasta — with this recipe, you can have a large plate of pasta, but half of it is vegetables! 

This recipe also works for those of you who are on THM (Trim Healthy Mama) as an “E” meal. 

We’ve eaten this meal many times through the summer, and it’s perfect for hot weather, but we eat it year-round. 

I named this a Vietnamese recipe, although I do want to clarify that this isn’t a claim to being an authentic Vietnamese recipe, but rather, I’ve used some of the flavor profiles and sauce inspiration from Vietnamese cuisine. 

Notes on the recipe:

  • Traditionally, a recipe like this would have used white rice noodles, such as rice sticks. I am using whole grain brown rice noodles. You can get something like these stir-fry Thai Kitchen brown rice noodles, though I have been using brown rice fettuccine noodles, as they are cheaper and similar in taste and texture. 
  • This will need to be served right away. If you aren’t serving it right away, you can keep the elements of the recipe separate, and toss right before serving (toss the noodles with a bit of the sauce and/or oil to keep them from sticking before storing them, however, or simply make the other elements – the sauce, the meat, and the chopped vegetables, and cook the noodles right before serving. 

Notes on THM:

  • While technically you are supposed to use 96% lean meat for an E meal on THM, because I don’t add any fat to this recipe, I use the 93% grasssfed ground beef that I find locally and I think that works well for fat limits for an E meal. If you don’t use a lean meat here, it counts as a cross-over (XO). 
  • Honey isn’t encouraged on THM when in weight loss mode, but the ¼ a cup of honey here is pretty small per serving. I’ve tested this with both honey and xylitol, and both worked very well. Allulose should work perfectly too (and is dog-safe, unlike xylitol). 
  • Brown rice noodles are on plan on THM, but you are encouraged to watch your blood sugar when eating them, if you are sensitive, and to keep your portions small. This recipe works well, because it mixes vegetables with the noodles for a filling meal, without leaning completely on the noodles. 
  • Cassava noodles are not considered on-plan for THM, but for those grain-free, some find that they do well with occasional cassava noodles (cassava is also a wonderful prebiotic fiber!). Some other grain-free noodle options to play with are here.

Vietnamese Beef Noodle Salad

Serves: 6-8

Ingredients:

Meat:

  • 1 lb ground beef (96% or up, for an E meal)
  • 1 tsp dried ginger
  • 3 cloves garlic
  • 2 tbsp rice vinegar
  • 1 tbsp tamari or coconut aminos or fish sauce
  • Optional: 1 tsp onion powder and 1 tsp garlic powder
  • Optional: pinch or two of red pepper flakes
  • Add more coconut aminos/tamari/fish sauce, and vinegar to taste

Sauce/Dressing

  • Scant ¼ cup honey or ¼ cup xylitol. Other options: Allulose, or of-plan organic white sugar
  • ½ cup hot or warm water
  • ½ cup rice vinegar
  • ¼ cup fish sauce
  • 3 garlic cloves, finely minced
  • Scant 1 tsp dried ginger
  • Pinch of cayenne pepper

Salad

  • 8-12 oz dried pasta *
  • 2 cucumbers
  • 3-6 green onions
  • 2 large bell peppers (red, yellow, or orange)
  • 1 bunch of cilantro
  • Optional: a few handfuls of (Thai) basil
  • 4 cups shredded or thinly sliced cabbage

*We usually use brown rice noodles, but I also tried this with 8 ounces of cassava noodles for a grain-free option. Both worked! But the cassava needs to especially be eaten right away as it will get mushy if left to sit. Cassava noodles aren’t on THM, although some use it as a personal choice option if needed.

Directions:

  1. Make the sauce by first stirring together the hot or warm water with the sweetener of choice. Add the rest of the ingredients. Set aside.
  2. Prep the vegetables: Peel the cucumbers and cut into small wedges. Seed and thinly slice the sweet bell peppers. Thinly slice cabbage, chop the green onions (removing the top two inches and discarding), and wash the cilantro, remove the stems, and chop.
  3. Cook pasta according to box directions, but make sure you salt well. While the pasta cooks make up the ground beef, adding the seasoning as it cooks, and stirring frequently.
  4. Drain the pasta once just tender, and rinse with cold water. Drain well. Add to a large bowl with the vegetables, and then toss with the dressing.
  5. Serve right away. You can also add more rice vinegar and fish sauce to add more flavor if needed. Over time, the noodles will start absorbing the sauce, so, if needed, you can add a bit more vinegar and either tamari, coconut amino acids, or fish sauce, to taste.

Filed Under: Dairy Free, Egg Free, Egg Free, Gluten Free, Grain Free, Main Dishes

Next Page »

Primary Sidebar

ConvertKit Form

Get Every Recipe

And the insider's view from our kitchen

Success! Now check your email to confirm your subscription.

There was an error submitting your subscription. Please try again.

We won't send you spam. Unsubscribe at any time. Powered by ConvertKit

Follow Me

  • Facebook
  • Google+
  • Instagram
  • Pinterest
  • RSS

Search

Please Read:

The information you find here at The Nourishing Gourmet is meant to help you become a better cook! This site is primarily for sharing family friendly recipes. It's not meant to give medical advice or to make any health claims on the prevention or curing of diseases.This site is only for informational and educational purposes. Please discuss with your own, qualified health care provider before adding in supplements or making any changes in your diet. Also, any links to sponsors or affiliates (including Amazon) may give me a percentage of the sale or a pay per click. Thank you for supporting this site.

Categories

  • $10 Main (42)
  • $5 Dishes (43)
  • 52 ways to save money on a healthy diet (53)
  • AIP (23)
  • Baked Goods (83)
  • Beverages (72)
  • Breakfast and Brunch (61)
  • Condiments (8)
  • Dairy Free (492)
  • Desserts (184)
  • Dietary Needs (6)
  • Egg Free (11)
  • Egg Free (86)
  • For the Kids (66)
  • For the Love of Food and Books (18)
  • Gluten Free (484)
  • Grain Free (95)
  • Health (75)
  • Kitchen Tools (4)
  • Main Dishes (126)
  • Nourishing Frugal Recipes (167)
  • Nourishing Frugal Tips (70)
  • Nourishing Practices (56)
  • Nutrient Dense Foods (70)
  • Q and A (15)
  • Salads (39)
  • Sides (101)
  • Snacks (124)
  • Soups (50)
  • The Healthy $1 Menu (21)
  • The Low Energy Guide to Healthy Cooking (18)
  • THM (2)
  • Trim Healthy Mama (2)
  • Uncategorized (846)
  • Vegan (241)
  • Vegetarian (361)

Recent Posts

  • 2 Ingredient Peppermint Bark
  • Herbal Hibiscus Lemonade (Keto, THM)
  • Creamy Curry Red Lentil Soup
  • One-Pot Gluten-Free Mac and Cheese
  • Healthy Pumpkin Spice Granola
  • Crispy Pumpkin Spice Granola (oil-free)
  • Why I Use THM Principles Now
  • Vietnamese Beef Noodle Salad
  • Coconut Flour Pancakes
  • Instant Pot Mexican Shredded Chicken

Recent Comments

  • Dorene St G on Cracker Toffee (Easy Peasy Christmas Candy)
  • Nadia Kriston on Finding a Toaster Oven Without Nonstick
  • KimiHarris on How to make heavenly coconut milk whipped cream (with an isi dispenser)
  • KimiHarris on Autumn Beef Stew (Tomato Free)
  • KimiHarris on How to make heavenly coconut milk whipped cream (with an isi dispenser)

Fresh: Nourishing Salads for All Seasons

Get Every Recipe

And the insider's view from our kitchen

Success! Now check your email to confirm your subscription.

There was an error submitting your subscription. Please try again.

We won't send you spam. Unsubscribe at any time. Powered by ConvertKit

Footer

Privacy

Copyright © 2023 · Foodie Pro & The Genesis Framework