• Skip to primary navigation
  • Skip to main content
  • Skip to primary sidebar
  • Skip to footer

The Nourishing Gourmet

Nourishing. Satisfying. Gourmet.

  • THM Coaching
  • About
    • Privacy
    • Contact
  • Recipes
  • Cookbooks
    • Everyday Nourishing Food
    • Salad Cookbook
    • Soup Cookbook

Desserts

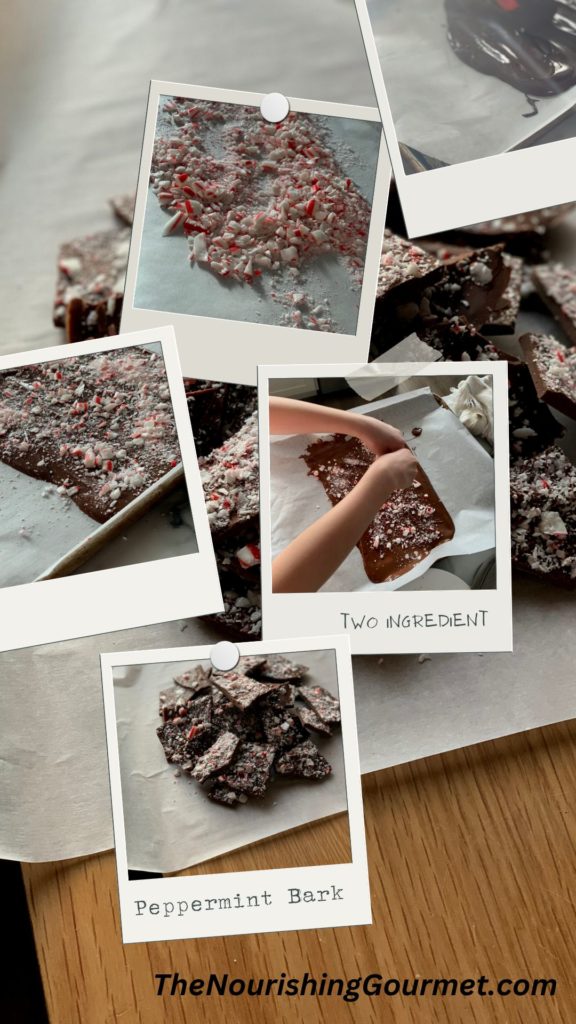
2 Ingredient Peppermint Bark

December 21, 2022 by KimiHarris Leave a Comment

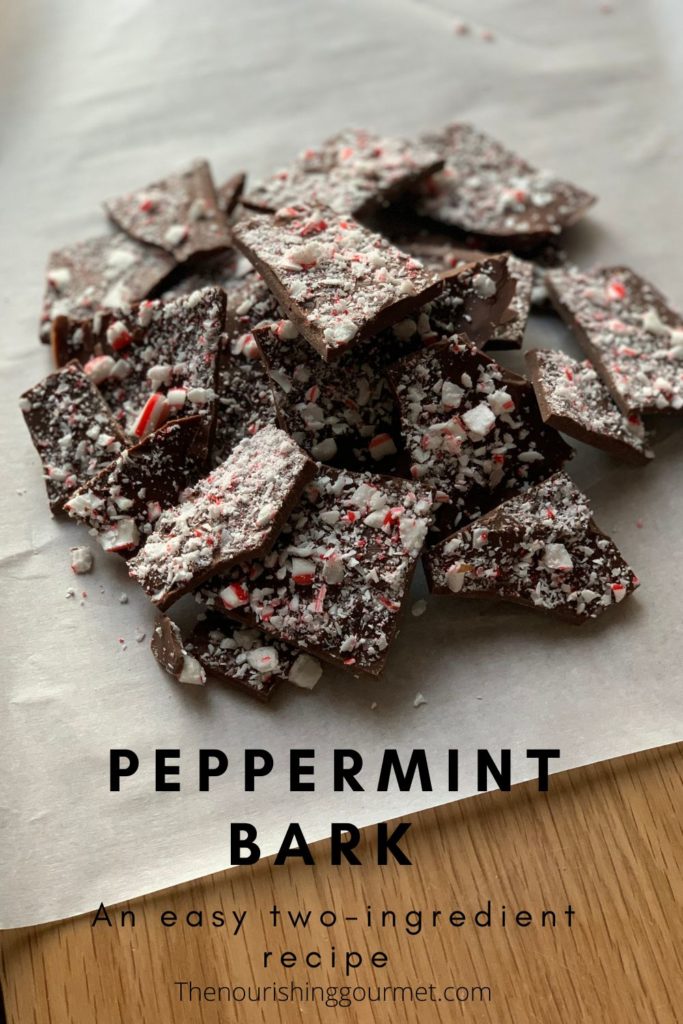
One of my favorite flavor combinations is chocolate and peppermint. This easy, two-ingredient recipe explodes with flavor yet takes just a few minutes to throw together. 

It makes a wonderful last-minute gift or a treat to eat while watching a Christmas movie. 

(Save some candy canes so you can make it again later in the year, as this is delicious any time of year!) 

Because you are only using a couple of ingredients, make sure you pick chocolate that you especially like, as well as flavorful candy canes. 

We’ve made this with super dark chocolate for our family and with smooth milk chocolate for gifting. Enjoy Life is a great, allergen-friendly chocolate. Just use chocolate you like, and it will be good!

There are some delicious candy canes out there. We’ve made it using a more typical candy cane as well as the YumEarth brand (which uses organic ingredients and natural coloring from fruit). 

If you use a dark chocolate, this treat is also lower in sugar, especially in comparison to most Christmas cookies and treats. If you have allergens, such as dairy or gluten, it should be easy to find chocolate and candy canes that meet your needs.

Do you love peppermint and chocolate together? Here are some other recipes: 

  • Chocolate Peppermint Fudge
  • Hot Peppermint Carob (or use cocoa powder for hot cocoa!)
  • DIY Mint Chocolate Lip Balm

Peppermint Bark

Ingredients: 

  • 11.5 ounces chocolate chips (dark, super dark, or milk) 
  • 5 regular sized candy canes 

Directions:

  1. Unwrap candy canes and put them between sheets of parchment paper. Using a mallet, crush the candy canes into small pieces. We like there to be some pieces about the size of a large pea, and some of it finer. 
  2. Lay a new piece of parchment paper out on a jelly roll pan. 
  3. Put the chocolate chips into a medium-sized dry microwaveable bowl. Melt using 15 to 30 second intervals, stirring in between, until the chocolate is just melted. *
  4. Using a spatula, scrape the melted chocolate into the center of the parchment paper on the pan, and smooth out to about ¼ inch thickness 
  5. Sprinkle the crushed candy cane evenly over the melted chocolate. Let the chocolate harden (you can put it into the refrigerator or freezer for a faster approach). When hard, break into smaller pieces. Keeps well. 

Recipe Notes:

  • * You can also melt the chocolate by putting it in a double boiler over low heat, and gently stirring it until just melted. 
  •  This method is really so simple, you can use varying amounts of chocolate and candy canes.
Filed Under: Dairy Free, Desserts, Egg Free, Snacks, Vegan, Vegetarian

How to Make Whipped Dalgona Coffee with Mushroom Coffee Option

April 10, 2020 by KimiHarris 2 Comments


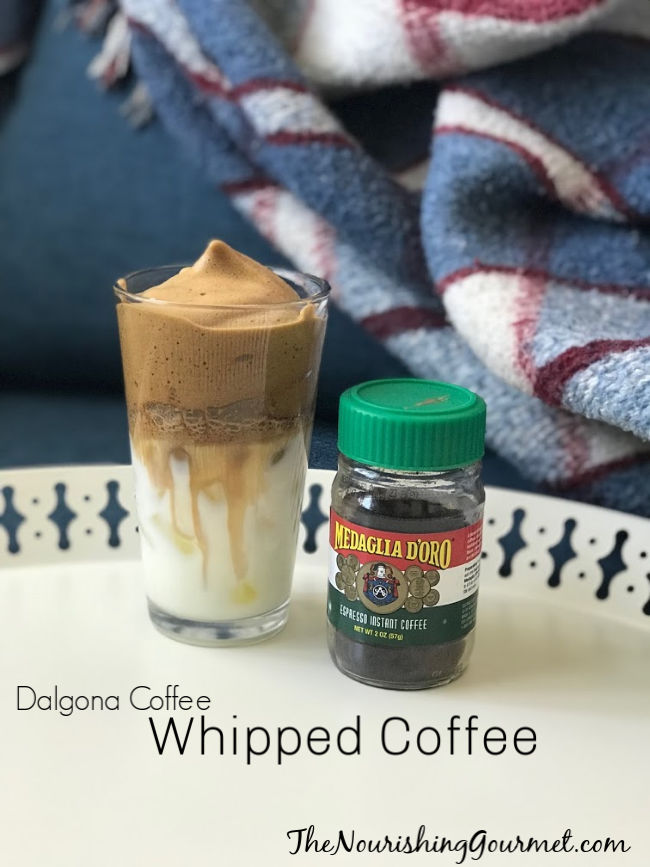
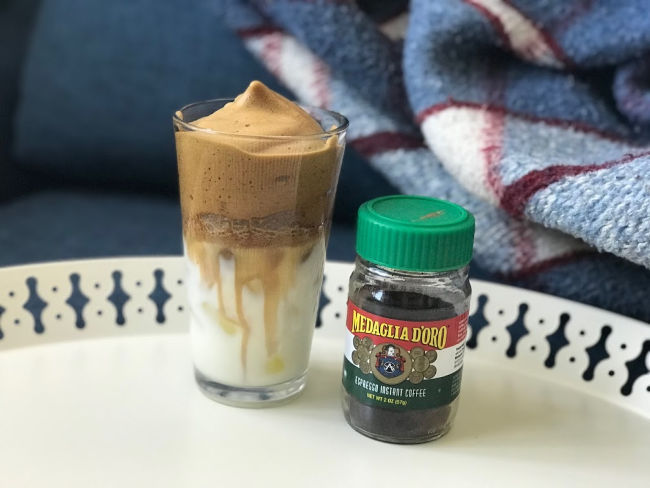
It apparently started as a craze in South Korea, and now is tearing its way through the U.S –- some have dubbed it the “quarantine coffee,” though it’s most often known by the name “Dalgona coffee.” Of course, I had to try it out. What alchemy is this! You put together some hot water, instant coffee, and sugar of choice, and it whips up like whipping cream.

My husband and I weren’t really sure that we would like it, but once spooned on top of milk over ice, it’s a deliciously sweet coffee drink that is an easy treat to make at home. We are sold! 

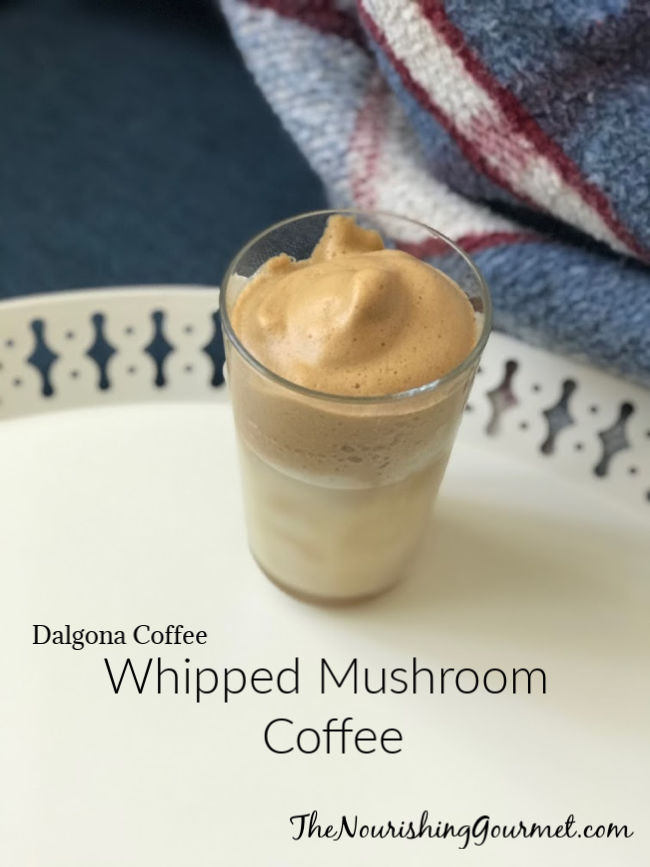
I had to dig out my instant coffee stash from our camping supplies for our first batch, but then I had an epiphany — what about my instant mushroom coffee? This is an instant coffee blend mixed with good-for-you mushrooms. It also happens to be the one coffee I can always tolerate. 

I liked the version with mushroom coffee even better. 

Some tips on supplies and methods: 

  • Instant coffee is good to have on hand not simply for coffee making but to use in baked goods. Try adding a teaspoon or two to your next brownie batch, and see how coffee makes the flavor richer and more robust. 
  • We used this brand of instant coffee. However, this brand has gotten thumbs up as one of the better ones. You can also find instant organic coffee (for our normal coffee habits, we try to pick organic since coffee beans can be heavily sprayed during the growing process). Also, this is a heavily caffeinated drink, but you can use decaf as well. 
  • This is the brand of mushroom coffee that I adore. It’s one of the only coffee brands I always tolerate. 
  • You want to use neutral milk for this. I tried coconut milk, and it was pretty strong in flavor (it helped once I watered it down some). Normal milk is ideal, but for those of us who are dairy-free, use the most neutral milk you have. 
  • We are trying to really keep our sugar consumption low right now, so we ended up trying out xylitol instead of regular white sugar, and it worked perfectly! I’ve also heard of people using coconut sugar with success. 
  • If you don’t have a hand mixer, I’ve heard that whisking vigorously by hand works or using a hand frother. One chef even shook it by hand in a mason jar! 
Incredibly delicious, but super easy, this coffee uses instant coffee to make whipped coffee foam.

Whipped Coffee 

  • 1 tablespoon instant coffee 
  • 1-2 tablespoons of sugar of choice (evaporated cane sugar, coconut sugar, and xylitol are all good choices) 
  • 2 tablespoons hot water 
  • Ice and milk for serving 
  1. Put all three ingredients in a heat-safe bowl, and then beat with an electric beater for 2-5 minutes, until the mixture resembles whipped cream texture. 
  2. Put ice in a cup, and pour milk of choice until 2/3s full. Spoon whipped coffee on top, and enjoy. 
This delicious and healthy version of “Dalgona coffee” is made using instant mushroom coffee. I love it with a neutral dairy-free milk with a little vanilla added to it.

Whipped Mushroom Coffee 

  • 1 packet of mushroom coffee *
  • 1 tablespoon of sugar of choice (evaporated cane sugar, coconut sugar, and xylitol are all good choices) 
  • 2 tablespoons hot water 
  • Ice and milk for serving 

  1. Put all three ingredients in a heat-safe bowl, and then beat with an electric beater for 2-5 minutes, until the mixture resembles whipped cream texture. 
  2. Put ice in a cup, and pour milk of choice until 2/3s full. Spoon whipped coffee on top, and enjoy. 

* One packet of mushroom coffee isn’t a tablespoon of instant coffee. It worked well despite that, but the foam was softer likely because it was half the amount. You can use two packets for a whole tablespoon, if desired.

Filed Under: Beverages, Desserts

Black Citrus Ice Cream

October 18, 2017 by KimiHarris 11 Comments

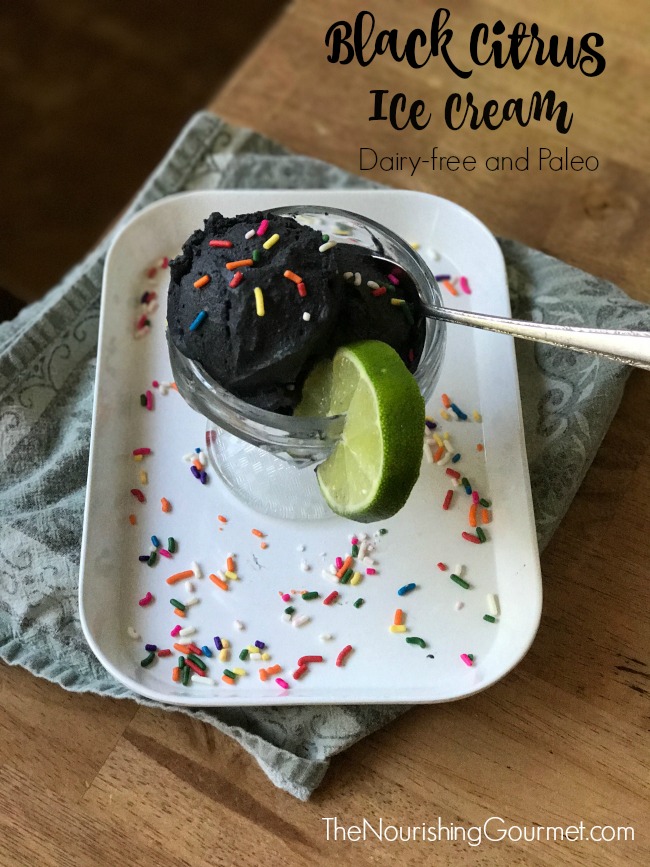
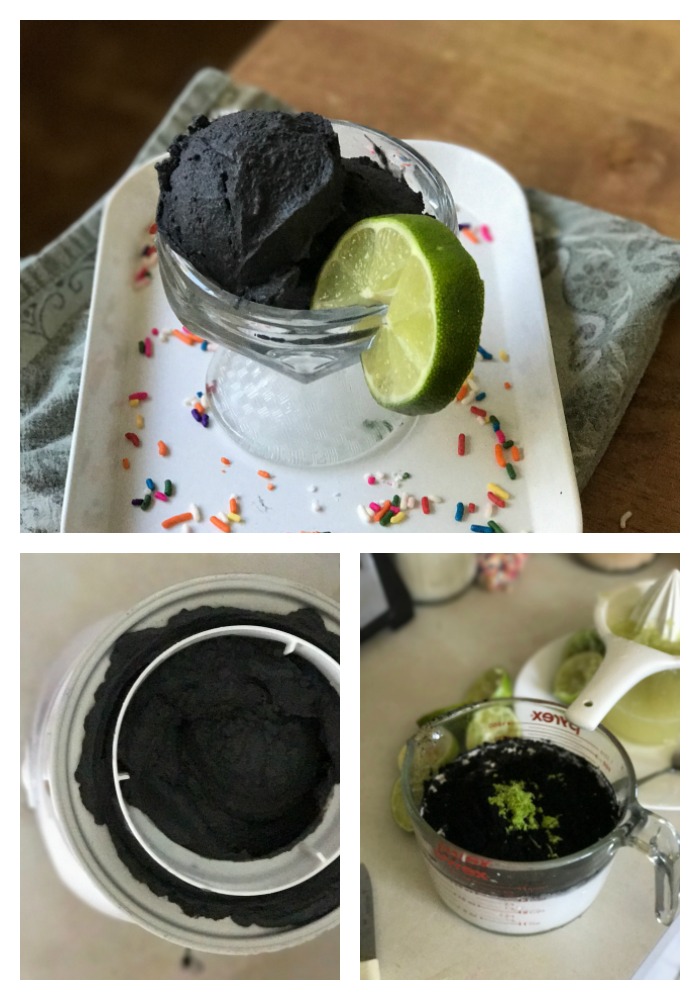
Amazing color and citrus flavor! This vibrant dairy free ice cream is colored with activated charcoal and is bursting with lime zest and juice. Yum! -- The Nourishing Gourmet

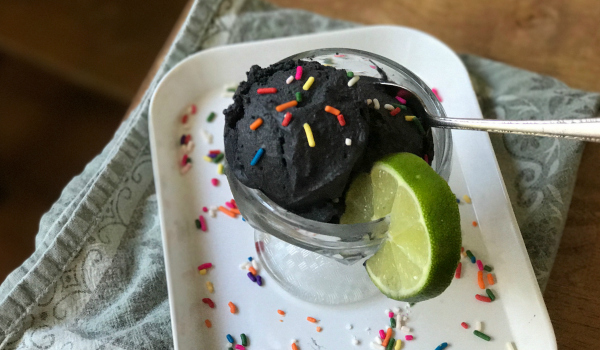
This vibrant ice cream has a deep black color and a tangy and sweet lime flavor! Not only does this gloriously and naturally colored ice cream make the perfect Halloween ice cream, but it also offers benefits as well. Upset tummy? This is what I turn too. This paleo version is dairy-free and egg-free, so it is suitable for many diets.

Black Ice Cream and Activated Charcoal Craze

Have you heard about the black ice cream craze? I know of several high-end ice cream stores that have offered black ice cream as a novelty item, but it’s so easy to make at home. The secret to black ice cream is not black dye (no thank you!), but activated charcoal. Activated charcoal is popular in everything from face masks, toothpaste, supplements, drinks, and food items! (I got this finely ground, food grade activated charcoal powder for a great deal).

What Activated Charcoal Does

While the black color lends itself well to a gag treat for Halloween, it also makes the perfect dessert to serve after consuming food that has unhealthy ingredients in it, or perhaps foods that you mildly react to such as food dye, gluten, dairy, or other trigger foods. That’s because activated charcoal acts like a mop in your digestive track. (Please note, if you are constipated, don’t take activated charcoal! It can make you constipated, or your make your constipation worse because of how it works in the intestine.)

In scientific terms, activated charcoal “adsorbs” certain materials.

“The word adsorb is important here. When a material adsorbs something, it attaches to it by chemical attraction. The huge surface area of activated charcoal gives it countless bonding sites. When certain chemicals pass next to the carbon surface, they attach to the surface and are trapped.” Source: How Stuff Works

Practically speaking, activated charcoal is used as an important part of many water filters to remove impurities, and is even used in hospitals to treat specific poisonings (they use high amounts under supervised medical care, and it is not suitable for all cases of poisoning). You can read more about that use from Poison Control.

My doctor has me using activated charcoal as a supplement, but I’ve also become interested in reports of people finding it helpful in dealing with digestive complaints after exposure to problem foods. I’m not sure if that’s because it adsorbs gas in the digestive tract or the actual food, but it does seem to help with the after effects. When not dealing with an actual allergy, but with foods that cause gas, digestive discomfort, etc., activated charcoal does seem to be helpful for us. We also use it when we have stomach bugs as it helps settle the stomach.

IMPORTANT NOTE: It’s very important not to take medication or supplements with activated charcoal, because it can adsorb them. Time them a couple of hours away from taking activated charcoal or consuming drinks or foods that contain them.

Other Important Notes: A friend commented below that they experienced some “detox” symptoms when adding in activated charcoal, so serve small servings and be aware of any side effects if you have never taken it before. Also, don’t take or eat foods or drinks with activated charcoal if you are constipated or have any health condition that slows food through the intestine. Please read about any side effects of activated charcoal here, and talk to your health care provider about any concerns.

For KIDS: If you serve this to children, you need to keep servings very small! Our kids have had small amounts of activated charcoal before, so I knew they didn’t have any problems with it, but I still wouldn’t serve them a huge scoop of this. This is a lot of activated charcoal, so keep servings small. (I’m always surprised that the ice cream shops who serve this don’t have some sort of warning label on it, considering the fact that it can adsorb medication and make you constipated if you eat too much of it!)

Special Supplies:

  • You can use coconut activated charcoal or hardwood. I recommend finely ground (the ice cream will have a little texture to it because of the charcoal, but you don’t want it to be overly gritty). As of right now, this 30 dollar’s worth of finely ground activated charcoal powder is only 10 dollars.
  • My ice cream maker is one of my favorite kitchen tools! I have this ice cream maker.
  • I love this guar gum-free coconut milk (you can also use the coconut cream).
  • For zesting a lime, this is my favorite tool.

We had fun coming up with crazy names for this black ice cream: Dementor Ice Cream (Harry Potter inspired), Santa’s Black Coal Ice Cream, Black Dwarf Ice Cream (Narnia), Black Cat Ice Cream, Spooky Ice Cream. Do you have any to add? I’d love to hear!

Amazing color and citrus flavor! This vibrant dairy free ice cream is colored with activated charcoal and is bursting with lime zest and juice. Yum! -- The Nourishing Gourmet

Black Citrus Ice Cream

This dairy-free, egg-free and paleo version of black ice cream is delightfully limey. If you would like to make a simple vanilla version, leave out the lime juice and lime zest and add 2 teaspoons of vanilla extract instead.

Other variations: Use lemons instead of limes for a lemonade ice cream. Or try an orange juice and orange zest for a creamy orange ice cream!

  • 3 cups of coconut milk (I used this guar gum free milk)
  • The zest of one lime
  • ½-¾ cup of freshly squeezed lime juice (I used the full ¾ cup for extra lime flavor, yum! But if you want it a little more subtle, use the ½ cup).
  • ⅔ cup of organic cane sugar, or ½ cup of honey
  • ¼ cup finely ground activated charcoal

1: Add all ingredients into a blender, and blend until smooth.
2: Optional: Chill in the refrigerator until cold.
3: Pour into ice cream maker and make according to manufacturer’s directions. My ice cream maker takes about 20 to 25 minutes.
4: Serve right away as soft serve, or put into a container and place in the freezer.
5: Remove from freezer 20 minutes before serving.


Printable version:

Black Citrus Ice Cream
 
Print
 
This dairy-free, egg-free and paleo version of black ice cream is delightfully limey. If you would like to make a simple vanilla version, leave out the lime juice and lime zest and add 2 teaspoons of vanilla extract instead. Other variations: Use lemons instead of limes for a lemonade ice cream. Or try an orange juice and orange zest for a creamy orange ice cream!
Ingredients
  • 3 cups of coconut milk (I used this guar gum free milk)
  • The zest of one lime
  • ½-¾ cup of freshly squeezed lime juice (I used the full ¾ cup for extra lime flavor, yum! But if you want it a little more subtle, use the ½ cup).
  • ⅔ cup of organic cane sugar, or ½ cup of honey
  • ¼ cup finely ground activated charcoal
Instructions
  1. Add all ingredients into a blender, and blend until smooth.
  2. Optional: Chill in the refrigerator until cold.
  3. Pour into ice cream maker and make according to manufacturer's directions. My ice cream maker takes about 20 to 25 minutes.
  4. Serve right away as soft serve, or put into a container and place in the freezer.
  5. Remove from freezer 20 minutes before serving.
3.3.3077


Some links may be affiliate links. I may earn a small commission on items purchased through my links. 


Filed Under: AIP, Dairy Free, Desserts, Egg Free, For the Kids, For the Love of Food and Books, Gluten Free, Grain Free

Easiest Gluten Free Cake from a Muffin Mix

January 5, 2017 by KimiHarris 4 Comments

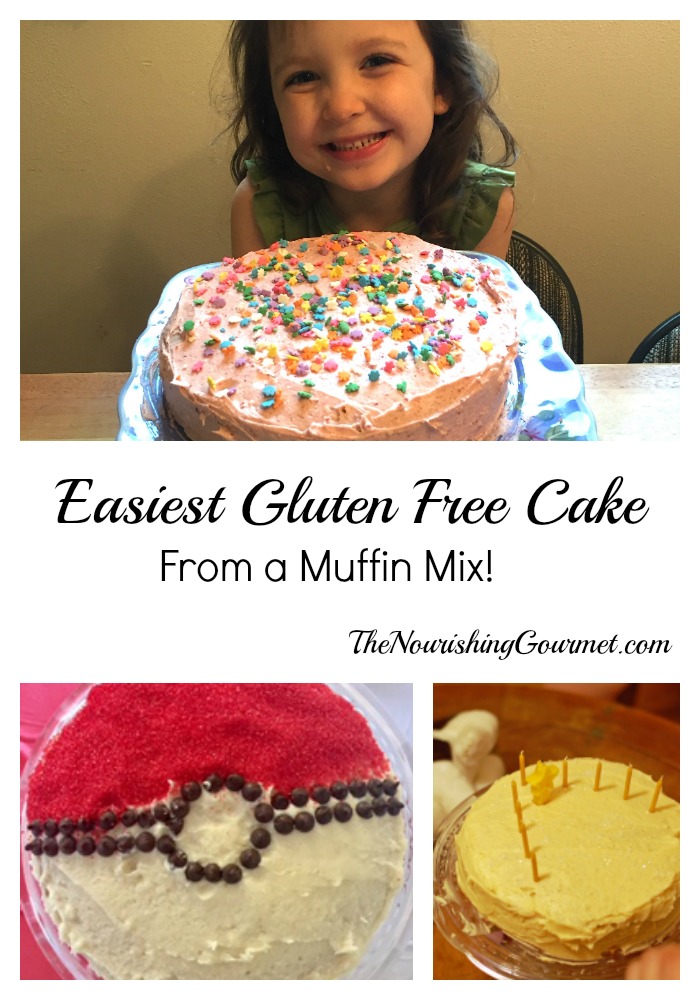
This super easy and frugal gluten free cake got rave reviews! -- The Nourishing Gourmet

One of the things that made me first love being in the kitchen was baking. I love baking! Warm bread from the oven, juicy pies, sweet cakes, healthy muffins, pizza, bagels ¬– I love it all. I especially loved making baked good for my family and friends. I still have my love of baking, but I don’t always have the time or energy now to spend as much time baking as I’d like. In fact, as we have been in survival mode as I go through treatment for a chronic health issue, I’ve hardly been baking at all.

For us this last year, if we were in the kitchen it was making the most basic of basic things while we tried to figure out my health issues (things like super easy skillet dinners). Dinner was a priority. Making cookies weren’t.

However, when there was a special occasion (such as a birthday), I really needed to make sure I made something special for the girls. To them, it’s not a birthday unless we have cake. A couple of years ago they were horrified that I didn’t have a cake on my birthday. It was like having Christmas without a Christmas tree to them!

So while this addition to my series, The Low Energy Guide to Healthy Cooking, isn’t exactly centered on a healthy main dish, I think it’s important for those of us who need a relatively healthy option for gluten-free cake making for our family.

My youngest has a birthday coming up, and we had two fall birthdays, all during a time of ill health for me. I’ve never found baking to be tiring until recently when I’ve found most kitchen tasks to be tiresome and have had to keep things as simple as possible.

As I was scrambling to make the all important birthday cake, I figured out a method that kept sugar content lower and made things super easy and fast for me. Win-win!

My New “Secret” GF Cake Trick

You all know that I am a make-it-by-scratch all the time type person. But desperate times call for desperate measures, and with the girl’s birthdays coming up, I knew that having a homemade cake for them was really important to them. I was feeling extreme fatigue at that time, though, so I knew my usual soaked gluten-free cakes were not going to be an option. I also knew that all of the gluten-free cake mixes were extremely sweet – something we didn’t enjoy.

In a moment of inspiration, I found a gluten-free muffin mix that was more lightly sweetened and had good (not perfect, but good) ingredients in it. When I compared it to some of the gluten-free cake mixes, the muffin mix was only about half of the sugar content per serving!

We made it into a lemon cake for my ten-year-old’s birthday by simply adding lemon zest to the mix with homemade lemon frosting once it was baked. For my six-year-old, we added vanilla and sprinkles for a fun cake that she adored.

It wasn’t too sweet, they were super easy to make (even for me with my fatigue), and my girls felt loved and happy with their cakes. When I served this cake to guests at their birthday party, I was gratified to see that everyone liked the cake, and even a hard-to-please family member complimented me on the cake. Great news for a gluten-free cake made out of a muffin mix! With a frosting, the sweetness it just right for a birthday cake.

For their joint, Pokemon party, we did the same trick and made it into a Pokemon ball cake.

Tips for Success

This is the gluten free muffin mix we used.
Instead of using muffin tins, I just greased two cake pans. It took roughly the same amount of time to cook as the muffins on the package instructions. Since this will make thin layers, check for doneness a couple of minutes early. You can also make just one cake layer (just add more time to the cooking time).
I added lemon zest to both the cake and a simple frosting for the lemon cake (one lemon for each).
For the sprinkle cake, I added vanilla to the batter along with a generous amount of sprinkles. For the frosting, I used freeze dried raspberries and blended them into a powder in my blender. I added that to a simple butter frosting, and then lightly sprinkled with sprinkles.
For the Pokemon cake, I kept it a simple vanilla cake by adding 2 teaspoons of vanilla and then decorated with dark chocolate chips and red sprinkles on top of a plain butter frosting.
I was in survival mode, so I didn’t think of it in time, but you can order naturally dyed sprinkles! (Examples:This one or this one. )

Other ideas: Chocolate chip cake – add chocolate chips, Orange cake – use orange zest, Lemon Poppyseed: Zest of one lemon and 1 tablespoon of poppyseeds.

Two other bonuses? This is a very inexpensive cake to make. I thought about buying a cake from a gluten-free local bakery, but it would have been at least 6- 10 times the price. Plus, it’s so easy to put together even a beginner baker can easily make it (like one of your children!).

Some links may be affiliate links. I may earn a small commission on items purchased through my links. 

Filed Under: Dairy Free, Desserts, For the Kids, Gluten Free, Nourishing Frugal Tips

Next Page »

Primary Sidebar

ConvertKit Form

Get Every Recipe

And the insider's view from our kitchen

Success! Now check your email to confirm your subscription.

There was an error submitting your subscription. Please try again.

We won't send you spam. Unsubscribe at any time. Powered by ConvertKit

Follow Me

  • Facebook
  • Google+
  • Instagram
  • Pinterest
  • RSS

Search

Please Read:

The information you find here at The Nourishing Gourmet is meant to help you become a better cook! This site is primarily for sharing family friendly recipes. It's not meant to give medical advice or to make any health claims on the prevention or curing of diseases.This site is only for informational and educational purposes. Please discuss with your own, qualified health care provider before adding in supplements or making any changes in your diet. Also, any links to sponsors or affiliates (including Amazon) may give me a percentage of the sale or a pay per click. Thank you for supporting this site.

Categories

  • $10 Main (42)
  • $5 Dishes (43)
  • 52 ways to save money on a healthy diet (53)
  • AIP (23)
  • Baked Goods (83)
  • Beverages (72)
  • Breakfast and Brunch (61)
  • Condiments (8)
  • Dairy Free (492)
  • Desserts (184)
  • Dietary Needs (6)
  • Egg Free (11)
  • Egg Free (86)
  • For the Kids (66)
  • For the Love of Food and Books (18)
  • Gluten Free (484)
  • Grain Free (95)
  • Health (75)
  • Kitchen Tools (4)
  • Main Dishes (126)
  • Nourishing Frugal Recipes (167)
  • Nourishing Frugal Tips (70)
  • Nourishing Practices (56)
  • Nutrient Dense Foods (70)
  • Q and A (15)
  • Salads (39)
  • Sides (101)
  • Snacks (124)
  • Soups (50)
  • The Healthy $1 Menu (21)
  • The Low Energy Guide to Healthy Cooking (18)
  • THM (2)
  • Trim Healthy Mama (2)
  • Uncategorized (846)
  • Vegan (241)
  • Vegetarian (361)

Recent Posts

  • 2 Ingredient Peppermint Bark
  • Herbal Hibiscus Lemonade (Keto, THM)
  • Creamy Curry Red Lentil Soup
  • One-Pot Gluten-Free Mac and Cheese
  • Healthy Pumpkin Spice Granola
  • Crispy Pumpkin Spice Granola (oil-free)
  • Why I Use THM Principles Now
  • Vietnamese Beef Noodle Salad
  • Coconut Flour Pancakes
  • Instant Pot Mexican Shredded Chicken

Recent Comments

  • Dorene St G on Cracker Toffee (Easy Peasy Christmas Candy)
  • Nadia Kriston on Finding a Toaster Oven Without Nonstick
  • KimiHarris on How to make heavenly coconut milk whipped cream (with an isi dispenser)
  • KimiHarris on Autumn Beef Stew (Tomato Free)
  • KimiHarris on How to make heavenly coconut milk whipped cream (with an isi dispenser)

Fresh: Nourishing Salads for All Seasons

Get Every Recipe

And the insider's view from our kitchen

Success! Now check your email to confirm your subscription.

There was an error submitting your subscription. Please try again.

We won't send you spam. Unsubscribe at any time. Powered by ConvertKit

Footer

Privacy

Copyright © 2023 · Foodie Pro & The Genesis Framework