• Skip to primary navigation
  • Skip to main content
  • Skip to primary sidebar
  • Skip to footer

The Nourishing Gourmet

Nourishing. Satisfying. Gourmet.

  • THM Coaching
  • About
    • Privacy
    • Contact
  • Recipes
  • Cookbooks
    • Everyday Nourishing Food
    • Salad Cookbook
    • Soup Cookbook

Uncategorized

One-Pot Gluten-Free Mac and Cheese

December 2, 2021 by KimiHarris 4 Comments

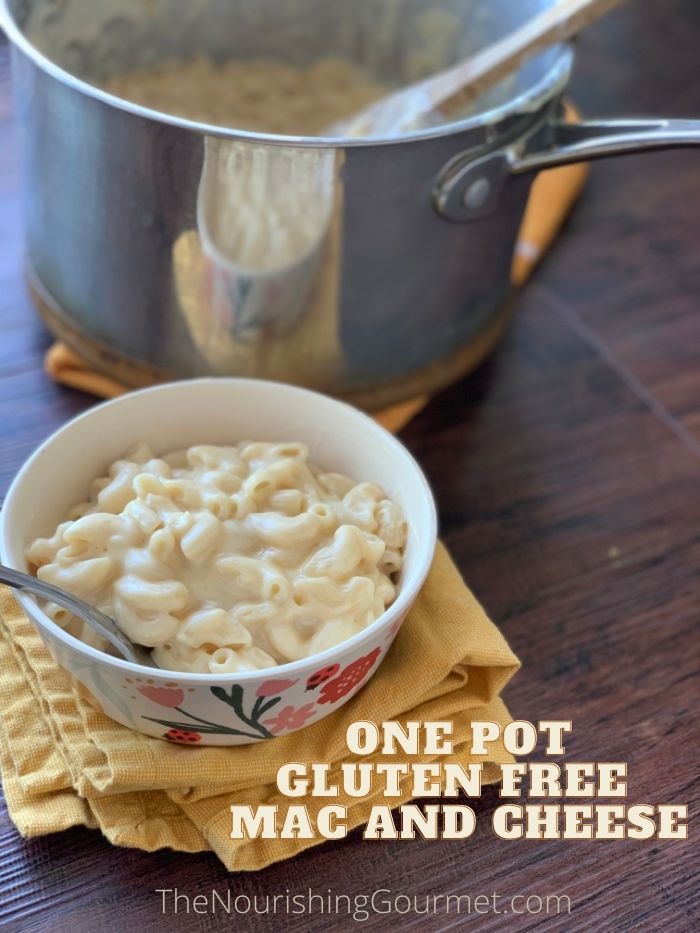
This one-pot super creamy and delicious gluten-free mac and cheese is finished in less than 15 minutes. It’s so simple! 

My kids aren’t really into sandwiches, unfortunately, but this pasta dish is something they love as a last-minute meal. If my husband has an evening meeting, and I’m eating a dairy-free (THM) meal, I can whip this together with minimum fuss. Since I homeschool our kids currently, they also ask for it for lunch. 

You only need a few basic ingredients: Milk (I use whole), chicken broth, pasta, cheese, and salt. That’s it! 

How it works: Instead of boiling the pasta in water and making a cheese sauce, this recipe boils the pasta in the chicken broth and milk, and the starch released from the pasta thickens the sauce as it cooks. It’s a little magical. To compare it to a more traditional mac and cheese method, check out this recipe (also gluten-free, but using goat cheese!).

Notes: 

  • You can have fun trying this with different cheeses. Our favorite so far is half Colby Jake and half Pepper Jake. Yum! 
  • You can use all milk instead of half broth. I love my homemade broth, so this is a chance to get some more in. But I also think the flavor is better and more complex with half broth. If you are using homemade do pre-salt it, otherwise it will be too bland. 
  • Pick a gluten-free pasta brand you know stays together well for this recipe, and cook until just tender. Because different brands may vary in how much starch they give off, you may need to adjust the amount of liquid if it ends up too liquidy. Just remember that you can give it a quick boil at the end to remove excess liquid, if necessary.  

One-Pot Gluten-Free Mac and Cheese

  • 12 oz dry gluten-free pasta (shells, elbows, or other short pasta) (about 4 cups of dry pasta) I tested this with Field Day Gluten-free Brown Rice pasta
  • 2 cups of whole milk 
  • 2 cups of chicken broth (homemade or storebought) 
  • 2 teaspoon salt 
  • 2 cups of shredded cheese (my kids like Colby, or one of our favorites, Pepper Jack! I like to use half of each. Use cheddar for a more traditional flavor)

Directions

Place the pasta, milk, chicken broth, and salt in a medium or large pot. Bring to a low simmer, and simmer until just tender (for the brand of brown rice pasta I use, that took about 7-10 minutes. Look at the package and follow their time suggestions). 

Because you are using less liquid, you will need to stir more often to make sure the pasta isn’t sticking on the bottom of the pan. Not quite constantly, but pretty often, especially as it begins to cook. 

Once the pasta is getting close to being done, you can turn up the heat a little to boil away any extra moisture there is, if necessary (again, making sure you don’t let the pasta stick on the bottom of the pan). When it looks thick enough to be a sauce-y mac and cheese, turn off the heat, and add your cheese. Stir in (it should melt easily), and let sit for a minute or two, and serve! The sauce will continue to thicken as it sits.

Filed Under: Uncategorized

Why I Use THM Principles Now

July 17, 2021 by KimiHarris Leave a Comment

I know that it has been a surprise to some of my long-term readers that I now use THM principles. It was a surprise to me as well! When I was first introduced to THM, I was glad that others found it helpful, but it seemed overly complicated (just being honest, here). I also didn’t really need it. I was at a healthy weight. I ate healthy food. And there was no reason to change what worked well for me. 

Fast forward, and I had a huge health crisis caused by mold exposure and a mix of other health concerns and stressors. I was extremely ill and extremely inflamed. That inflammation caused weight gain, despite not changing anything about how I ate. 

I had to work extremely hard to get better again, and my family had to make many sacrifices to make that possible. That’s a long story, and I’m so thankful to have regained my health. But once I had improved, I had assumed that my weight would go back to a healthy weight again, and that just wasn’t happening. 

So I tried keto, and I tried intermittent fasting. I read the research and I was encouraged. But my practical experience was that it did seem to help, at least temporarily, with some of my inflammation, but I lost my energy eating that way. It also appeared to slow my metabolism even more, and crazily enough, I didn’t lose weight on it either. Others feel amazing on a keto diet or when using intermittent fasting principles, but my body seemed to just get stressed on it instead. 

It was then that I remembered THM, and I thought, “Why not?” I decided to try a two-week THM trial, and see how I felt on it and how sustainable it would be for me. I noticed such a difference in just those two weeks; I knew I had to continue.

What Sets THM Apart

One of the primary principles of THM is separating your fuels. The body uses either fats or glucose for energy, but when you stack those fuels together, our bodies can’t efficiently burn through them, and you end up with weight gain. 

This would be why mashed potatoes, French fries, heavily buttered bread, and rich curries over white rice can cause some of us to gain weight. They are giving you a lot of carbohydrates (glucose) with fats. 


The keto diet allows you to burn primarily fat as your fuel source, so it does “separate” the fuel sources, but simply by eliminating one of them. 

Keto and Healthy Carbohydrates

But for some of us, being off healthy carbohydrates long-term ends up messing with our hormones and thyroid/adrenal health, which is why many of us feel so tired when eating a low-carb diet and end up with stalled weight loss or even weight gain over time. 

On THM, you eat both fuels (slow carbohydrates and fats), but not together. 

While you concentrate on getting high-quality protein and vegetables in, you eat the majority of your meals with the two fuels separate from each other. This looks like having some meals look very much like a keto meal, but with more freedom with your vegetables and a concentration on protein, rather than fat (though you still eat plenty of fats with these meals). Then you switch to a meal that has slow carbohydrates (sweet potatoes, quinoa, brown rice, fruit, etc.), lean protein, and vegetables, with only a small amount of fat. 

This switching back and forth between the fuels for the body, coupled with eating every 3-4 hours, ended up being highly effective for me. 

My Experience and Results

I lost over 30 pounds, regained my energy, and my metabolism turned back on again. I also lost a lot of the premature aging in my face that had occurred while sick because of inflammation. But it wasn’t just about vanity either. 

Because adding more foods back into my diet (instead of taking them out, such as when on the keto diet), along with separating my fuels, ended up being really helpful for my gut health. Instead of feeling weighed down after I ate because of my sluggish metabolism and gut, I started feeling energized by my meals again. I also was loving all of the delicious meals I could make on the plan.

Much to my surprise, I also found that I could add back in problematic foods too, such as oats, which had caused rather severe issues for me in the past. (I have a theory for why this happened, and it’s related to the impact on our gut health of getting higher amounts of fiber from a variety of sources, something I shared in the free webinar that I hope to offer again soon). 

Getting off excessive weight while being able to eat a wide variety of fiber-rich foods (many of which weren’t allowed on the keto diet) did also help my continued healing journey. It reduced my chronic low-grade inflammation as well. Because weight issues feed into inflammation issues, getting back to a healthy weight helped turn the vicious cycle into a positive cycle, and I’m grateful. 

My Conclusion

The THM umbrella is large, meaning that people use the THM principles, but their meals can look very different from each other. I choose to eat it with a concentration of real food, along with principles I’ve learned from other experts such as Dr. Wahls, and Julia Ross. This combination has made a huge difference in my life. 

It has also helped me regain my joy in both cooking and in what I eat. I so enjoy being able to bake whole grain gluten-free bread again, as well as eat a variety of healthy carbohydrates without feeling like I’m not eating optimally for my health. (For an example of a slow-carb meal, see this Vietnamese Beef Noodle Salad or the Mexican Chicken Bowl on this recipe. For an example of a fat-fueled meal, see this carnitas recipe.)

There are other dietary eating plans that essentially separate fuels in a similar way as THM, but I’ve found THM the most flexible and doable. That flexibility has allowed me to use their principles in the way that is most helpful for healing and weight loss for me personally. 

I will say that, yes, there is a learning curve to eating this way. My initial reaction of thinking THM was more complicated than other dietary plans was correct. But, not only has learning how to eat THM been well worth the effort for me, but it’s also very easy for me to eat this way now.

 If you put some time into learning how to eat with your fuels separated, it does become second nature over time. 

All of this led to me deciding to coach others on how to use THM principles while concentrating on the healing, real foods. And I’ve loved every minute of it. You can read about that here.

To get the full scoop on THM, two books that give you a great head start are:

  • Trim Healthy Mama Plan (This short book gives you just the plan, and helps you understand what principles you need to follow and why.) 
  • Trim Healthy Table (This cookbook gives an great overview of the plan, in short form, as well as a lot of recipes.)

Filed Under: Uncategorized

Instant Pot Mexican Shredded Chicken

May 13, 2021 by KimiHarris 1 Comment

This easy recipe takes just a couple of ingredients and can be thrown together in mere minutes, but produces flavorful shredded chicken that’s perfect for tacos, burritos and burrito bowls, and taco salads.

If you’ve followed this blog for a while, you may have noticed that we tend to love dark meats, such as chicken thighs. But chicken breast can be delicious too! This recipe is suitable for most gluten-free, grain-free, paleo/primal diets. I most often eat this on the THM (Trim Healthy Mama) plan as part of my E meal.

For those of us coming to THM from the traditional foods world, eating some meals that are higher in the slow carbs, but lower in fat is a real transition. However, look at how satisfying this meal is below!

What’s in this bowl: Brown rice, pinto beans, Mexican shredded chicken, cabbage slaw tossed with a teaspoon of oil and lime juice, fresh garlic and salt, salsa, and nonfat Greek yogurt.

If you are interested in why I decided to start combining what I had learned from other experts in the holistic world with THM, you can read my story here and learn about my coaching as well.

For an S meal, or other Mexican-inspired recipes, check out this juicy Carnitas recipe as well as my Simple Mexican Coleslaw. Delicious!

But regardless of your dietary lifestyle, this recipe is delicious!

Instant Pot Shredded Chicken

  • 2-3 Chicken Breasts
  • 1 and 1/4 cup salsa or Picante sauce
  • 1 teaspoon each chili, cumin, garlic powder
  1. In a 6 quart Instant Pot add the salsa or sauce. An IP needs at least 1 cup of liquid, so if your salsa is dry, add chicken broth. Add the chicken and spices.
  2. Secure lid, set steam release valve to closed, and program for ten minutes on high on manual.
  3. Let rest for five minutes, and then release. Check to make sure chicken is cooked all the way through.
  4. Shred chicken, then pour the sauce over it. Enjoy!

Filed Under: Dairy Free, Egg Free, Gluten Free, Grain Free, Main Dishes, Nourishing Frugal Recipes, The Low Energy Guide to Healthy Cooking, Uncategorized

Autumn Roasted Vegetables (with Sweet Potatoes, Cabbage, Squash, Cranberries, and Potatoes)

November 19, 2019 by KimiHarris Leave a Comment

This delicious side dish can easily be made into a main one, and has many Thanksgiving and Christmas flavors in it. Yum!

As the holiday season encroaches on our fall schedule, I’ve found myself often making sheets of roasted vegetables for dinner. I love this simple process of cutting up several types of vegetables and allowing a hot oven and time to produce tender, slightly caramelized vegetables. 

This version was especially delicious, and so I had to share it. Really, it’s almost like having Thanksgiving flavors on one sheet. You don’t have to use the cranberries – our kids didn’t like them as they are quite sour – but my husband and I loved the sour punch they gave when eaten with a bite of sweet potato. I really adore the mix of vegetables in this dish, plus, you can make it a main dish, by roasting some chicken thighs or breasts with them as well. 

This recipe is highly adaptable, so don’t feel like you have to follow it exactly. That said, this mix of vegetables was so delicious, I am going to be making it again soon. Here’s a thought – why not add some fresh green beans to it as well? That would be delicious too!

This makes two full sheets of vegetables. For our family of five, it fed us twice. At first, we ate it with beef patties and a salad, and the second time we fried eggs and placed them over the reheated vegetables. Delicious! (It would make a wonderful breakfast or dinner!) 

You can use whatever type of sweet potato you like best for this recipe. I cover some of our favorites in this post. 

Autumn Roasted Vegetables (with Sweet Potatoes, Cabbage, Squash, Cranberries, and Potatoes) 

  • ½ green cabbage, cored, and thinly sliced into ½ inch pieces
  • 1 delicata squash, washed, cut in half lengthwise, seeded, and then cut into ¼-½ inch slices 
  • 2 largish yams/sweet potatoes, Washed,(peeled, if desired), cut into thin slices, and then halved or quartered
  • 1-2 pounds of potatoes (I used small yukon gold), washed (peeled if desired), and either cut the same as the yams, or if using small potatoes, cut into thin slices lengthwise 
  • 1 onion (white, yellow, or sweet), peeled, cut in half, and then thinly sliced
  • 2 handfuls of fresh cranberries (optional)
  • Oil or melted fat of choice
  • Salt and Pepper
  1. Preheat oven to 425F. Prepare vegetables as listed above.
  2. Line two sheet pans with parchment paper (optional) 
  3. Evenly mix the vegetables on the two pans and then toss generously with oil/fat, and salt and pepper. You want all vegetables to have a light layer of oil on them so that they roast correctly, without drying out. 
  4. Put vegetables in preheated oven, and after 20 minutes switch racks the pans are on for even heating (I didn’t bother stirring them, but you can). Cook for another 15-20 minutes, or until vegetables are tender, and lightly browned. Serve and enjoy!

Filed Under: Uncategorized

Next Page »

Primary Sidebar

ConvertKit Form

Get Every Recipe

And the insider's view from our kitchen

Success! Now check your email to confirm your subscription.

There was an error submitting your subscription. Please try again.

We won't send you spam. Unsubscribe at any time. Powered by ConvertKit

Follow Me

  • Facebook
  • Google+
  • Instagram
  • Pinterest
  • RSS

Search

Please Read:

The information you find here at The Nourishing Gourmet is meant to help you become a better cook! This site is primarily for sharing family friendly recipes. It's not meant to give medical advice or to make any health claims on the prevention or curing of diseases.This site is only for informational and educational purposes. Please discuss with your own, qualified health care provider before adding in supplements or making any changes in your diet. Also, any links to sponsors or affiliates (including Amazon) may give me a percentage of the sale or a pay per click. Thank you for supporting this site.

Categories

  • $10 Main (42)
  • $5 Dishes (43)
  • 52 ways to save money on a healthy diet (53)
  • AIP (23)
  • Baked Goods (83)
  • Beverages (72)
  • Breakfast and Brunch (61)
  • Condiments (8)
  • Dairy Free (492)
  • Desserts (184)
  • Dietary Needs (6)
  • Egg Free (11)
  • Egg Free (86)
  • For the Kids (66)
  • For the Love of Food and Books (18)
  • Gluten Free (484)
  • Grain Free (95)
  • Health (75)
  • Kitchen Tools (4)
  • Main Dishes (126)
  • Nourishing Frugal Recipes (167)
  • Nourishing Frugal Tips (70)
  • Nourishing Practices (56)
  • Nutrient Dense Foods (70)
  • Q and A (15)
  • Salads (39)
  • Sides (101)
  • Snacks (124)
  • Soups (50)
  • The Healthy $1 Menu (21)
  • The Low Energy Guide to Healthy Cooking (18)
  • THM (2)
  • Trim Healthy Mama (2)
  • Uncategorized (846)
  • Vegan (241)
  • Vegetarian (361)

Recent Posts

  • 2 Ingredient Peppermint Bark
  • Herbal Hibiscus Lemonade (Keto, THM)
  • Creamy Curry Red Lentil Soup
  • One-Pot Gluten-Free Mac and Cheese
  • Healthy Pumpkin Spice Granola
  • Crispy Pumpkin Spice Granola (oil-free)
  • Why I Use THM Principles Now
  • Vietnamese Beef Noodle Salad
  • Coconut Flour Pancakes
  • Instant Pot Mexican Shredded Chicken

Recent Comments

  • Dorene St G on Cracker Toffee (Easy Peasy Christmas Candy)
  • Nadia Kriston on Finding a Toaster Oven Without Nonstick
  • KimiHarris on How to make heavenly coconut milk whipped cream (with an isi dispenser)
  • KimiHarris on Autumn Beef Stew (Tomato Free)
  • KimiHarris on How to make heavenly coconut milk whipped cream (with an isi dispenser)

Fresh: Nourishing Salads for All Seasons

Get Every Recipe

And the insider's view from our kitchen

Success! Now check your email to confirm your subscription.

There was an error submitting your subscription. Please try again.

We won't send you spam. Unsubscribe at any time. Powered by ConvertKit

Footer

Privacy

Copyright © 2023 · Foodie Pro & The Genesis Framework