• Skip to primary navigation
  • Skip to main content
  • Skip to primary sidebar
  • Skip to footer

The Nourishing Gourmet

Nourishing. Satisfying. Gourmet.

  • About
    • Privacy
    • Contact
  • Recipes
  • Cookbooks
    • Everyday Nourishing Food
    • Salad Cookbook
    • Soup Cookbook

Nutrient Dense Foods

Why I’m Spatchcocking My Turkey This Year

November 26, 2019 by KimiHarris 6 Comments

This method has many advantages, including a super fast cooking time, and moist, delicious meat.

Turkey is the centerpiece of most Thanksgiving tables, yet it’s also the hardest to cook correctly. If you undercook it, food poisoning is a possibility, but if you overcook it, the breasts can be dry and unappetizing. 

My solution for the past five years or so has been trying out different forms of brining. My go to is this dry brine – I love not having to deal with a lot of liquid (as well as not having to find a large enough container for said turkey and brine). A dry brine still gives you the flavorful benefits of a brine as well as a juicy turkey. 

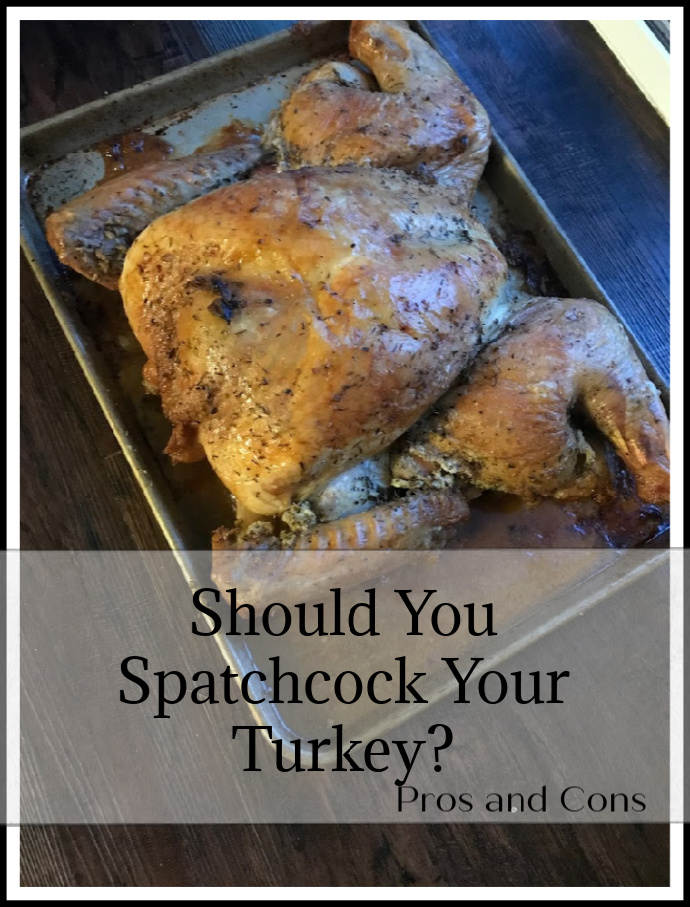
However, I think spatchcocking makes my recipe even better. Spatchcocking is when you remove the spine of the turkey, and roast the turkey flat. This has significant benefits, the biggest that it cooks very fast. I cooked a 16 pound turkey in a little less than an hour and a half. Wow! But it also gets the turkey’s skin delicious, crisp and brown, and even better –roasts the turkey evenly – so the legs and breasts get done at the same time. 

While you won’t be able to stuff your turkey this way (an option that many experts say not to do anyway), the benefits far outweigh that fact. 

But before I send you all scurrying to try this out yourself, I do want to honestly share our experience testing this method out. 

  1. It’s not at all hard to spatchcock a chicken with a sharp knife or kitchen shears. I had a harder time with a turkey. My husband, with his stronger hands, ended up helping me out with this part. I prefer kitchen shears, but do expect to have to use some oomph on this part. 
  2. When I pressed down on the turkey to flatten it after the backbone was removed, a large squirt of turkey juice sprayed across the kitchen floor. Oops. 
  3. Most recipes I found used a very hot oven for this method. This ended up causing a lot of smoking. For Thanksgiving, I plan on turning the oven down a bit after the first 20 minutes, and also adding water to the bottom of the pan to hopefully prevent that from reoccurring. 
  4. Our turkey was hefty at 16 pounds, so it just barely fit on our sheet pan once flattened. I would say it needs to be 16 pounds or less, so this method won’t likely work for larger birds unless you split the turkey in half and roast on two pans. 

Despite those disadvantages, our “test” turkey turned out so well cooked and delicious we all decided this was a method we simply had to do again. Paired with the salt brine? Amazing. 

I don’t want to give my own directions yet, as I still want to experiment with this method, but here are a couple of recipes showing how to spatchcock: Example one, two, and three.

And here is my dry brine recipe! 
Filed Under: AIP, Dairy Free, Egg Free, Gluten Free, Grain Free, Main Dishes, Nutrient Dense Foods

Why I Started Adding Okra into My Smoothie ( And Fruit Okra Recipe)

October 4, 2017 by KimiHarris 10 Comments

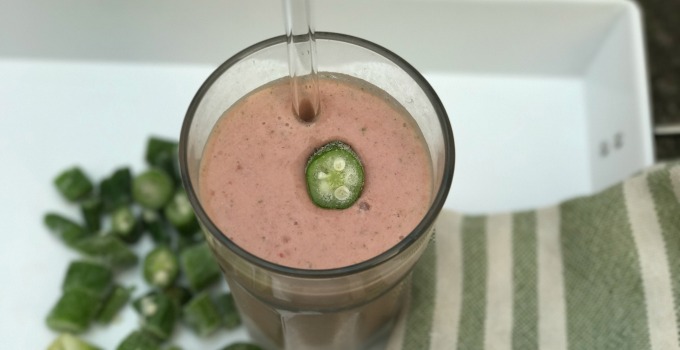
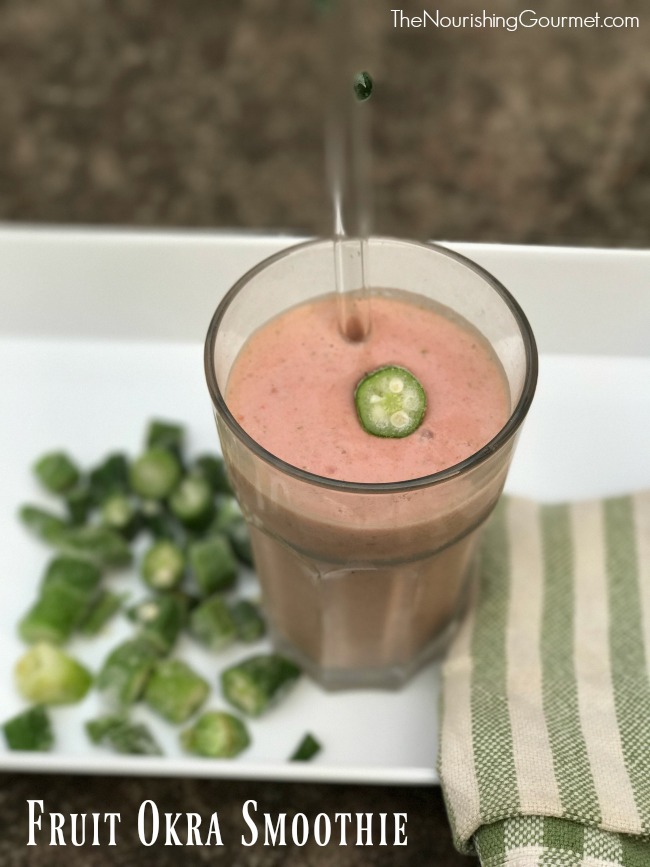
Fruit Okra Smoothie - this green smoothie is full of important nutrients! Okra has well documented heath promoting attributes, and adds a lot of body to smoothies!

This beautiful fruit smoothie has a green secret that adds important minerals and vitamins to it, as well as making a frothy texture – okra!

Okra is an unlikely contender for smoothies, yet here I am throwing it into my smoothies. It’s known for being a popular vegetable in many southern dishes, but certainly isn’t known as a typical smoothie addition. So why am I adding it to mine? Besides the fact that it’s an excellent source of whole food fiber, vitamin C and K, and folate, there are some interesting studies looking into possible benefits.

What is Okra?

First, what is okra? It’s a flowering plant from the mallow family. The mallow family boasts of the following well-known family members: cacao, cotton, hibiscus, okra, and durian. Okra is the edible fruit of a variety of hibiscus (so it’s not technically even a vegetable!). Did you notice that “mallow” sounds like “marshmallow”? That’s because the original marshmallow was developed from the gelatinous properties of marshmallow roots, from the mallow family. Okra also can produce a gelatinous texture.

Health Benefits and Studies on Okra

  • Okra helps diabetic symptoms and lowers blood sugar (Source)
  • A lectin from okra may help fight or prevent some cancers. (Source) (Also good information here on contradictions – make sure you check them out!)
  • Could help protect the liver (Source)
  • Okra could also help prevent stomach ulcers (Source)
  • Plus,it could also be helpful for your gut health – both in promoting good gut bacteria and soothing inflammation. (Source)

Speaking from a culinary perspective, it adds a lot of creamy texture to the smoothie because of its gelatinous (otherwise known as mucilage) texture. I love the texture, and it only adds a mild taste to the smoothie. However, I will warn you that my children have all informed me that they are not a fan of the “weird green vegetable” I put into the smoothies. Although, I’ve heard reports of many children not even noticing it in their smoothies, mine have been too perceptive for me to add it without them noticing. I may try to sneak in very small amounts next time to see if they notice, but for now, I’ve been making my own personal smoothies stuffed full with it! UPDATE: Adding only a small amount was the key! My kids have now drunk several smoothies with small amounts of okra in it without knowing it was there. 

A Notes on Ingredients and Blenders:

I use pre-steamed and pre-frozen sliced okra. It works well and is easy to use. Although technically you could use raw, this recipe suggests pre-steaming it to reduce a slimy texture.

Secondly, you should have a powerful blender to properly blend frozen vegetables. I use a Blendtec, but any brand that can pulverize ice well should work great.

Lastly, for extra nutrition, I’ve been adding two things lately. First gelatin. I like many brands, but lately I’ve been using Super Collagen . Supposedly it’s in in a smaller peptide form so that it is easier to digest. What I like about it is that it is so fine that there is no added grittiness from it. Sadly, it’s not from pastured animals. The other addition I’ve been adding is colostrum from this company – which is a wonderful immune booster. Although some in the family are sensitive to dairy, it appears that we all do fine with it!

Finally, take note that okra is high in oxalates. If you are sensitive to okra, be careful. I don’t seem to be sensitive, but with all things being done in moderation, I don’t eat okra, or other high oxalate foods every day.

Fruit Okra Smoothie - this green smoothie is full of important nutrients! Okra has well documented heath promoting attributes, and adds a lot of body to smoothies!

Okra Fruit Smoothie

PDF for Printing

Makes 1 large or two small smoothies. This recipe can have so many variations! Have fun with it.

  • ½ cup of frozen fruit (such as blueberries, raspberries, mango, or peach slices)
  • ¼-½ cup of frozen and sliced okra
  • ½ cup each of kombucha and coconut cream/milk (or 1 cup of desired liquid – kefir, milk, juice, coconut water, etc.), plus extra, as needed
  • ½ teaspoon vanilla extract
  • 1 small ripe banana (adds a lot of sweetness, but sometimes I leave out because they are a bit high in sugar for me)

Add all of the ingredients into a blender and blend on high until very smooth. Stop to scrape sides, if needed, and add more liquid as needed (I often use more).

Some links may be affiliate links. I may earn a small commission on items purchased through my links. 

Filed Under: Beverages, Breakfast and Brunch, Dairy Free, Egg Free, Gluten Free, Grain Free, Nutrient Dense Foods, Vegan, Vegetarian

Creamy Quinoa Casserole with Chicken and Mushrooms

April 14, 2016 by Megan Stevens 6 Comments

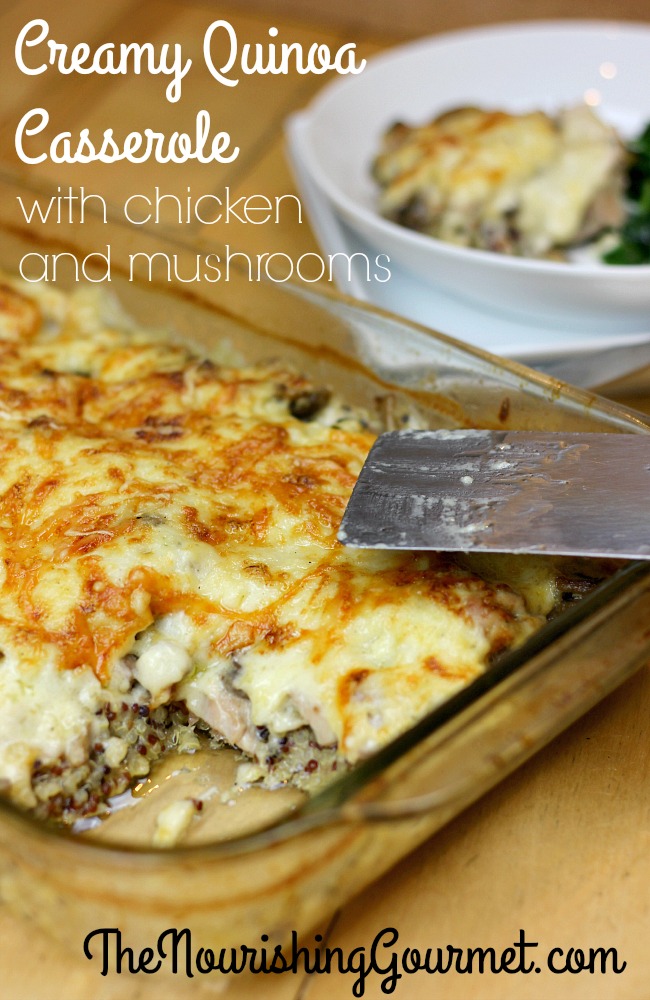
Creamy Quinoa Casserole with Chicken and Mushrooms - a frugal, lovely comfort food that's full of nourishing ingredients too! -- The Nourishing Gourmet
This casserole’s aroma and visual appeal had my kids ogling: first the smell of the easy roux cooking (think browned butter and cream!), then the grating of the Gruyere, the toasty smell of quinoa bubbling in bone broth, and, of course, the redolence of sauteed mushrooms with garlic and herbs.
I first made this casserole when we were phasing off of a grain-free diet, to see how we’d do with quinoa. I soaked the gluten-free grain overnight, to reduce phytic acid and improve its digestibility. (That’s an easy step- just a little salt water overnight: instructions below.) We all loved it and pronounced it an instant creamy classic.
Although the recipe is topped with a roux (homemade cream sauce), I hope you’ll know this is one quick-to-assemble casserole that provides 8 big servings; so it’s great for guests or a weeknight meal. Melted cheese atop chicken and cozy, high protein quinoa (that cooks while it bakes!) provide a comfort food that’s fun to make and sure to please.
The main ingredients are all accessible at Trader Joe’s- an easy way to grab what you need for a plentiful dinner. (There are a few additional basic pantry or fridge ingredients you may already have on hand at home.) The ingredients aren’t all inexpensive, but they’re high quality and relatively affordable; (let’s face it: organic chicken isn’t cheap). When you buy a couple of the ingredients, the Gruyere cheese (or jack, for a milder flavor) and quinoa, you’ll be able to use leftovers of these ingredients another time as well; the recipe only uses half of what you’ll buy. Or perhaps you already buy quinoa in bulk?
The whole casserole costs about $18.25 to make. If you serve 8 people, each servings costs about $2.25.
Here’s the price breakdown if you purchase your ingredients from Trader Joe’s:
$4.58- 1 pound organic mushrooms
$1.75- 1 cup quinoa
$8.50- 1.75 pounds organic chicken thighs
$3.15- 1-1/4 cups grated Gruyere (or less for jack cheese)
$.25- 3 cloves organic garlic
The additional ingredients you’ll need are bone broth, a cup of cream or milk (we use raw cream), a teeny bit of white rice flour, butter, herbs, salt and pepper. The casserole is loaded with chicken; so if you want to save money, make a really big salad and give smaller portions of the casserole, or use less chicken, if you’re really stretched budget-wise. It’s the spendiest ingredient by far.
Enjoy!
Creamy Quinoa Casserole with Chicken and Mushrooms
Serves 8-10

Ingredients

  • 1 cup uncooked quinoa
  • 1-1/2 cups water + 1 tablespoon apple cider vinegar
  • 1 cup bone broth
  • 1 cup organic, grass-fed cream (or raw cream or milk)
  • 1/4 cup white rice flour
  • 1/4 cup butter
  • 1/2 teaspoon sea salt
  • 1/2 teaspoon white pepper
  • 1-3/4 cup bone broth or water
  • 1.5-1.75 pounds boneless skinless chicken thighs, cut into 1″/bite-size cubes/pieces
  • 3 cloves garlic, crushed or minced
  •  1 cup shredded Gruyere cheese (or use jack for a milder flavor)
  • 1 pound mushrooms, sliced
  • 2 tablespoons animal fat, butter, or avocado oil (for sauteing)
  • 1-1/2 teaspoons Herbes de Provence or mixed Italian herbs
  • 1/2 teaspoon sea salt

In a medium size bowl, soak the quinoa in the 1-1/2 cups water and apple cider vinegar overnight. When ready to assemble the casserole, rinse the quinoa in a fine mesh strainer and set aside. It will cook in the oven.

Grease a large casserole dish (9″ by 13″ or similar) and set aside. Preheat the oven to 400 degrees Fahrenheit.

Place 1/4 cup butter in small saucepan and melt over medium heat. Add the 1/4 cup rice flour and cook, whisking for 5 minutes, to cook the raw flavor out of the flour. (This part smells really good.) In a steady, thin stream, constantly whisk in the bone broth, then the cream, allowing the liquid to absorb the flour, as it becomes a creamy sauce. Simmer over low heat for 3 minutes. Add the 1/2 teaspoon sea salt and 1/2 teaspoon white pepper, stirring, and set aside.

In a large skillet, melt the 2 tablespoons preferred fat over high heat. Add mushrooms and 1/2 teaspoon sea salt, stirring briefly. Cover for 2-3 minutes, to produce steam. Uncover and add herbs. Saute over medium-high heat for 8 minutes more. Set aside and allow to cool slightly for about 10 minutes. Add cubed chicken and stir to combine.

Place soaked, rinsed quinoa (uncooked) into greased casserole dish, spreading it out evenly. Top with chicken mushroom mixture, spreading it out over the quinoa. Add about 3/4 of the total grated cheese to the roux (cream sauce), stirring briefly to mix. Top chicken and mushrooms with cream sauce. Spread the sauce to within 1″ of the edges of the casserole. Pour the 1-3/4 cup bone broth or water in around the edges. Carefully transfer dish to oven and bake 45 minutes, until edges are bubbling rapidly and all water is absorbed.

Serve with an optional side of wilted greens or a green salad.

Creamy Quinoa Casserole with Chicken and Mushrooms
 
Author:
Megan Stevens
Serves: 8-10 servings
Print
 
Ingredients
  • 1 cup uncooked quinoa
  • 1-1/2 cups water + 1 tablespoon apple cider vinegar
  • 1 cup bone broth
  • 1 cup organic, grass-fed cream (or raw cream)
  • ¼ cup white rice flour
  • ¼ cup butter
  • ½ teaspoon sea salt
  • ½ teaspoon white pepper
  • 1-3/4 cup bone broth or water
  • 1.5-1.75 pounds boneless skinless chicken thighs, cut into 1"/bite-size cubes/pieces
  • 3 cloves garlic, crushed or minced
  • 1 cup shredded Gruyere cheese (or use jack for a milder flavor)
  • 1 pound mushrooms, sliced
  • 2 tablespoons animal fat, butter, or avocado oil (for sauteing)
  • 1-1/2 teaspoons Herbes de Provence or mixed Italian herbs
  • ½ teaspoon sea salt
Instructions
  1. In a medium size bowl, soak the quinoa in the 1-1/2 cups water and apple cider vinegar overnight. When ready to assemble the casserole, rinse the quinoa in a fine mesh strainer and set aside. It will cook in the oven.
  2. Grease a large casserole dish (9" by 13" or similar) and set aside. Preheat the oven to 400 degrees Fahrenheit.
  3. Place ¼ cup butter in small saucepan and melt over medium heat. Add the ¼ cup rice flour and cook, whisking for 5 minutes, to cook the raw flavor out of the flour. (This part smells really good.) In a steady, thin stream, constantly whisk in the bone broth, then the cream, allowing the liquid to absorb the flour, as it becomes a creamy sauce. Simmer over low heat for 3 minutes. Add the ½ teaspoon sea salt and ½ teaspoon white pepper, stirring, and set aside.
  4. In a large skillet, melt the 2 tablespoons preferred fat over high heat. Add mushrooms and ½ teaspoon sea salt, stirring briefly. Cover for 2-3 minutes, to produce steam. Uncover and add herbs. Saute over medium-high heat for 8 minutes more. Set aside and allow to cool slightly for about 10 minutes. Add cubed chicken and stir to combine.
  5. Place soaked, rinsed quinoa (uncooked) into greased casserole dish, spreading it out evenly. Top with chicken mushroom mixture, spreading it out over the quinoa. Add about ¾ of the total grated cheese to the roux (cream sauce), stirring briefly to mix. Top chicken and mushrooms with cream sauce. Spread the sauce to within 1" of the edges of the casserole. Pour the 1-3/4 cup bone broth or water in around the edges. Carefully transfer dish to oven and bake 45 minutes, until edges are bubbling rapidly and all water is absorbed.
  6. Serve with an optional side of wilted greens or a green salad.
3.3.3077

Filed Under: Egg Free, Egg Free, Gluten Free, Main Dishes, Nourishing Frugal Recipes, Nutrient Dense Foods

Sweet & Spicy Candied Walnuts & Pecans

December 3, 2015 by Renee Kohley 1 Comment

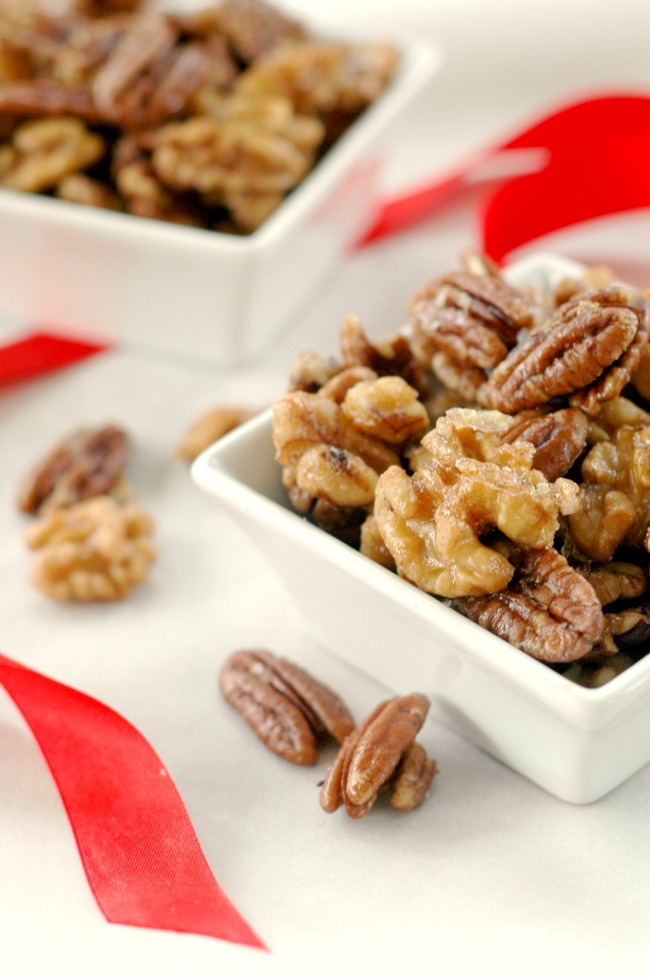
Sweet and Spicy Candied Walnuts and Pecans - A delicious DIY gift! They are great for snacking on, or for serving on green salads. Yum! --- The Nourishing Gourmet

Walnuts and pecans are coated with an unrefined sweetener (such as coconut sugar), spice, and salt, for a delicious combo of sweetness, saltiness, and spice.  They make a perfect gift!

Every December for the last few years I try to come up with a new holiday nut mixture to give as hostess gifts where ever we are visiting. It is one of the easiest things to do and a thoughtful gesture to parents, friends, and neighbors. They can be made up way ahead of time which I love too.

Speaking of DIY gifts, see other lovely and healthy DIY Christmas gifts here (Everything from Dairy-free Hot Cocoa Mix to Homemade Candies to a Healthy Ice Cream Basket), and see the other two posts for the 2015 12 Days of Christmas Series, Mint Chocolate Lip Balm, and Chai Eggnog.

I always end up going back to giving my candied nuts a bit of a spicy kick to them though! There is just something about that flavorful heat that goes so well with the sweet candied coating.

I actually do not have much of a palate for super spicy food but I do appreciate a flavorful heat from a smokey chipotle or a cayenne type of heat and these nuts have just the perfect amount of heat to me. If you prefer things really spicy you could definitely get away with almost doubling the heat in the recipe.

Soaking the nuts before they are prepared will help with digestion – it only takes a little bit of extra time and very little hands on time. (See also how I used this method to make salted soaked and dehydrated almonds).  If you are sensitive to eggs you can leave the egg white out. It does give the nuts a pretty candy like coating but they still come out really good without the whites and I do this with one of my batches every year for a family that we visit that has egg allergies.

By the way! Don’t throw that egg yolk out! Put it in a smoothie or use it for this delicious Caesar dressing! They are very nutrient-rich. (Katie shares great safety information on consuming raw eggs here. As always, consume at your own risk – as small as that risk may be.)

The nuts wrap up great in those little holiday party bags or look gorgeous in a little mason jar with ribbon.

If you don’t have one yet already, here is a (affiliate link) good dehydrator that is high quality and long lasting.

Sweet and Spicy Candied Walnuts

Ingredients: 

  • 2 cups raw walnuts
  • 2 cups raw pecans
  • 1 tablespoons sea salt for soaking
  • 1 egg white
  • 1 cup organic pure cane sugar or coconut sugar
  • 2 teaspoon sea salt
  • 1 teaspoon cayenne pepper or chipotle pepper if you like a smoky heat (more if you like more heat – you can do a combo of these to pepper powders too if you wish)

Directions: 

  1. Put the walnuts, pecans, and 1 TB of sea salt in a medium mixing bowl and add water to cover by a couple inches. Place the bowl in a warm spot in your kitchen 8 hours – this soaking process breaks down the phytic acid in the nuts making them easier to digest as well as making their nutrients more available to absorb.
  2. After the nuts soak, place the nuts in a strainer to drain the water while you put the egg white, sugar, sea salt, and cayenne pepper in the bowl and beat to combine.
  3. Return the drained nuts to the bowl of seasoned egg white and combine with a big spoon to coat the nuts in the seasoned mixture.
  4. Spread the coated nuts onto your dehydrator trays and dehydrate overnight at 150 degrees until crispy and dried out. If you are using an oven you can bake them around 300 degrees for a half hour stirring occasionally.

Sweet & Spicy Candied Walnuts & Pecans
 
Author:
Renee Kohley www.thenourishinggourmet.com
Print
 
Ingredients
  • 2 cups raw walnuts
  • 2 cups raw pecans
  • 1 TB sea salt for soaking
  • 1 egg white
  • 1 cup organic pure cane sugar or coconut sugar
  • 2 tsp sea salt
  • 1 tsp cayenne pepper or chipotle pepper if you like a smoky heat (more if you like more heat - you can do a combo of these to pepper powders too if you wish)
Instructions
  1. Put the walnuts, pecans, and 1 TB of sea salt in a medium mixing bowl and add water to cover by a couple inches. Place the bowl in a warm spot in your kitchen 8 hours - this soaking process breaks down the phytic acid in the nuts making them easier to digest as well as making their nutrients more available to absorb.
  2. After the nuts soak, place the nuts in a strainer to drain the water while you put the egg white, sugar, sea salt, and cayenne pepper in the bowl and beat to combine.
  3. Return the drained nuts to the bowl of seasoned egg white and combine with a big spoon to coat the nuts in the seasoned mixture.
  4. Spread the coated nuts onto your dehydrator trays and dehydrate overnight at 150 degrees until crispy and dried out. If you are using an oven you can bake them around 300 degrees for a half hour stirring occasionally.
3.3.3077


Filed Under: Dairy Free, Gluten Free, Grain Free, Nutrient Dense Foods, Snacks

Next Page »

Primary Sidebar

Follow Me

  • Facebook
  • Instagram
  • Pinterest
  • RSS

Search

Please Read:

The information you find here at The Nourishing Gourmet is meant to help you become a better cook! This site is primarily for sharing family friendly recipes. It's not meant to give medical advice or to make any health claims on the prevention or curing of diseases.This site is only for informational and educational purposes. Please discuss with your own, qualified health care provider before adding in supplements or making any changes in your diet. Also, any links to sponsors or affiliates (including Amazon) may give me a percentage of the sale or a pay per click. Thank you for supporting this site.

Categories

  • $10 Main (43)
  • $5 Dishes (43)
  • 52 ways to save money on a healthy diet (53)
  • AIP (23)
  • Baked Goods (84)
  • Beverages (72)
  • Breakfast and Brunch (63)
  • Condiments (8)
  • Dairy Free (498)
  • Desserts (185)
  • Dietary Needs (6)
  • Egg Free (14)
  • Egg Free (92)
  • For the Kids (70)
  • For the Love of Food and Books (18)
  • Gluten Free (491)
  • Grain Free (98)
  • Health (75)
  • Kitchen Tools (5)
  • Main Dishes (128)
  • Nourishing Frugal Recipes (169)
  • Nourishing Frugal Tips (70)
  • Nourishing Practices (57)
  • Nutrient Dense Foods (70)
  • Q and A (16)
  • Salads (40)
  • Sides (104)
  • Snacks (126)
  • Soups (50)
  • The Healthy $1 Menu (21)
  • The Low Energy Guide to Healthy Cooking (20)
  • THM (5)
  • Trim Healthy Mama (5)
  • Uncategorized (848)
  • Vegan (243)
  • Vegetarian (363)

Recent Posts

  • Eating for Comfort and Sustenance
  • Perfect Instant Pot Black and Brown Rice
  • What Worked and What Didn’t in My Cooking Life Last Year
  • Mocha Dark Chocolate Bombs (low sugar)
  • Gingerbread Caramel Corn
  • Thyme and Garlic Potato Stacks
  • The Great Big Holiday Salad
  • 30 Favorite Kitchen Stocking Stuffers
  • Luxurious DIY Lip Balm
  • Spicy Korean Beef and Cabbage

Recent Comments

  • June on One-Pot Gluten-Free Mac and Cheese
  • Kim on Eating for Comfort and Sustenance
  • Michelle Sanders on Chile-Spiked Dark Chocolate Bark with Pepitas & Mango (Dairy Free)
  • KimiHarris on Eating for Comfort and Sustenance
  • KimiHarris on Eating for Comfort and Sustenance

Fresh: Nourishing Salads for All Seasons

Footer

Privacy

Copyright © 2026 · Foodie Pro & The Genesis Framework