• Skip to primary navigation
  • Skip to main content
  • Skip to primary sidebar
  • Skip to footer

The Nourishing Gourmet

Nourishing. Satisfying. Gourmet.

  • About
    • Privacy
    • Contact
  • Recipes
  • Cookbooks
    • Everyday Nourishing Food
    • Salad Cookbook
    • Soup Cookbook

Sides

Perfect Instant Pot Black and Brown Rice

February 14, 2025 by KimiHarris Leave a Comment

A bowl full of black and brown rice.

Rich in antioxidants, black rice (also known as purple or forbidden rice) adds a light nutty flavor and a wealth of nutrients to this simple dish. It is a striking side dish with subtle flavor, a not-so-subtle color, and many nutrients. 

Black rice is thought to have been reserved for royalty in ancient China, and was also called longevity rice because of its health-promoting properties. It is believed to have been cultivated for thousands of years, making it a traditional food. 

While you can easily cook black rice alone, my family found it more appetizing when mixed and then cooked with brown rice. Because black rice can be expensive, this helps stretch it out. Black rice contains the antioxidant anthocyanin, which gives this dish not only its beautiful color, but is also responsible for potential health benefits such as reducing inflammation, and helping protect against various diseases. It also contains high amounts of lutein and zeaxanthin, which support eye health. In one controlled study for weight loss, they found that women who frequently ate a brown and black rice diet, instead of white rice, lost more weight, although they ate the same amount of calories. 1, 2, 3.

There are various kinds of black rice, some of which I am eager to try, but haven’t been able to find locally or online. Two accessible brands are Lotus Forbidden Black Rice and Lundberg Black Pearl Rice. I’ve had success using both short and long-grain brown rice in this recipe. 

Many of my readers enjoy “soaking” their grains to reduce anti-nutrients, such as phytic acid in grains. Pressure cooking is an excellent form of cooking to reduce anti-nutrients without soaking. It’s our current preferred way to make rice! Feel free to add a soaking period to this recipe, if desired, however. Rice is traditionally rinsed or washed before cooking, and we now know that it also washes away arsenic in rice, so it is recommended for both culinary and health reasons. 

You can use whatever ratio of brown to black rice that you like, including using this recipe to make all black rice, if desired. 

I am feeding a family, so I use the 6-quart Instant Pot.

Serve with:

  • Spicy Korean Beef and Cabbage
  • 3-Ingredient Teriyaki Chicken
  • Paleo Teriyaki Chicken
  • Japanese Cucumber Salad

Perfect Instant Pot Black and Brown Rice

Printable PDF, Serves 4-6 people 

You can make a smaller portion of this dish by keeping the ratios the same in smaller amounts. (For example: ¼ cup black rice, ¾ cup brown rice, 1 cup water or broth, ¼ teaspoon salt.)

  • 1 cup of black rice 
  • 3 cups of brown rice 
  • 4 cups of water or broth 
  • 1 teaspoon salt

Directions:

  1. Rinse rice by placing rice in a fine sieve and rinsing under the faucet until the water runs clear. Or wash the rice by placing rice a large bowl, covering with cold water, and then gently swirling. Pour out the water, and then repeat until the water runs clear and is no longer cloudy. Add drained rice to the instant pot. 
  2. Add water or broth and salt. Secure the lid and then ensure that the steam release valve is in the sealing position. 
  3. Select manual at high pressure and set to 25 minutes. *
  4. Once the cooking time is done, let it naturally release for 10 minutes (natural-release simply means leaving it alone) and then release any remaining pressure by moving the steam release valve to venting position. 

*Many find that 20 minutes is adequate for cooking brown and black rice, but I find that I need the 25 minutes.

Filed Under: Dairy Free, Egg Free, Gluten Free, Sides, The Low Energy Guide to Healthy Cooking, THM, Trim Healthy Mama, Vegan, Vegetarian

Thyme and Garlic Potato Stacks

December 6, 2024 by KimiHarris 4 Comments

Garlic and thyme potato stacks in muffin tins

Imagine this: Melt-in-your-mouth tender potatoes that are bursting with garlic and fresh thyme. This elegant potato dish is a beautiful side for holiday meals (or really, just anytime!). The concept is simple—use a mandoline to thinly and evenly slice potatoes, toss with melted butter, fresh garlic, and thyme, stack in muffin tins, and then roast in the oven until the tops are browned, and the potatoes are tender in the middle. 

We tried this a few times, and we found that olive oil also works for a dairy-free version. Sweet potatoes are also quite good.

Some Notes on Tools:

  • Mandolines can be dangerous to use, so be careful and use the safety food holder. You can also consider using a protection glove like this one. I used a very simple mandoline like this one. However, I really like this one that makes the process quick and easy as well as very safe.
  • I use my reliable stainless steel muffin tins for this recipe.
  • I love my garlic grinder too.

Note on Ingredients:

  • Yes, this is a large amount of butter or oil, but you need the potatoes to be well-coated with fat to cook properly and not dry out. 
  • Make sure the potatoes you use are small enough in diameter that they can stack, sliced, in your muffin tins. We tried out a variety of potatoes and they all worked! My favorite may have been Yukon golds. 
  • Feel free to cut the recipe in half. 
picture of potato stacks in muffin tins

Thyme and Garlic Potato Stacks

PDF Printable, Serves 8-12

Ingredients:

  • 3 lbs potatoes (see note above), scrubbed and rinsed. 
  • 1 cup butter or olive oil (if using olive oil, start with ¾ cup, and use the extra ¼ if needed) 
  • 1 ½ teaspoons of salt 
  • 2-4 tablespoons of fresh thyme (rinse, and then slide your fingers up the stem of thyme sprig to remove the herb leaves for this recipe) 
  • 6-8 garlic cloves, peeled and finely minced

Directions:

1: Preheat oven to 375F. Lightly grease muffin tins (2 dozen). 

    2. Using the thinnest setting (1/16 inch), thinly slice the potatoes using a mandoline.  

    3. Melt butter in a small pot until just melted. Take off heat and cool slightly. Add salt, thyme and garlic to the butter, and then pour over potatoes and gently toss until each slice is coated. (If using olive oil, start with ¾ a cup, and add an extra ¼ cup, if needed to lightly coat potatoes). 

    4. Stack potato slices in muffin tins. They will shrink while cooking, so stack higher than the top of the muffin tin. 

    5. Put into the middle of the oven, and cook until the potatoes are soft in the middle (I check with a toothpick), and the edges and tops are starting to brown. This should take around 45 minutes, but start checking at 35-40 minutes. 

    6. Carefully remove potato stacks from muffin tins (I find a thin heat-safe spatula or butter knife helpful here), and serve right away. 

    7. For Thanksgiving, I put them in a casserole dish and covered with foil to keep warm until serving. 

    Filed Under: Dairy Free, Egg Free, Egg Free, Gluten Free, Sides

    The Great Big Holiday Salad

    December 3, 2024 by KimiHarris Leave a Comment

    large salad bowl full of salad and toppings

    This holiday-worthy salad is bursting with a variety of flavors and textures with dried cranberries, crunchy pumpkin seeds, fresh apples, crispy sweet potato slices, and roasted Brussels sprouts. Its colorful appearance hints at the wide range of antioxidants and nutrients it brings along with its flavor. Topped with our favorite balsamic vinaigrette, we decided we wanted this salad more often than just special occasions.

    I made this for Thanksgiving, and it would make the perfect salad for a Christmas meal as well, but I think we will make it regularly! You can easily turn it into a main dish event by adding another protein (chicken, turkey, crumbled cheese, or even beans)! 

    You may find that you have plenty of these ingredients on hand after Thanksgiving, so this could be a great time to try this recipe out.

    Notes:

    • You can air fry the vegetables and cut the cooking time in half. 
    • Variation: Use pomegranate seeds instead of dried cranberries
    • Use whatever apple you love to snack on (honeycrisp, pink lady, or gala are some of our favorites) 
    • You can use sprouted pumpkin seeds or soaked and dried ones, if desired

    Other Recipes You May Enjoy:

    • Creamy Winter House Dressing
    • Roasted Beat and Blueberry Salad
    • How to Make a Balsamic Reduction

    The Great Big Holiday Salad

    PDF to print

    Ingredients:

    • 2 small (or 1 large/medium) sweet potatoes, peeled and then thinly sliced. 
    • 8 ounces (about a heaping cup) Brussels sprouts
    • 8 cups of lettuce (I like a mixture of chopped romaine and spring mix) 
    • 2 tablespoons fresh thyme (optional) 
    • Salt 
    • 3-4 tablespoons oil or fat of choice (I used extra virgin olive oil) 
    • 1 large apple, cored and thinly sliced 
    • ½ fresh lemon (optional) 
    • ⅓ cup of pumpkin seeds 
    • ½ cup dried cranberries (you can use fruit sweetened, if desired) 
    • 1 recipe balsamic vinaigrette (below)

    Directions:

    1. Preheat oven to 425. Put parchment paper on a sheet pan. Prepare sweet potatoes by peeling, then cut in half lengthwise (for small sweet potatoes) or cut into quarters for a large sweet potato. Then, thinly slice. Cut thin so that they will get browned and crispy when roasted. Rinse Brussels sprouts, and cut the woody stem off. Cut each Brussels sprout into quarters. Place sprouts on one half of the prepared sheet pan and drizzle with one tablespoon of oil/fat, one tablespoon of the optional fresh thyme, and salt. Toss to evenly coat. If the sprouts aren’t well coated with oil, add a second tablespoon and toss again. Do the same with the sweet potatoes on the other side of the sheet pan with the other 2 tablespoons of oil/fat, salt, and optional fresh thyme. 

    2. Put in the middle of the oven and roast until the sweet potatoes are starting to crisp and brown (around 25 minutes). Remove from oven and cool. 

    3. While the vegetables are cooking, make the balsamic dressing, and core and cut the apples. If not serving right away, toss apples with lemon juice to prevent browning. 

    4. To serve: In a large bowl, place all of your greens, and then add the rest of the toppings. Drizzle with the dressing, toss to coat well, and serve.

    Balsamic Vinaigrette 

    Ingredients:

    • 1/4 cup balsamic vinegar
    • ¾  cup extra virgin olive oil
    • 2 teaspoons dijon style mustard
    • 1 teaspoon unrefined salt
    • 1-3 garlic cloves, peeled, and finely minced or put through a garlic press

    Directions: Put all the ingredients into a mason jar, put the lid on, and shake until well mixed (or, whisk with a small whisk in a bowl).

    Filed Under: Dairy Free, Egg Free, Egg Free, Gluten Free, Grain Free, Salads, Sides, Vegan, Vegetarian

    Simple Mexican Coleslaw

    April 8, 2021 by KimiHarris 2 Comments

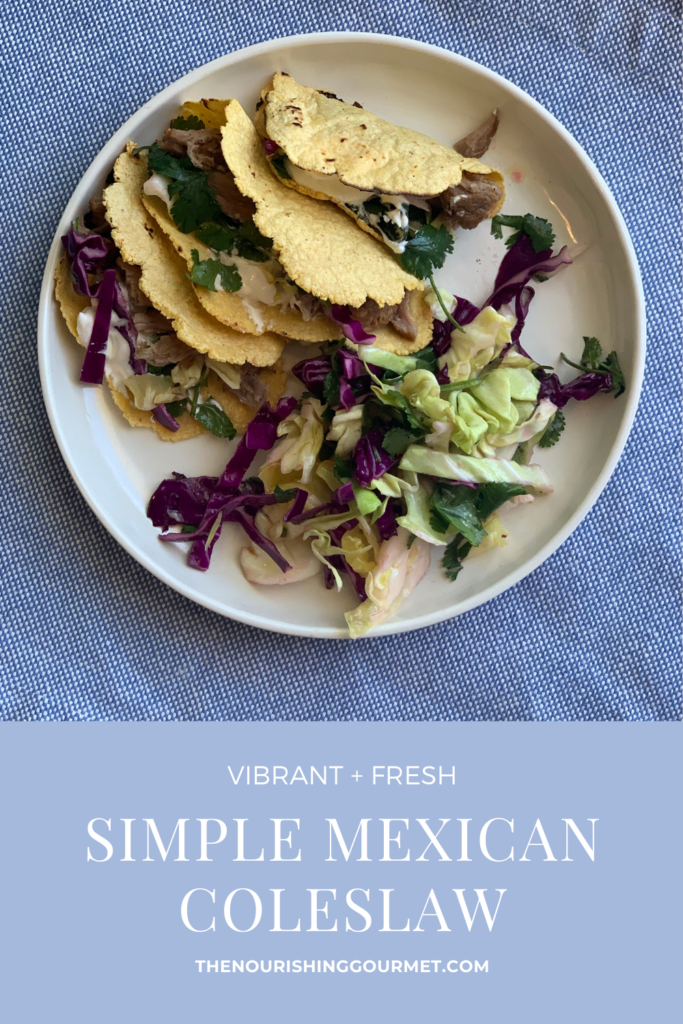
    picture of mexican coleslaw with tacos

    This easy and simple coleslaw is perfect for two things – topping tacos or using it as a flavorful base for a “taco salad.” Vegetable sides are regularly overlooked, but they shouldn’t be! They not only add a lot of important nutrition, antioxidants, and fiber, but they also add vibrant flavor. 

    That said, I like to keep my sides simple so that I can get dinner on the table quickly. This recipe fits the bill. 

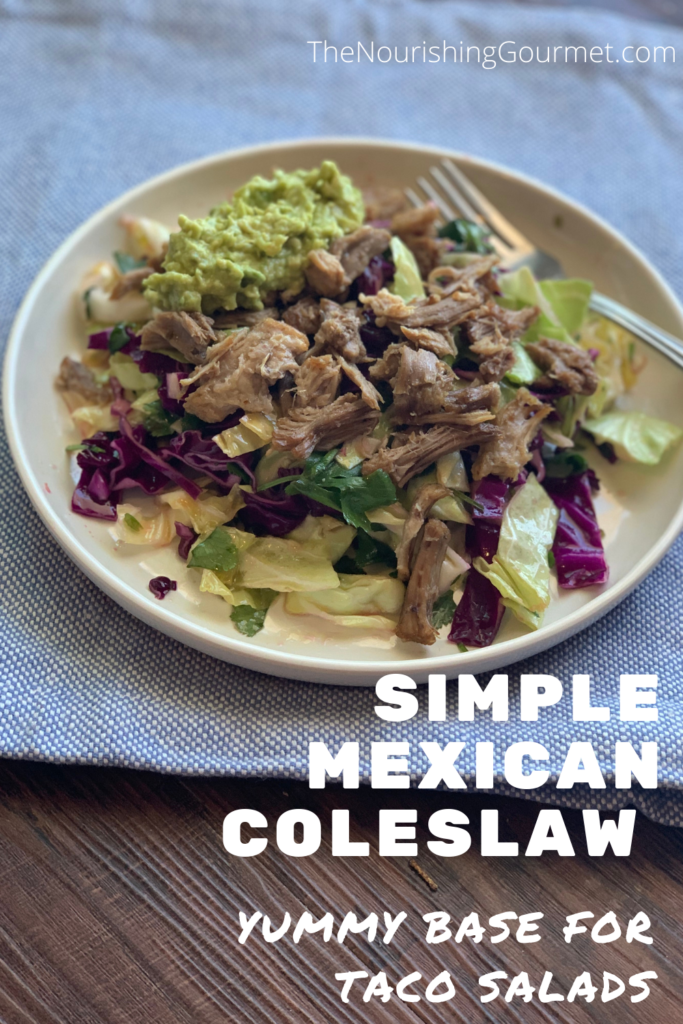
    I make a large bowl of it, and serve it on taco night. For those in the family who regularly enjoy corn, they use it both in their tacos and as a side salad. For those of us who don’t always eat corn (or who are eating using keto or using Trim Healthy Mama principles), we use it as a base and then top it with top tender meat, salsa, avocado, sour cream, and cheese. 

    Mexican coleslaw topped with meat and avocado.

    It’s a really delicious and satisfying meal, with taco shells or without, and is a regular part of our menu. 

    While cabbage dressed up this way is just delicious, I also love that the regular addition of cruciferous vegetables, such as cabbage, can help prevent or reduce inflammation (1, 2, 3). Also, consider using red cabbage! It has other benefits because of its anthocyanin content (1), and also looks beautiful. 

    Related Recipes:

    • Simple Mexican Quinoa Bowls

    • Mexican Quinoa Salad

    • Mexican Chocolate Dairy-free Ice Cream

    • Lacto-Fermented Escabeche

    • 7 Layer Mexican Dip

    Simple Mexican Coleslaw 

    • 1 medium-large cabbage (I sometimes use half of a green, and half of a red) 

    • 1 bunch of cilantro, washed, stemmed and chopped 

    • ½ cup fresh lime juice*

    • ¼ cup extra virgin olive oil 

    • 1 teaspoon salt 

    • 3-6 garlic cloves, peeled and finely minced 

    1. Wash the outside of the cabbage, and then cut in half using a large, sharp knife. Thinly slice the cabbage after cutting out the core. Add to a large bowl, and then add the cilantro. 
    2. Add the rest of the ingredients together in a small bowl or glass measuring cup, and stir together. Pour over cabbage and cilantro, and toss. Taste test, and add more salt, olive oil, or lime juice, as desired. 
    3. Serve right away, or premake an hour or two beforehand and allow the flavor to meld, and the cabbage to slightly soften. 

    Variation: Cut the lime juice to ¼ of a cup and add ½ cup of orange juice for a more mild version. For a kick, add some red pepper flakes or cayenne pepper.

    Filed Under: $5 Dishes, Egg Free, Main Dishes, Sides Tagged With: coleslaw, Mexican coleslaw, Mexican recipes

    Next Page »

    Primary Sidebar

    Follow Me

    • Facebook
    • Instagram
    • Pinterest
    • RSS

    Search

    Please Read:

    The information you find here at The Nourishing Gourmet is meant to help you become a better cook! This site is primarily for sharing family friendly recipes. It's not meant to give medical advice or to make any health claims on the prevention or curing of diseases.This site is only for informational and educational purposes. Please discuss with your own, qualified health care provider before adding in supplements or making any changes in your diet. Also, any links to sponsors or affiliates (including Amazon) may give me a percentage of the sale or a pay per click. Thank you for supporting this site.

    Categories

    • $10 Main (43)
    • $5 Dishes (43)
    • 52 ways to save money on a healthy diet (53)
    • AIP (23)
    • Baked Goods (84)
    • Beverages (72)
    • Breakfast and Brunch (63)
    • Condiments (8)
    • Dairy Free (498)
    • Desserts (185)
    • Dietary Needs (6)
    • Egg Free (14)
    • Egg Free (92)
    • For the Kids (70)
    • For the Love of Food and Books (18)
    • Gluten Free (491)
    • Grain Free (98)
    • Health (75)
    • Kitchen Tools (5)
    • Main Dishes (128)
    • Nourishing Frugal Recipes (169)
    • Nourishing Frugal Tips (70)
    • Nourishing Practices (57)
    • Nutrient Dense Foods (70)
    • Q and A (16)
    • Salads (40)
    • Sides (104)
    • Snacks (126)
    • Soups (50)
    • The Healthy $1 Menu (21)
    • The Low Energy Guide to Healthy Cooking (20)
    • THM (5)
    • Trim Healthy Mama (5)
    • Uncategorized (848)
    • Vegan (243)
    • Vegetarian (363)

    Recent Posts

    • Eating for Comfort and Sustenance
    • Perfect Instant Pot Black and Brown Rice
    • What Worked and What Didn’t in My Cooking Life Last Year
    • Mocha Dark Chocolate Bombs (low sugar)
    • Gingerbread Caramel Corn
    • Thyme and Garlic Potato Stacks
    • The Great Big Holiday Salad
    • 30 Favorite Kitchen Stocking Stuffers
    • Luxurious DIY Lip Balm
    • Spicy Korean Beef and Cabbage

    Recent Comments

    • June on One-Pot Gluten-Free Mac and Cheese
    • Kim on Eating for Comfort and Sustenance
    • Michelle Sanders on Chile-Spiked Dark Chocolate Bark with Pepitas & Mango (Dairy Free)
    • KimiHarris on Eating for Comfort and Sustenance
    • KimiHarris on Eating for Comfort and Sustenance

    Fresh: Nourishing Salads for All Seasons

    Footer

    Privacy

    Copyright © 2026 · Foodie Pro & The Genesis Framework