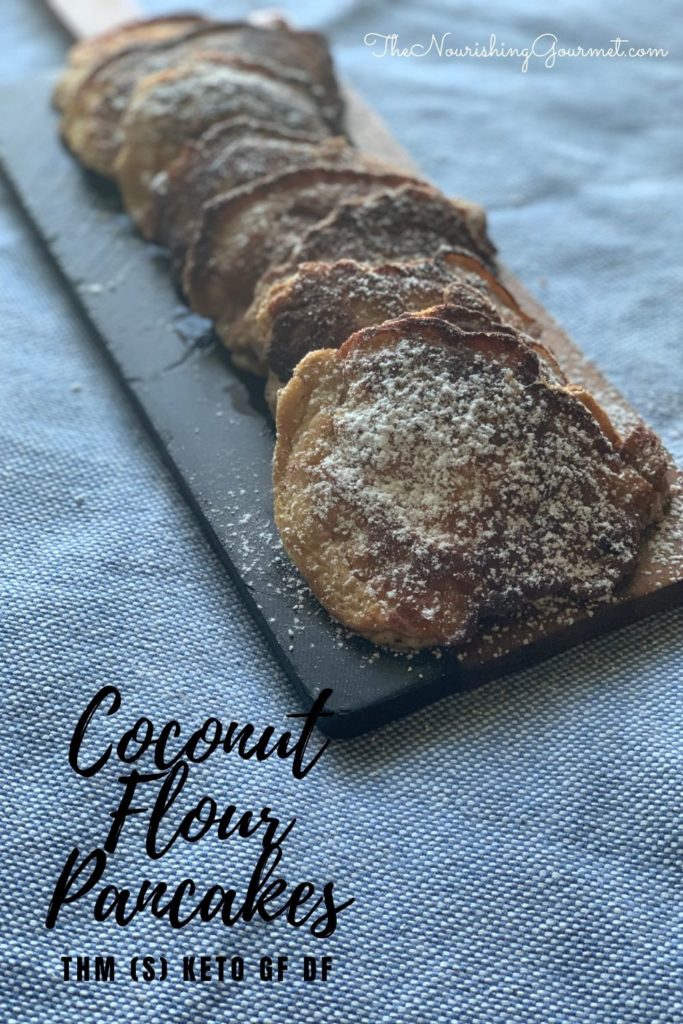
These grain-free coconut flour pancakes are moist, have a great crumb, and are delicious and family-friendly. I love them topped with berries. Delicious! They work well for those on grain or gluten-free diets, or for those eating keto or THM (they are an “S” meal).
Coconut flour recipes can end up dry, with a poor crumb. How do you fix that? You should pair coconut flour with high-fat ingredients. In this case, butter and coconut milk (or you could use cream, sour cream,or whole milk Greek yogurt). This keeps your pancakes moist and tender instead of dry.
Tips:
- You can cook this in whatever pan you have, but I especially like to use my large cast iron pans when making pancakes.
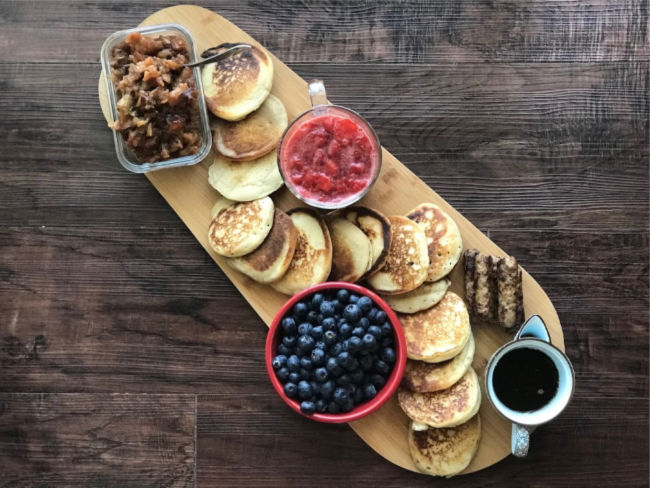
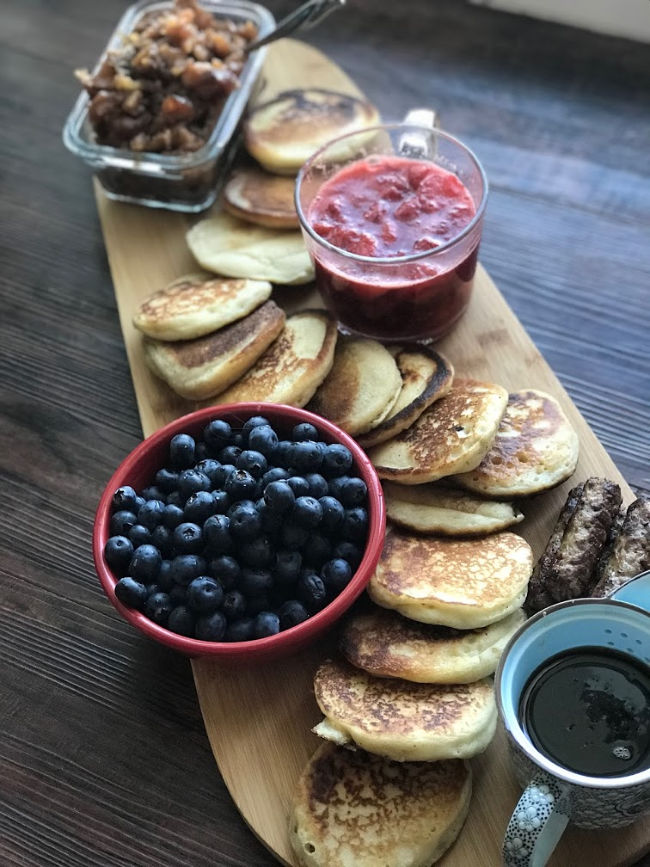
- This would be lovely served on a Pancake Charcuterie Board.
- Serving suggestions: Any typical pancake toppings work here. If you are keto or THM (S), Lakanto Powdered Sugar or is one option, a fresh berry sauce made with xylitol/stevia, and served with stevia-sweetened coconut whipped cream is another. I also enjoy it topped with unsweetened Greek yogurt and fresh berries.
- For extra protein: serve with unsweetened nut or seed butters.
- OR, make them into savory pancakes and top with a fried egg and bacon.
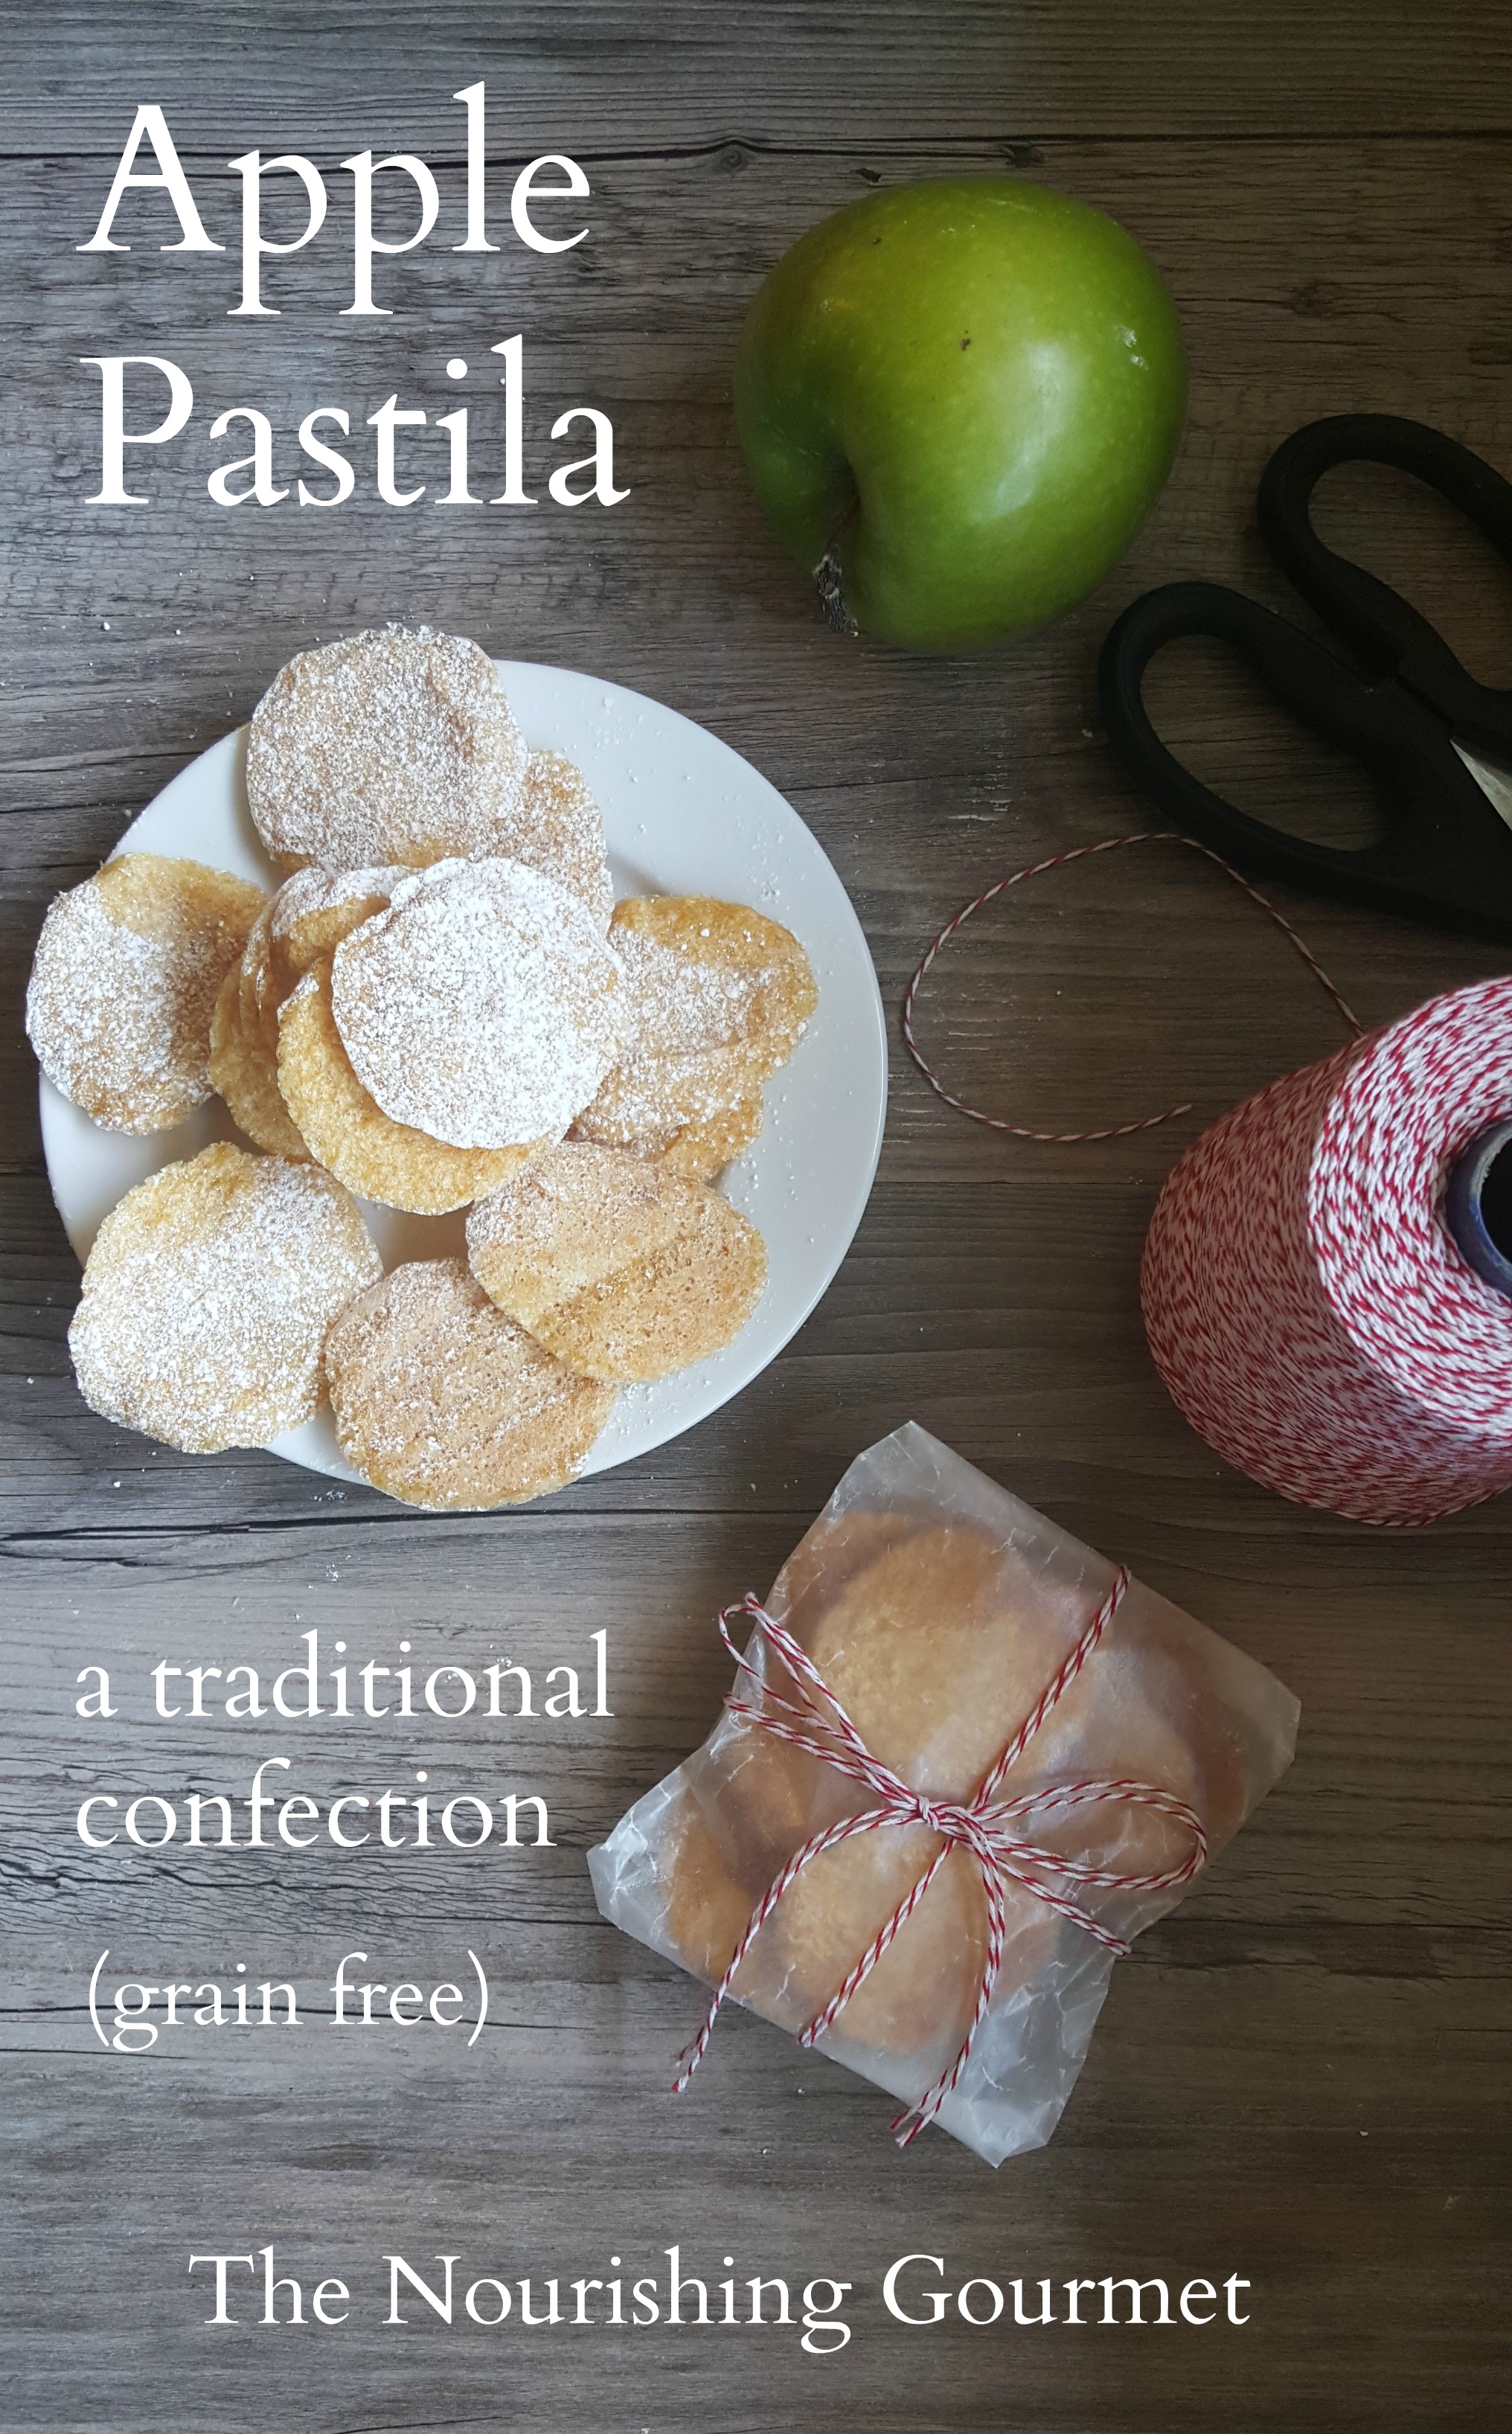
Coconut Flour Pancakes
- 3 eggs
- ¼ cup coconut milk (or cream, yogurt, sour cream)
- ¼ cup melted butter or coconut oil
- ¼ cup coconut flour
- 1 teaspoon baking powder
- Butter and coconut oil for pan
Directions:
1. In a medium-sized bowl, add the eggs and coconut milk, and whisk. If using butter, go ahead and whisk in as well. If using the coconut oil, wait until after you’ve added the dry ingredients, and then whisk in the melted coconut oil.
2. Add in the coconut flour and baking powder, whisk. Let sit for a few minutes. If the mixture is too thick, you can thin it with a little more liquid, but you want the mixture to be pretty thick, just not dry. Heat a pan over medium heat until warm. Add butter or coconut oil to the pan.
3.This recipe works best for small pancakes. I usually use about ¼ cup or less of batter per pancake. Add batter to the pan, and let cook until one side is browned and edges are starting to firm up. If the bottom is cooking too quickly, turn down the heat. Flip, and cook the second side (the second side will cook more quickly). Remove and repeat the process, adding more fat to the pan as needed.
Serve with desired toppings and enjoy!