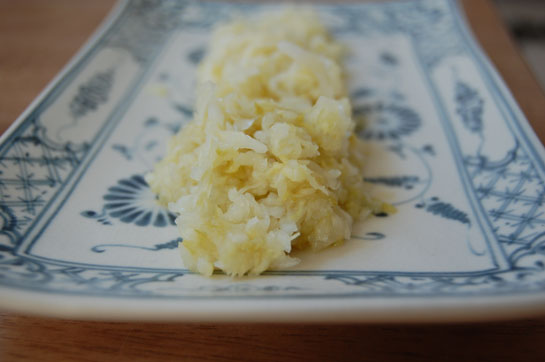
 Tangy, crisp, flavorful sauerkraut is so refreshing on a hot day! It makes the perfect side to many grilled meats. Culinary benefits aside, it’s also healthy for you! In my recipe, I share a little secret that makes for a no pound sauerkraut. No more pounding your cabbage for 15 minutes in this recipe! It’s so easy.
This is the crock method (read about the different methods here) but I am doing it without the crock as I still haven’t decided what I want to buy. Meanwhile, I can make a mean sauerkraut with a big nonreactive bowl (I use glass) a plate, and something to weigh it down.
I find that sauerkraut made in the mason jar method just doesn’t taste right to me, but this? Oh… my…. lands (as my great grandparents would say), I could definitely eat a huge bowl of it in one sitting! It has just the right amount of tangy sourness.
And guess what? You only need cabbage and salt to make it! This is one of the most frugal ways to get beneficial bacteria (probiotics)! Most sauerkraut in the stores is no longer fermented but made with vinegar and the lacto-fermented versions are generally a little over our budget.
And speaking of frugality, don’t forget about Pennywise Platter Thursday coming up!
So here we go!
Old Fashioned Lacto-Fermented Sauerkraut
- 5 Pounds Cabbage (about two heads, organic preferable)
3 1/2 tablespoons coarse sea salt (unrefined)
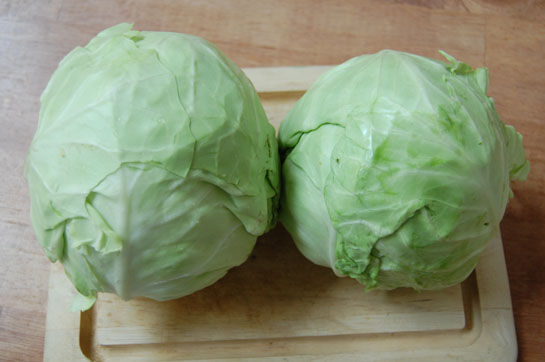
First make sure that all dishes used for this project are very clean. You will need a crock or a large non-reactive bowl, such as the glass one I used, a plate that fits snugly inside and something to weigh the plate down. I used a food grade plastic bucket full of water, a mason jar full of water, another bowl full of water, or a jug full of water, are all options.
1-Shred cabbage (if you have one, a food processor makes this step a cinch) and place in the bowl or crock you will be fermenting in. Toss with the salt and cover with some kitchen towels. Leave for 15 minutes to an hour to allow the salt to draw out the juices of the cabbage. This is the secret that makes this recipe pound free. I learned it in a Russian cookbook.
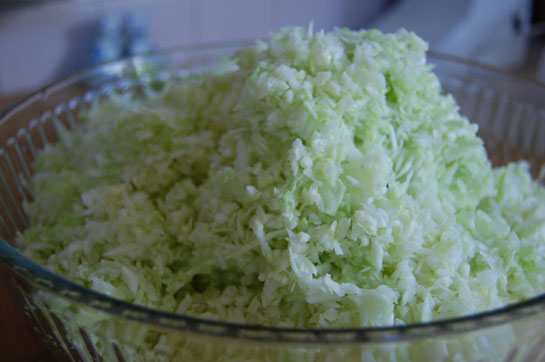
2-Using a mallet, or whatever you have on hand gently pound the cabbage down so that it’s tight fitting in the bowl. Place the clean plate on top and weigh it down with whatever you are using for the purpose. Press down gently, but firmly. The liquid from the cabbage should rise to the top. You will want the liquid to cover the plate with room to spare within in 12-24 hours. If it hasn’t risen above the plate by that point, make up some salt water my mixing one cup of filtered water with one teaspoon of sea salt and use as much as you need. Cover with kitchen towels or a clean pillow case to protect it from flies and dust.
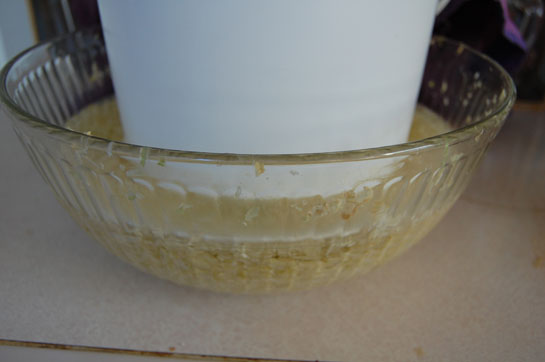
3-Each day you will remove the plate, and rinse it. If there is any “scum” on the surface of the water, remove as you much of it as you can with a spoon. Start tasting the sauerkraut after a few days. It will start to sour within a few days and will continue to “ripen” as the days go on. How quickly it ferments will depend on the temperature of your house. We like it after about ten days. Before that point, we just think it lack the depth of flavor we want. But the lovely thing is that you can stop the fermentation process when it tastes good to you.
4-When it’s fermented enough for your taste, Bottle it up in clean mason jars, and place in the refrigerator where it will keep for a long time. 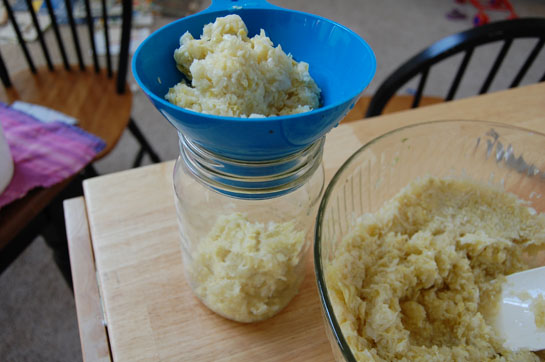
And that’s it!
More resources:
Wild Fermentation’s Crock Method (the same as above)
Trouble Shooting
Latest posts by KimiHarris (see all)
- 2 Ingredient Peppermint Bark - December 21, 2022
- Herbal Hibiscus Lemonade (Keto, THM) - March 16, 2022
- Creamy Curry Red Lentil Soup - December 8, 2021
I just tried this last night and hope it turns out well. Just wanted tthose o make a suggestion for those that find their kraut too salty. Rinse it in a colander under running water and drain prior to using. You might lose some of the lacto bacillus but you should be able to eat your kraut.
I took a recipe for making sauerkraut from an Amish cookbook. The recipe calls for you to shred the cabbage and pack it into a mason jar with salt, white vinegar and topped off with water. Close the jar and let it go for a few weeks. Well that is what I did and have 12 quarts of it in my basement. It didn’t say anything about putting it through a hot water bath. I don’t want to get anyone sick with this recipe. Do you think it will be ok to eat? Would appreciate suggestions or recommendations. Thanks.
I think I have the same recipe. We didn’t have any problems with it. Nobody got sick. I didn’t can it. The next year I couldn’t find the recipe, but I found an Amish recipe online and I was uncomfortable about not canning it, so I did can it. I think it works either way
Wondering watering what all the water is for! You mentioned bucket of water,jar of water and ect!
Hi, I realize this is an old post but hoping still active. I’m reading all I can on fermenting before I give it a first attempt. You mentioned that you spent half a day canning your batch so you didn’t have to refrigerate all those jars. I’d like to do the same but don’t want to use heat and cancel out all the good that fermenting provides. What method did you use to can?
You do not need to can sauerkraut Just make sure it is covered with juice in whatever jar you keep it in Always use glass jars
Hi and thanks for a nice article.
I’ve tried this recipe a few times and it really works well. However, the fermentation process can be a bit unstable depending on temperature, salt concentration and other factors; working with live bacteria is not rocket science. For me using a starter culture has made the process much more predictable and final product better, tastier and crunchier.
can you use kosher salt instead? also, can any type of organic greens be used in this recipe?
When you say remove the plate each day, am I also removing the liquid on top of the plate, or do I keep all the liquid in the bowl as the cabbage ferments? Obviously, I’m a newbie at this! Thanks for your help!
No. You keep the liquid. 🙂
I worry about keeping the liquid. I have a plate that isn’t completely flat and some liquid rests on top of the plate – out of the rest of the liquid- the rest of the liquid below the plate is submerging the cabbage so that’s okay. it’s hard to remove the plate though without the (potentially ?) stagnant liquid going back into the main bowl…thoughts?
Hi Kim. When you say to ‘shred’ the cabbage, in the food processor is this the attachment with many holes – we say grater in uk/Ireland – or will the fine slicer do fine? Thanks!
Easiest no fuss way to ferment cabbage I have found yet. I live in Florida, my kitchen stays about 80. I had read hot temps make the cabbage go mushy but it didn’t do that at all. This method worked great. I had great tasting sauerkraut in 10 day. I did have to add more salt/water solution after day 1 because I started with less salt than called for. It was easy to see it needed more salt when the daily check showed the brine water hadn’t come up over the plate. Used the finished kraut in potato salad instead of dill pickle relish! Was yummy! Tried 1st batch with 1/2 cabbage. Today started second batch with one 5lb cabbage. I’ve done my own kimchi and fermented fruit but most recipes are too fussy with unnecessary warnings for making sauerkraut. This was easy. I used a glass Pyrex mixing bowl for the cabbage, cut a plastic picnic plate to fit into that and to put on top of the cabbage, then a smaller glass bowl containing water to keep the plastic plate pushed down keeping the cabbage always under the brine and brine solution above the plate thus the cabbage had absolutely no air contact. The white cloudy water (not mold) is the good part for you in this process. Mold only starts if the cabbage gets air. This was so much easier to keep the cabbage in the brine than using mason jars with some kind of weight. Thanks for sharing this.
I am new at this and I was so grateful to find your post.
What size crock did you buy to fit 5 lbs of shredded cabbage?
Also, what did you use to push down the plate when you used the crock?
Thanks,
Lori
I was very dissapointed , your site stated ginger water kefir . I searched all over your site and could not find a receipe for it?
I tried this recipe a few weeks ago but it tastes odd. It fermented for 14 days because it did not taste right at 10 days, and I live in Florida with kitchen temperature of about 76 degrees. It tastes kind of musty and “swampy” with a tiny bleach taste. I am wondering why this is. I did not shred the cabbage thin enough, so maybe not enough sugars were exposed, or it was just that head of cabbage (half recipe). Of course this happens on my first try! The saltiness seemed fine but maybe that could be a factor? I had to add more brine as per instruction. I did not rinse the plate daily as every other site said not to, there was some mold a few times that I spooned out. It was bubbling a lot by the 3rd day and then stopped on the 6th, but then started up again on the 10th or 11th and lasted about 2 days. So I put it in the fridge once it finished. The result is tolerable but very undesirable. I fermented other fruits and veggies using the brine and they all turned out great. This will not discourage me, but I would like to know how to prevent this. Any help with this would be greatly appreciated.
What a great post! I took a look at the other page about the differences between crock fermenting and mason jar fermenting, and now I’m wondering if the mason jar was the reason why my sauerkraut has never turned out the way that I like it. I’ll have to try making it again in a crock some time!
I just put my sauerkraut in jars and it came out wonderful. Thanks so much for the recipe! Now I’m trying to decide what I’ll ferment next.
So glad it turned out well for you!
you can also put your round plate on the cabbage then take a garbage bag fill it with water tie it off it seales all areas