• Skip to primary navigation
  • Skip to main content
  • Skip to primary sidebar
  • Skip to footer

The Nourishing Gourmet

Nourishing. Satisfying. Gourmet.

  • THM Coaching
  • About
    • Privacy
    • Contact
  • Recipes
  • Cookbooks
    • Everyday Nourishing Food
    • Salad Cookbook
    • Soup Cookbook

Dessert

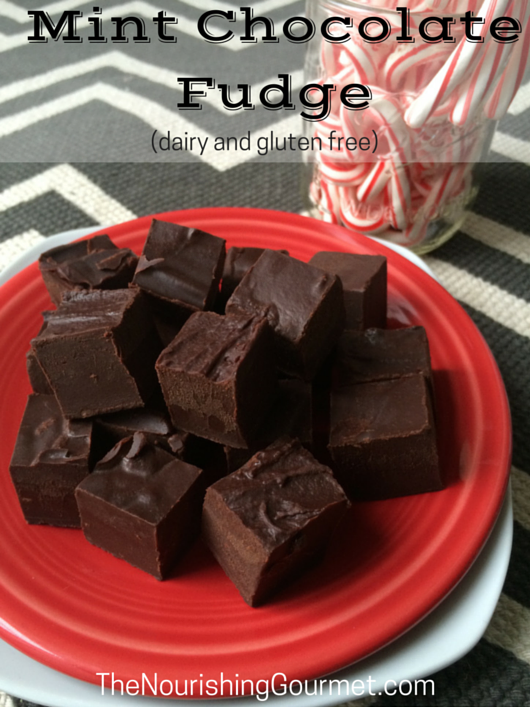
Easy Mint Chocolate Fudge (Dairy and Gluten free)

December 12, 2014 by April Swiger 23 Comments

Mint Chocolate Fudge (dairy and gluten free)

By April Swiger, Contributing Writer

Velvety smooth fudge, rich in chocolate, mingled with refreshing peppermint is a must-try this season. This mint chocolate fudge is the perfect way to satisfy a craving, or finish off a hearty meal this holiday season. Even better it’s surprisingly quick to make, and can be boxed up easily to give as a lovely gift.

I am a huge fan of fudge. It’s always my go-to treat during summer vacations at the beach, and my top pick off the Christmas dessert table. The first time I made fudge at home I used Kimi’s recipe for the easiest, healthiest, most scrumptious fudge ever (also see this version using maple syrup). It definitely lived up to its name, and I have made it many times since then to satisfy those pesky little chocolate cravings. I love that her recipe, and the one I created as well, is free from refined sugar, dairy, gluten, and all other kinds of yucky ingredients the more typical fudge recipes have. This version starts with chocolate chips instead of cocoa powder for a more stable fudge for gift giving.

My 3 year old son is a major chocolate lover. He saw me pull out my bag of chips and immediately wanted to help with whatever I was doing. I purposefully made this recipe as simple as possible because, well, life can be a bit crazy with a toddler in tow…especially during the holiday season! He had so much fun helping me dump all the ingredients into a big bowl (not as much as he enjoyed trying to finished product though). I received a hearty “yum yum yummy in my tum tum tummy!” after his first bite 🙂
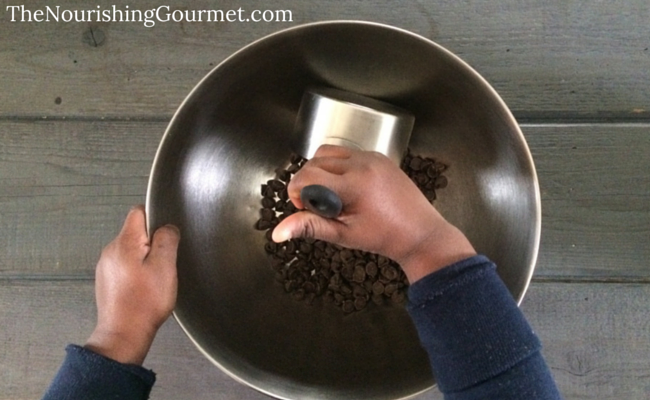
Mint Chocolate Fudge (dairy and gluten free)

There are some fantastic chocolate chips on the market that are completely allergy free, and would be a great option for this recipe. I have used the Enjoy Life Brand of chocolate chips, which are very allergy friendly, a number of times and find the flavor and texture top notch!

You can use either the (Affiliate links)  Semi-Sweet chocolate chips, or the dark chocolate chips in this recipe. Truly though, any chocolate of your choice should work, and the amount of honey you add to sweeten the recipe can be adjusted to your liking as well. I used Frontier’s Natural Mint Extract for flavoring my fudge, and it was delicious!

Homemade gifts are some of my favorite to give. Even the most frugal and simple recipe can be made extra special with its presentation. This fudge wrapped in parchment paper, tied up in colorful bakers twine, and a special box makes for a very thoughtful gift.

Other healthy, and homemade, gifts you may enjoy:

  • Homemade and healthy food gift list 
  • Silky Maple Chocolate Fudge
  • Almond Roca (maple syrup sweetened – this is a family favorite!)
  • Chile Spiked Dark Chocolate Bark with Pepitas and mangos (another favorite of mine)
  • Scrumptious Candied Citrus Peel

Mint Chocolate Fudge (dairy and gluten free)
 
Author:
April Swiger
Recipe type: Dessert
Print
 
This velvety mint chocolate fudge is simple to make, includes nourishing ingredients, and is a lovely gift to give this season!
Ingredients
  • 2½ cups chocolate (I used semi-sweet)
  • ½ cup full-fat coconut milk
  • 2 teapoons peppermint extract
  • 1 Tablespoon honey
  • 1 Tablespoon coconut oil
  • pinch of salt
Instructions
  1. Put all the ingredients into a large bowl, and create a double boiler by placing it over a pot of lightly simmering water.
  2. Allow the chocolate to melt slowly. Stir continuously until all of the ingredients are smooth and incorporated.
  3. Pour the chocolate mixture into a parchment paper lined dish. If desired, top with crushed candy cane pieces. Refrigerate until hardened, and cut into small square pieces to serve.
3.2.2807


Filed Under: Dairy Free, Desserts, For the Kids, Gluten Free, Grain Free, Vegan, Vegetarian Tagged With: Chocolate, Dairy Free, Desserts, Gluten Free

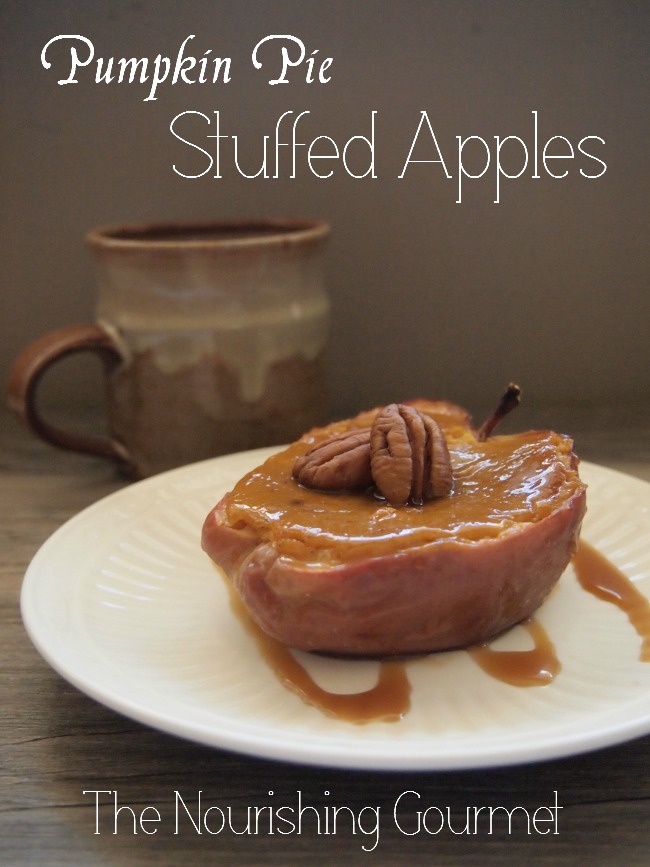
Pumpkin Pie Stuffed Apples (Gluten & Dairy Free)

November 3, 2014 by Natalia Gill 2 Comments

Pumpkin Pie Stuffed Apples (Grain Free with Dairy Free Options) - The Nourishing Gourmet

By Natalia Gill, from An Appetite For Joy

Warmly-spiced pumpkin filling is spooned into a hollowed-out apple shell that softens and caramelizes as it bakes. Topped with a simple caramel sauce this is a a rustic yet elegant fall dessert to serve to family and friends!

No need to limit yourself to pumpkin. This filling is based on a sweet potato pie recipe. I have also made it with buttenut squash and next up is kabocha. Carrot pie is also intriguing! My kids won’t go near winter squash in the lightly salted, roasted version that I adore. But this is one of their favorite desserts of all time. That’s a win in my book.

I’ve recently become even more excited about carotenoid-rich vegetables after discovering a new health benefit. Current research is showing that those with the highest serum-levels of carotenoids were 20-30% less likely to develop breast cancer. It’s probably a bit early to tell whether this is because those with more carotenoids are likely to be higher in other nutrients as well, but there seems to be at least some link since it has been noted across multiple studies.

Concerned that the apple shells may be too tedious? It turns out that hollowing an apple is easier than it may seem. This recipe calls for four huge apples (or 5 large) and the whole operation takes no more time than it would to make a crust – a sometimes stressful endeavor, in my opinion. I use red delicious because they are softer. Just half them, hollow out each side with a knife, then scoop out the center with a good spoon (a grapefruit spoon works well).

When you finish putting these together you are left with the perfect amount of apple with which to make an apple pie! Just toss it with some lemon to prevent it from oxidizing and store it in the fridge until you’re ready to put it together in the next day or two. Or try one of the savory apple recipes that have recently appeared on The Nourishing Gourmet.

Here are some apple recipe ideas:

Cranberry Apple Mini Pies (GF, if desired)
Apple Cinnamon Ice Cream with Salted Caramel Sauce (DF)
Apple Clafoutis (Grain-Free)
Potato Apple Soup with Caramelized Onions & Gorgonzola
Easy Pan-Fried Cabbage and Apples

We usually prefer our pumpkin pie chilled, but we love these warm. And you won’t want to skip the caramel. It’s definitely worth the quick extra step!


Pumpkin Pie Stuffed Apples (GF/DF)
 
Author:
Natalia Gill
Recipe type: Dessert
Serves: 8 servings (1 pie)
Print
 
These rustic little treats are perfect for fall. Mix and match different orange squashes or use your own pumpkin pie filling recipe!
Ingredients
  • 4 very large apples (I use red delicious)
  • lemon (sprinkle on apples to prevent oxidation)
  • Filling Ingredients:
  • 2 cups pumpkin or orange squash puree (here are instructions for making your own)
  • ½ cup full-fat coconut milk
  • ¼-1/2 cup coconut sugar (pumpkin and other orange vegetables vary in sweetness, you will have the chance to taste the filling and adjust so start with less)
  • 2 tablespoons melted butter (optional, for those who don't need it to be dairy free)
  • ⅛ teaspoon ground cloves
  • ¼ teaspoon nutmeg (preferably fresh grated)
  • ½ teaspoon ground ginger
  • 1 teaspoon cinnamon
  • 2 eggs
Instructions
  1. Preheat the oven to 350.
  2. In a food processor, puree all pumpkin filling ingredients except the eggs. Taste and adjust sweetness and spices (remember, the caramel sauce will also add sweetness). Then incorporate the eggs.
  3. Carefully and confidently, hollow out the apples - slice them in half (from stem to bottom). WIth a knife, carve out the apple on each side leaving the core intact, then scoop out the core with a good spoon (I used a grapefruit spoon). Leave about ¼" of apple attached to the peel. Sprinkle each shell with a little lemon before moving on to the next step.
  4. Fill each shell with pumpkin filling and bake for 45 minutes to an hour, until done.
  5. Serve warm with Easy-Peasy Caramel Sauce.
3.3.3077

Filed Under: Baked Goods, Dairy Free, Desserts, Gluten Free, The Healthy $1 Menu, Uncategorized, Vegan, Vegetarian

Super-Easy Homemade Peanut Butter Chips

October 8, 2014 by Natalia Gill 24 Comments

Super-Easy Homemade Peanut Butter Chips - The Nourishing Gourmet

By Natalia Gill, from An Appetite For Joy

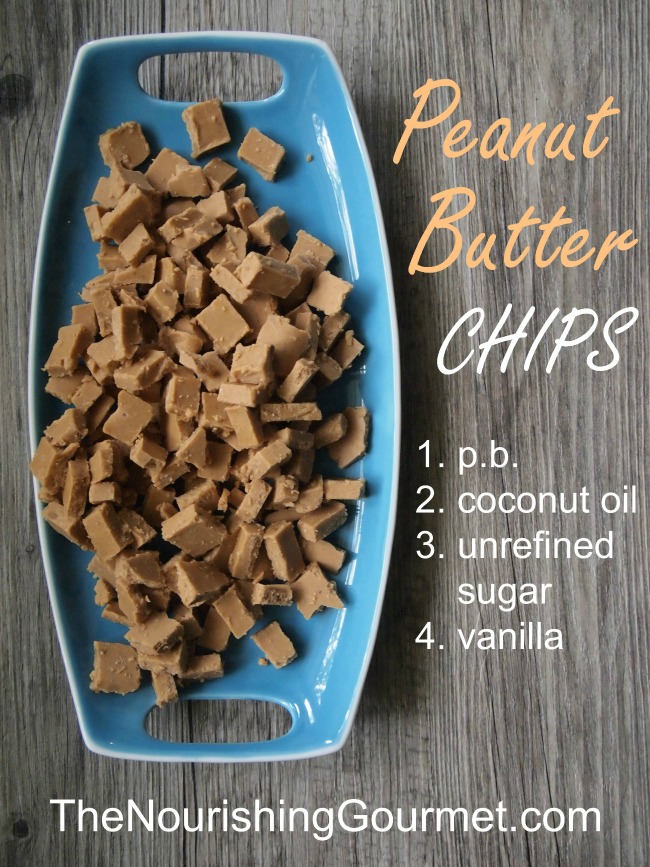
Peanut butter, unrefined sugar, coconut oil and vanilla are combined, hardened in the freezer then sliced into bite-sized morsels of bliss. These silky, sweet & salty little chips taste divine on their own, but this is a dangerous path to tread! I try to reserve them for a special treat atop ice cream or in cookies and other baked goods.

You may also want to check out the many other mouth-watering peanut butter recipes on this blog!

It was my 3-year old daughter who first opened the door to peanut butter chips. We were shopping at Trader Joe’s when she made the decision to place a bag into her kid-sized cart. My knee-jerk reaction was to quickly and nicely veto it, then redirect her to the dried mango. But I paused and skimmed the ingredients. Could have been worse. I decided to stroke her confidence and bring them home.

Last time she did this I ended up with 5 cans of sardines! I got a little creative them them.

Super-Easy Homemade Peanut Butter Chips - The Nourishing Gourmet

How these chips act in baking (it’s a little different)

When you take out the additives, and use unprocessed ingredients, peanut butter chips melt at a lower temperature. So you have to store these in the freezer then take them out immediately before you use them.

  • In cookies and scones they work perfectly, leaving little pockets of gooey goodness.
  • In muffins they leave somewhat concentrated pockets of peanut butter but they get absorbed by the muffin so there is no change in texture. Could be a good thing, but I’m just letting you know what to expect. (I’ve only tried them in coconut flour muffins, so they might act differently with less spongy flours.)
  • In waffles & pancakes – I haven’t tried this yet but I’m assuming they will work similar to the cookies since they are cooked quickly.
  • Over ice cream they are absolutely delicious!

Super-Easy Homemade Peanut Butter Chips - The Nourishing Gourmet

Using unrefined powdered sugar

You’ll need to use powdered sugar in these. Thankfully making your own unrefined powdered sugar is easy!

I have also tried a different method, leaving the sugar un-powdered and melting all the ingredients over the stove. For whatever reason, I had a surprisingly difficult time getting the coconut sugar to melt so powdering your sugar first is definitely the way to go.

UPDATE: I think melting the ingredients gently on the stove-top then cooling would work. I thought the coconut sugar wasn’t melting but now I realize that the graininess I was tasting was the texture in the natural peanut butter – it was more prominent when it was melted. I think the  graininess would be unnoticeable when cooled!

I hope you enjoy them!

Super-Easy Homemade Peanut Butter Chips - The Nourishing Gourmet

Super-Easy Homemade Peanut Butter Chips
 
Author:
Natalia Gill
Recipe type: Dessert
Cuisine: Topping, Add-In
Serves: about 4 cup
Print
 
These simple and delicious peanut butter chips come in handy for many purposes.
Ingredients
  • 1 cup peanut butter
  • ¼ cup coconut oil
  • ¼ cup powdered coconut palm sugar or powdered sucanat (it's easy to make your own)
  • 1 teaspoon vanilla extract
  • Sea salt, to taste (if your peanut butter is not salted)
Instructions
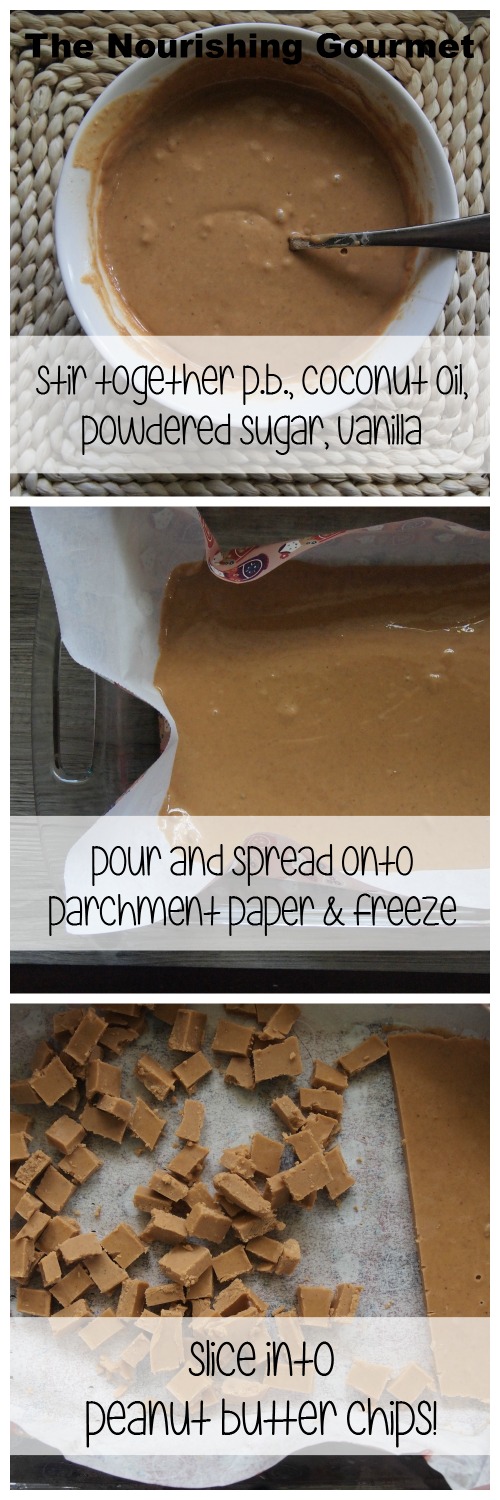
  1. Stir together the ingredients until smooth.
  2. Pour into a parchment paper lined baking pan (mine was 9x13)
  3. Freeze for 1 hour
  4. Slice up into chips (for best results, place the pan on cooling packs when doing this)
  5. Store in the freezer until immediately before use
Notes
You can certainly reduce the sugar! I put in a fair amount because we usually make our baked goods not-too-sweet so we like a sweet chip inside them.

Almond and sunflower seed butters would also work well.
3.2.2807

Filed Under: Baked Goods, Dairy Free, Desserts, Gluten Free, Uncategorized, Vegan, Vegetarian

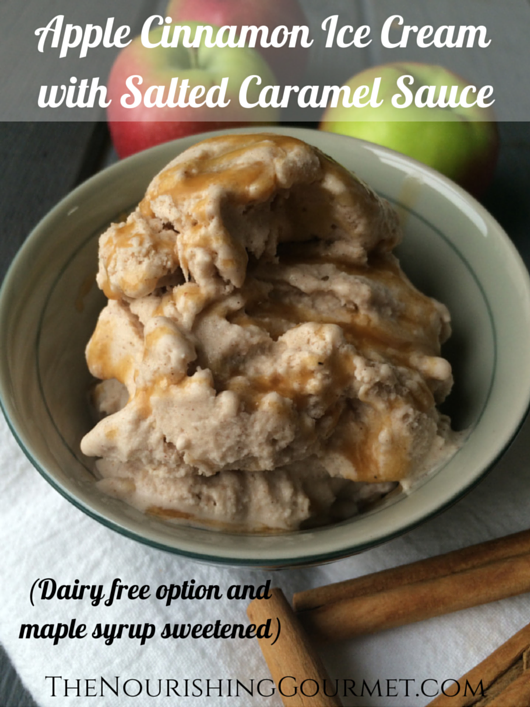
Apple Cinnamon Ice Cream with Salted Caramel Sauce (dairy free option and maple syrup sweetened)

September 19, 2014 by April Swiger 4 Comments

Apple cinnamon ice cream with salted caramel sauce (dairy free option and maple syrup sweetened)

By April Swiger, Contributing Writer

Creamy coconut milk flavored with spicy cinnamon, maple syrup, sautéed apples in butter, topped with Kimi’s easy peasy caramel sauce. This is the perfect ice cream to try as summer gives way to fall. Local apples made their first appearance at our natural food store a couple weeks ago and I’ve been eager to start transitioning my light summer cooking to the more hearty flavors of autumn.

Apple orchards are bountiful in New England and, in season, local organic apples are incredibly affordable. The benefits of eating local produce, and supporting the families that grow it, is a priority for us. We don’t buy everything local and organic, but when we are able to it’s so worth it. Not only is local produce more nutritious, it’s highly sustainable, and some of the most delicious food available to us. Every September I’m sad to say goodbye to strawberries and tomatoes, but I’ll be embracing the local apples, squash and potatoes with open arms.

My husband and I recently welcomed an almost three year old little boy into our family from the foster care system. I’ve been having so much fun teaching him about different kinds of fruits and vegetables. He’ll try anything once, which has been such a pleasant surprise for me. I can’t wait to take him apple picking this fall and make one of his favorite foods – applesauce! For days, he had been looking forward to trying this ice cream, and with the speed it left his bowl and entered his little belly, I can confidently say it’s “toddler approved” 🙂

I love sweetening my ice cream recipes with raw honey or maple syrup. Maple syrup is packed with important antioxidant minerals like manganese and zinc, which helps boost the immune system. It’s a fantastic alternative to refined sugar and corn syrup. Be sure that your maple syrup is 100% pure, as most store bought syrups are mixed with corn syrup and other highly processed sweeteners.

I’m sad to say that I had never tried Kimi’s salted caramel sauce recipe until a few days ago. It’s so simple to make (Really! You don’t need to be an experienced candy maker for this one), and a decadent addition to this autumn flavored ice cream. My spoon has dipped into the jar more times than I can count since making it. Don’t skip this part!

Earlier this summer we invested in a long-awaited ice cream maker, which is necessary for this recipe. We have used it many times so far, and I’m confident it’s never going to collect dust with some of my other unused appliances. Homemade ice cream is just so good! We have this 2-quart ice cream maker, but I know Kimi and many others
love this smaller version as well.

Other ice cream recipes:

  • Peach and Honey Ice Cream
  • Mexican Chocolate Ice Cream
  • Chai Coconut Milk Ice Cream
  • Double Chocolate Chip Cookie Dough Ice Cream 
  • Simple Chocolate Banana Ice Cream

Apple Cinnamon Ice Cream with Salted Caramel Sauce (dairy free option and maple syrup sweetened)
 
Author:
April Swiger
Recipe type: Dessert
Print
 
This delicious apple cinnamon ice cream is perfect for fall! Local apples, creamy coconut milk, and Kimi's salted caramel sauce makes this a decadent dessert that can be enjoyed all season.
Ingredients
  • APPLES:
  • 2 small to medium sized apples, peeled and cubed (any kind will do, but I used local Jonagold)
  • 4 Tbls butter (or substitute coconut oil to make it dairy free)
  • 2 Tbls coconut sugar (maple syrup or honey works too)
  • ½ tsp ground cinnamon
  • Pinch of salt
  • ICE CREAM:
  • 2 cans of full fat coconut milk
  • 2 tsp vanilla
  • ½ cup maple syrup
  • 1 Tbls ground cinnamon
  • Pinch of salt
  • CARAMEL SAUCE:
  • http://www.thenourishinggourmet.com/2013/12/easy-peasy-caramel-sauce-dairycane-sugarcorn-syrup-free.html
Instructions
  1. Peel and cube the apples.
  2. Add the butter (or coconut oil for dairy free) to a heavy bottomed pan and allow it to melt, on medium heat, until foamy. Toss in the apple pieces, coconut sugar, cinnamon and salt, making sure to coat everything evenly. Sauté until the apples are tender.
  3. While the apples are cooking, put all the ice cream ingredients into a bowl, or a half gallon mason jar. I love using a hand blender to mix everything together, but a whisk works fine too.
  4. Place the ice cream mixture and the cooked apples, separately, into the refrigerator for about two hours. It's important that the ingredients are cold upon entering the ice cream maker.
  5. While you wait for everything to chill, prepare Kimi's salted caramel sauce (and try not to eat it all before the ice cream is made!).
  6. After everything is chilled, follow your ice cream makers instructions for making the ice cream. I typically blend the ice cream mixture for about 25-30 minutes, and then add the cooked apples for a final 5 minutes.
  7. Top with a generous drizzle of the caramel sauce.
Notes
I have a 2 quart ice cream maker and used two 13.5 oz cans of coconut milk. Use a bit less for smaller machines, maybe only 3 cups worth of the coconut milk.
3.2.2708


Filed Under: Dairy Free, Desserts, Gluten Free

Next Page »

Primary Sidebar

ConvertKit Form

Get Every Recipe

And the insider's view from our kitchen

Success! Now check your email to confirm your subscription.

There was an error submitting your subscription. Please try again.

We won't send you spam. Unsubscribe at any time. Powered by ConvertKit

Follow Me

  • Facebook
  • Google+
  • Instagram
  • Pinterest
  • RSS

Search

Please Read:

The information you find here at The Nourishing Gourmet is meant to help you become a better cook! This site is primarily for sharing family friendly recipes. It's not meant to give medical advice or to make any health claims on the prevention or curing of diseases.This site is only for informational and educational purposes. Please discuss with your own, qualified health care provider before adding in supplements or making any changes in your diet. Also, any links to sponsors or affiliates (including Amazon) may give me a percentage of the sale or a pay per click. Thank you for supporting this site.

Categories

  • $10 Main (42)
  • $5 Dishes (43)
  • 52 ways to save money on a healthy diet (53)
  • AIP (23)
  • Baked Goods (83)
  • Beverages (72)
  • Breakfast and Brunch (61)
  • Condiments (8)
  • Dairy Free (492)
  • Desserts (184)
  • Dietary Needs (6)
  • Egg Free (11)
  • Egg Free (86)
  • For the Kids (66)
  • For the Love of Food and Books (18)
  • Gluten Free (484)
  • Grain Free (95)
  • Health (75)
  • Kitchen Tools (4)
  • Main Dishes (126)
  • Nourishing Frugal Recipes (167)
  • Nourishing Frugal Tips (70)
  • Nourishing Practices (56)
  • Nutrient Dense Foods (70)
  • Q and A (15)
  • Salads (39)
  • Sides (101)
  • Snacks (124)
  • Soups (50)
  • The Healthy $1 Menu (21)
  • The Low Energy Guide to Healthy Cooking (18)
  • THM (2)
  • Trim Healthy Mama (2)
  • Uncategorized (846)
  • Vegan (241)
  • Vegetarian (361)

Recent Posts

  • 2 Ingredient Peppermint Bark
  • Herbal Hibiscus Lemonade (Keto, THM)
  • Creamy Curry Red Lentil Soup
  • One-Pot Gluten-Free Mac and Cheese
  • Healthy Pumpkin Spice Granola
  • Crispy Pumpkin Spice Granola (oil-free)
  • Why I Use THM Principles Now
  • Vietnamese Beef Noodle Salad
  • Coconut Flour Pancakes
  • Instant Pot Mexican Shredded Chicken

Recent Comments

  • Dorene St G on Cracker Toffee (Easy Peasy Christmas Candy)
  • Nadia Kriston on Finding a Toaster Oven Without Nonstick
  • KimiHarris on How to make heavenly coconut milk whipped cream (with an isi dispenser)
  • KimiHarris on Autumn Beef Stew (Tomato Free)
  • KimiHarris on How to make heavenly coconut milk whipped cream (with an isi dispenser)

Fresh: Nourishing Salads for All Seasons

Get Every Recipe

And the insider's view from our kitchen

Success! Now check your email to confirm your subscription.

There was an error submitting your subscription. Please try again.

We won't send you spam. Unsubscribe at any time. Powered by ConvertKit

Footer

Privacy

Copyright © 2023 · Foodie Pro & The Genesis Framework