• Skip to primary navigation
  • Skip to main content
  • Skip to primary sidebar
  • Skip to footer

The Nourishing Gourmet

Nourishing. Satisfying. Gourmet.

  • THM Coaching
  • About
    • Privacy
    • Contact
  • Recipes
  • Cookbooks
    • Everyday Nourishing Food
    • Salad Cookbook
    • Soup Cookbook

Beverage

Homemade Glühwein Recipe

December 7, 2015 by Chloe Breczinski 1 Comment

This lovely mulled wine recipe is super easy to make, and will warm you down to your toes. Perfect for a cold winter night. -- The Nourishing Gourmet

By Chloe, of How We Flourish

Christmas here in Germany means two things: Christmas markets and Glühwein.

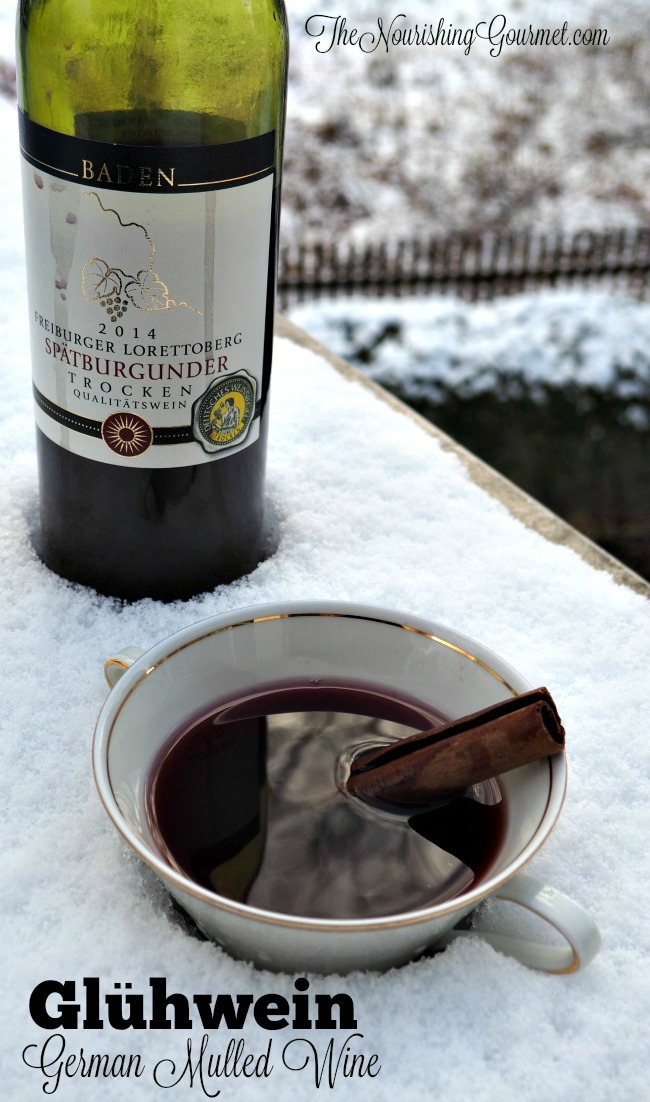
On a cold winter’s night, a warm mug of Glühwein (also called mulled wine) is the perfect companion. It conjures up cozy holiday feelings and will certainly instill the Christmas spirit in you!

In Germany, Glühwein is found everywhere you turn. But outside of a German restaurant, I have never actually seen Glühwein in America. When you want your own cup of this comforting winter drink (or don’t want to pay more than $2 for a mug), homemade Glühwein is actually very easy to make!

This simple Glühwein recipe is naturally sweetened and will make your kitchen smell lovely as it cooks. By using whole spices instead of seasoning packets, you know exactly what is going into your delicious homemade Glühwein. Enjoy! It goes particularly well with gingerbread cookies.

Note: I highly recommend using an organic lemon, since the whole peel will be cooked in the wine.

Other Posts in the 12 Days of Christmas Series:

  • Garam Masala No Cook Pickled Onions
  • Sweet and Spicy Candied Walnuts and Pecans
  • Mint Chocolate Lip Balm
  • Chai Eggnog

Homemade Glühwein Recipe (German Mulled Wine)

Ingredients:

  • 1 bottle dry red wine
  • 1 organic lemon
  • 2 sticks cinnamon
  • 3 cloves
  • 1/4 cup honey
  • ground cardamom

Instructions:

  1. Ground cardamom
  2. Combine all ingredients except for the cardamom in a clean pot.
  3. Heat gently to near boiling (around 170°F), but do not allow to boil.
  4. Turn off heat and let sit covered for 1 hour.
  5. Add a small amount of cardamom to taste (this adds depth to the flavor).
  6. Enjoy warm!

Homemade Glühwein (German Mulled Wine)
 
Author:
Chloe
Recipe type: Beverage
Serves: 1 bottle
Print
 
This cozy drink will warm you up and get you into the holiday spirit.
Ingredients
  • 1 bottle dry red wine
  • 1 organic lemon
  • 2 sticks cinnamon
  • 3 cloves
  • ¼ cup honey
  • ground cardamom
Instructions
  1. Ground cardamom
  2. Combine all ingredients except for the cardamom into a clean pot.
  3. Heat gently to near boiling (around 170°F), but do not allow to boil.
  4. Turn off heat and let sit covered for 1 hour.
  5. Add a small amount of cardamom to taste (this adds depth to the flavor).
  6. Enjoy warm!
3.3.3077


Filed Under: Beverages, Dairy Free, Egg Free, Egg Free, Gluten Free, Grain Free, Vegetarian

Chai Eggnog

December 1, 2015 by Katie Mae 1 Comment

Chai Eggnog-www.thenourishinggourmet.com


We have been busy planning a really fun 12 Days of Christmas project to share with you all! For the next 12 days, look for Christmas worthy, DIY gifts and treats! We have some really lovely recipes to share with you, so stick around. We can’t wait to share them with you all. 🙂 Today, Katie starts the project off with this delicious Chai Eggnog! I love how she has blended two traditional drinks for a tasty new drink!  — Kimi 

By Katie Mae, from Nourishing Simplicity

Cold, fresh eggnog is taken to a new level as it mingles with fragrant chai.

I was never a fan eggnog growing up. The flavors from the carton at holiday parties never pleased my palate. Then I discovered delightful homemade eggnog full of nutrient dense ingredients like (raw) whole milk, farm fresh eggs, freshly ground spices, and maple syrup. I never looked at a glass of the popular beverage the same again.

You could settle for a glass of regular raw eggnog but for a fun twist try mixing chai concentrate and eggnog together to get the best of both worlds!

This eggnog calls for raw yolks and white (optional) from pasture raised hens. If you know your source there is nothing wrong with consuming raw egg (although, like most foods, still carries some risk, so consume at your own risk). Some people are not comfortable with eating the white’s raw because of potential biotin deficiencies. However, as long as they are eaten with the yolk that shouldn’t be a problem. The whites add additional fluffiness to the eggnog.

From Dr. Mercola:

“The salmonella risk is increased when hens are raised in unsanitary conditions, which is extremely rare for small organic farms where the chickens are raised in clean, spacious coops, have access to sunlight, and forage for their natural food. Conventional eggs, making up the vast majority of eggs in typical grocery stores, have an increased risk for salmonella, which is why I advise against eating conventional eggs raw. One study by the British government found that 23 percent of farms with caged hens tested positive for salmonella, compared to just over 4 percent in organic flocks and 6.5 percent in free-range flocks.”

Recently I was reading an article that suggest that eggnog was once a fermented drink that was left to age for a couple months before drinking. It makes sense when you think about the laying cycles that hens go through. In areas further north with a limited amount of day-light and cold temperatures, there is a  decrease in the hens’ egg production. Thanks to artificial lighting and heaters added to chicken coops, eggs are more widely available year round. When I was raising chickens, my own hens tended to lay throughout the winter since I was further south and we rarely saw the weather dip below 35 at night.

Currently, I don’t have an inexpensive source for raw milk, my preference, so I drink more almond milk from the store or homemade. It works beautifully with the flavors of the chai eggnog, coconut milk tastes wonderful as well.

I used my homemade chai concentrate to make this chai eggnog. Kimi also has a delicious rooibos chai concentrate that would taste delicious as well.

Chai Eggnog

Serves 4-6

4 cups milk (whole raw, coconut milk, or almond milk)
1 cup raw cream or coconut cream (from the top of the can)
1 cup chai tea concentrate
1/2 cup maple syrup
1/4-1/2  cup rum or bourbon (optional)
6 eggs
1/2 tsp vanilla extract
1 tsp ground cinnamon
1/2 tsp freshly grated nutmeg (additional for serving)

Quick thin version: 

1. Put all the ingredients in a blender. Blend on high until smooth.

2. Top each glass with freshly grated nutmeg to serve.

Thick Version:

1. Separate the yolks from the egg whites.

2. Reserve the egg whites and cream in a medium sized bowl.

3. Place the remaining ingredients in a blend. Blend on high until smooth.

4. Using a hand mixer whip the egg whites and cream together until fluffy peaks form.

5. Gently fold the cream and egg white mixture into the rest of the eggnog.

6. Top each glass with freshly grated nutmeg to serve.

Chai Eggnog
 
Author:
Katie Mae @ The Nourishing Gourmet
Recipe type: Beverage
Serves: 4 to 6 servings
Print
 
Cold, fresh eggnog is taken to a new level as it mingles with fragrant chai. This homemade eggnog full of nutrient dense ingredients like raw milk, farm fresh eggs, freshly ground spices, and maple syrup. You could settle for a glass of regular raw eggnog but for a fun twist try mixing chai concentrate and eggnog together to get the best of both worlds.
Ingredients
  • 4 cups milk (whole raw, coconut milk, or almond milk)
  • 1 cup raw cream or coconut cream
  • 1 cup chai tea concentrate
  • ½ cup maple syrup
  • ¼-1/2 cup rum or bourbon (optional)
  • 6 eggs
  • ½ tsp vanilla extract
  • 1 tsp ground cinnamon
  • ½ tsp freshly grated nutmeg (additional for serving)
Instructions
  1. Quick thin version:
  2. Put all the ingredients in a blender. Blend on high until smooth.
  3. Top each glass with freshly grated nutmeg to serve.
  4. Thick Version
  5. Separate the yolks from the egg whites.
  6. Reserve the egg whites and cream in a medium sized bowl.
  7. Place the remaining ingredients in a blend. Blend on high until smooth.
  8. Using a hand mixer whip the egg whites and cream together until fluffy peaks form.
  9. Gently fold the cream and egg white mixture into the rest of the eggnog.
  10. Top each glass with freshly grated nutmeg to serve.
3.3.3077


Filed Under: Beverages

How to Make Carrot Juice With a Blender

November 3, 2015 by Chloe Breczinski 17 Comments


How to make carrot juice without a blender - easier than you think, and so helpful for those of us without juicers! -- The Nourishing GourmetBy Chloe, from How We Flourish

Here’s the thing: I have a very small kitchen. I’m also on a tight budget. I don’t have the option of having a kitchen filled with small appliances. However, I had heard a lot about the benefits of juicing. A morning carrot juice is also an important about of the GAPS Intro Diet, so I learned how to make carrot juice with a blender.

If you ask most people, they will tell you that you need a real juicer for juicing. To truly receive the benefits of juicing, commercial juice is not an option as it is pasteurized. Juices must be freshly pressed to preserve the enzymes and nutrients that makes vegetable juices so good for us. But not everyone can afford a big fancy masticating juicer! I’d love to have one, of course, as it is certainly less work than making juice with a blender. But when that is not an option, you do not need to worry. You can still get the benefits of juicing for a lot less money.

Why Juicing

I was never a fan of juice before GAPS. But I learned that juicing can help support detoxification, and the vitamins and minerals from the juiced vegetables can be quickly absorbed. It can be a great remedy for constipation! This might be TMI, but that is why I have taken such a liking to juicing. It helped for me very much, so it’s a tool I like to keep in my back pocket.

Interested? If you would like to test the benefits of juicing without the investment, read on to learn how to juice without a juicer.

How to Juice without a Juicer

The following tutorial is for 100% fresh carrot juice, which is the starting point for juicing on GAPS Intro. How many carrots you need will depend on how much juice you want – 2-3 carrots usually makes a decent sized glass for me. This method of making juice in a blender will also work for all types of juices!

  1. Wash and chop the carrots.
  2. Add them to the blender. Any type of blender should work fine.
  3. Add a small amount of filtered water. With more watery vegetables, you may not need any. If you like your juices more dilute, add more. For carrot juice, add enough water to come slightly less that halfway up the carrots. It just needs to be enough to help get things moving.
  4. Blend on medium until the ingredients are well pulverized.
  5. Place a nut milk bag in your desired cup/container and pour in the blended ingredients.
  6. Squeeze as much liquid out of the nut milk bag as possible. Save the leftover pulp in the freezer to be used in other recipes.
  7. Enjoy your juice! It is best to drink on an empty stomach, such as first thing in the morning before breakfast.

Tip: If you enjoy the benefits of juicing, but find that it spikes your blood sugar, try adding fat and protein to your juice. One of my favorite ways to do this with with the so-called “GAPS Milkshake.”

Want to make a large batch? It is recommended to always drink juice fresh. However, I believe that if you are experiencing benefits with juicing, less-than-optimal juice may be better than no juice at all. Try freezing the juice immediately and thawing it in a water bath when you want it.

Are you interested in learning more about healing your gut with GAPS Intro? Learn more about how I did just that (without going crazy!) in my book Healing Patiently.

How to Make Carrot Juice With a Blender
 
Author:
Chloe
Recipe type: Beverage
Print
 
Carrot juice is a delicious and nourishing drink. Learn how to make it fresh, even if you do not have a juicer!
Ingredients
  • 2-3 carrots
Instructions
  1. Wash and chop the carrots.
  2. Add them to the blender. Any type of blender should work fine.
  3. Add a small amount of filtered water. With more watery vegetables, you may not need any. If you like your juices more dilute, add more. For carrot juice, add enough water to come slightly less that halfway up the carrots. It just needs to be enough to help get things moving.
  4. Blend on medium until the ingredients are well pulverized.
  5. Place a nut milk bag in your desired cup/container and pour in the blended ingredients.
  6. Squeeze as much liquid out of the nut milk bag as possible. Save the leftover pulp in the freezer to be used in other recipes.
  7. Enjoy your juice! It is best to drink on an empty stomach, such as first thing in the morning before breakfast.
3.3.3077

 Do you juice? What is your favorite type of juice to make?

Filed Under: Beverages, Dairy Free, Egg Free, Egg Free, Gluten Free, Grain Free, Nourishing Practices, Nutrient Dense Foods, Vegan, Vegetarian

Stress Relieving Lavender Lemon Balm Iced Tea

May 15, 2015 by April Swiger 3 Comments

Stress Relieving Lavender Lemon Balm Iced Tea

By April Swiger, Contributing Writer

This refreshing lavender lemon balm iced tea is not only delicious, but it helps melt away stress. It’s so simple to make and can be enjoyed hot or iced for the upcoming summer months. Tea brewed from your own garden herbs is highly satisfying, and wonderfully nourishing.

I first discovered lemon balm a little over a year ago. The snow had finally melted away from the garden area of our little rental home, and these bushy green plants began to pop up all over the place. After a little research I learned that lemon balm (part of the mint family) is a perennial herb known for its calming and stress relieving properties. One gentle touch of the leaves and an intoxicating aroma of lemon fills the air. The scent alone lifts my spirits!

Stress Relieving Lavender Lemon Balm Iced Tea 1

Lemon balm has also been known to calm headaches, upset stomach, menstrual cramps, and insomnia to name a few. My husband and I have been on a recent journey to treat our adrenal fatigue and lemon balm is a wonderful herb to help calm the body and promote healing.

It is well know that lavender is also a natural stress reliever. The lovely scent from its leaves, and the variety of purple flowers it produces makes it one of the most beautiful herbs to grow in a garden. I have two different varieties in my garden, but the one I used for this recipe is English Lavender (lavandula angustifolia).

You could also dry the leaves and preserve them for making tea during the winter months. This is very easy to do with a dehydrator, or by hanging to air dry as well.

Stress Relieving Lavender Lemon Balm Iced Tea 2

It’s good to take a few moments each day and rest. This tea, adorned with a fresh lavender flower, would be the perfect companion for seeking a stress-free summer.

Other summer drinks you may enjoy:

  • Chai Tea Fauxccino (paleo-friendly)
  • Iced Chamomile Lavender Tea
  • Dairy Free Pina Colada (nonalcoholic)
  • Vanilla Lemonade

Stress Relieving Lavender Lemon Balm Iced Tea
 
Author:
April Swiger
Recipe type: Beverage
Print
 
This refreshing lavender lemon balm iced tea is is jam-packed with stress relieving properties. Enjoy it all summer long!
Ingredients
  • 1 quart filtered water
  • 1 cup fresh lemon balm leaves
  • 4 sprigs of fresh lavender leaves
  • 1-2 Tablespoons of raw honey per quart
  • Lemon slices and/or a lavender flower (optional)
Instructions
  1. Bring the water to a boil in a large pot.
  2. Add the lemon balm and lavender leaves to the water. Remove the pot from the heat, cover, and steep for 30 minutes.
  3. Strain out the leaves and pour the tea into a glass container of your choice.
  4. Stir in the honey. Enjoy this tea warm, or chill for iced tea.
3.3.3070


Filed Under: Beverages

Next Page »

Primary Sidebar

ConvertKit Form

Get Every Recipe

And the insider's view from our kitchen

Success! Now check your email to confirm your subscription.

There was an error submitting your subscription. Please try again.

We won't send you spam. Unsubscribe at any time. Powered by ConvertKit

Follow Me

  • Facebook
  • Google+
  • Instagram
  • Pinterest
  • RSS

Search

Please Read:

The information you find here at The Nourishing Gourmet is meant to help you become a better cook! This site is primarily for sharing family friendly recipes. It's not meant to give medical advice or to make any health claims on the prevention or curing of diseases.This site is only for informational and educational purposes. Please discuss with your own, qualified health care provider before adding in supplements or making any changes in your diet. Also, any links to sponsors or affiliates (including Amazon) may give me a percentage of the sale or a pay per click. Thank you for supporting this site.

Categories

  • $10 Main (42)
  • $5 Dishes (43)
  • 52 ways to save money on a healthy diet (53)
  • AIP (23)
  • Baked Goods (83)
  • Beverages (72)
  • Breakfast and Brunch (61)
  • Condiments (8)
  • Dairy Free (492)
  • Desserts (184)
  • Dietary Needs (6)
  • Egg Free (11)
  • Egg Free (86)
  • For the Kids (66)
  • For the Love of Food and Books (18)
  • Gluten Free (484)
  • Grain Free (95)
  • Health (75)
  • Kitchen Tools (4)
  • Main Dishes (126)
  • Nourishing Frugal Recipes (167)
  • Nourishing Frugal Tips (70)
  • Nourishing Practices (56)
  • Nutrient Dense Foods (70)
  • Q and A (15)
  • Salads (39)
  • Sides (101)
  • Snacks (124)
  • Soups (50)
  • The Healthy $1 Menu (21)
  • The Low Energy Guide to Healthy Cooking (18)
  • THM (2)
  • Trim Healthy Mama (2)
  • Uncategorized (846)
  • Vegan (241)
  • Vegetarian (361)

Recent Posts

  • 2 Ingredient Peppermint Bark
  • Herbal Hibiscus Lemonade (Keto, THM)
  • Creamy Curry Red Lentil Soup
  • One-Pot Gluten-Free Mac and Cheese
  • Healthy Pumpkin Spice Granola
  • Crispy Pumpkin Spice Granola (oil-free)
  • Why I Use THM Principles Now
  • Vietnamese Beef Noodle Salad
  • Coconut Flour Pancakes
  • Instant Pot Mexican Shredded Chicken

Recent Comments

  • Dorene St G on Cracker Toffee (Easy Peasy Christmas Candy)
  • Nadia Kriston on Finding a Toaster Oven Without Nonstick
  • KimiHarris on How to make heavenly coconut milk whipped cream (with an isi dispenser)
  • KimiHarris on Autumn Beef Stew (Tomato Free)
  • KimiHarris on How to make heavenly coconut milk whipped cream (with an isi dispenser)

Fresh: Nourishing Salads for All Seasons

Get Every Recipe

And the insider's view from our kitchen

Success! Now check your email to confirm your subscription.

There was an error submitting your subscription. Please try again.

We won't send you spam. Unsubscribe at any time. Powered by ConvertKit

Footer

Privacy

Copyright © 2023 · Foodie Pro & The Genesis Framework