So, you’ve made a delicious, nutritious, homemade beef broth, and it now has a glorious layer of beef fat on the top. Now what? Don’t waste it! With just a few short steps, you can render it for a delicious cooking fat! This lovely cooking fat is stable at high temperatures, making it lovely for sautéing or roasting vegetables and meats, and many other uses!
As long-time readers know, I try to balance using quality, good ingredients, with a realistic budget. A practical way to make that happen is by not wasting anything. Certainly, saving and using this quality fat is a great way to eat well AND save money! Because we try to only buy top quality oils and fats, this helps tremendously in how much we spend on our oils/fats.
And don’t worry. It’s simple to make!
How to Render Tallow from Beef Broth
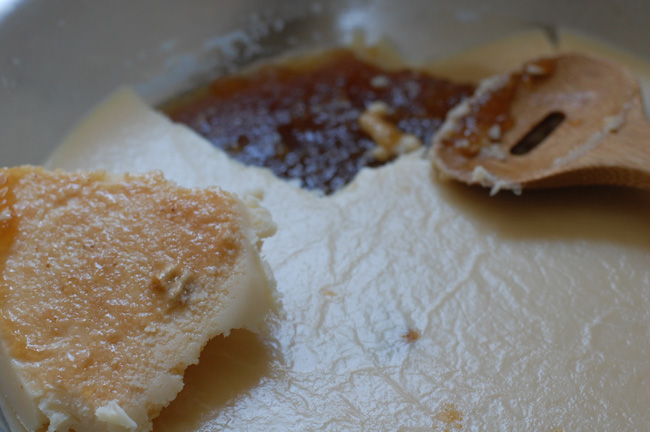
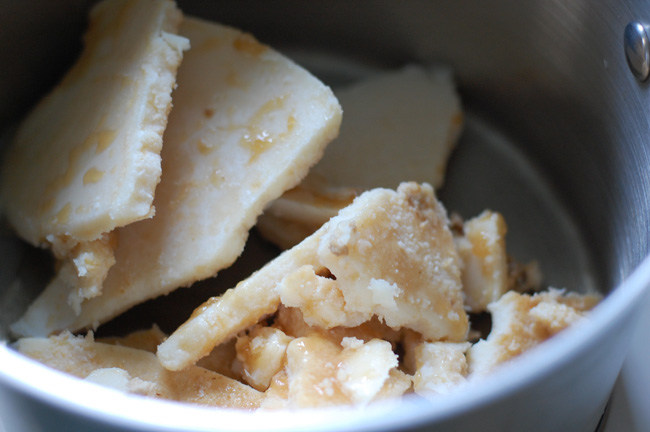
1. After you have cooled your homemade beef broth in the refrigerator, there should be a layer of fat on the top. How much fat there is depends on what type of bones you use. Because we try to use at least some marrow bones in each batch, we typically have quite a bit. Scoop this fat off and place into a pot. (I use a small pot for one batch of fat.)
2. Gently heat the fat over low heat until it is completely liquid.
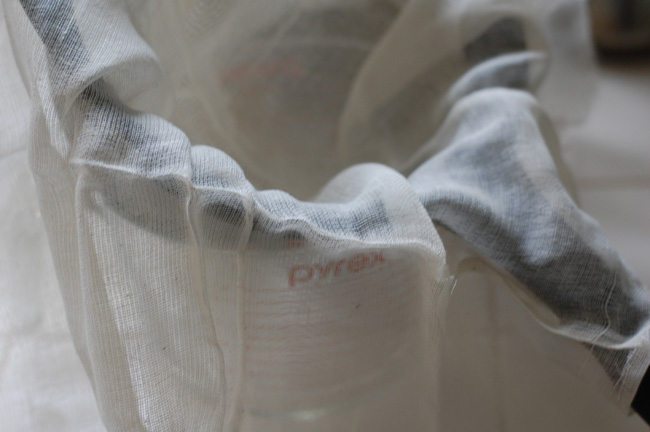
3. Pour over cheesecloth placed over a fine sieve over a heat safe bowl (or 4 cup measuring cup) to strain out any bits.
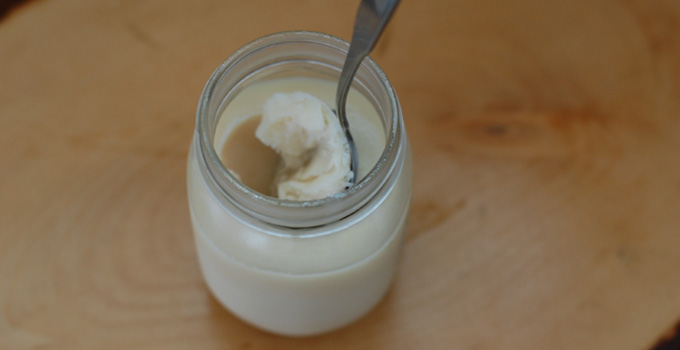
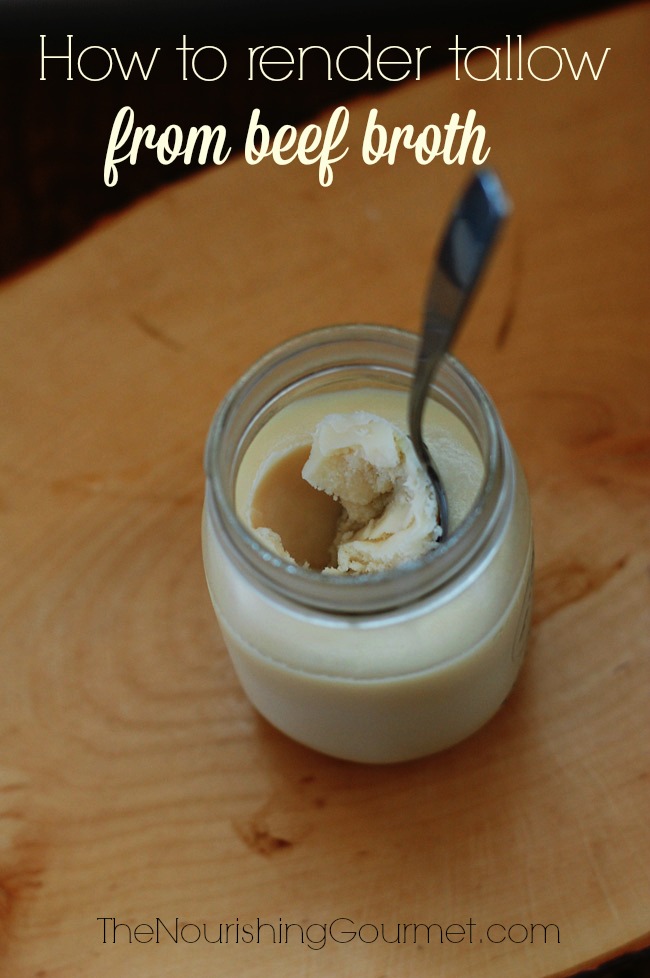
4. At this point, you can do the lazy method of simply pouring the fat into a mason jar and re-hardening it in the refrigerator. Any leftover bits or small drops of broth will go to the bottom of the jar, and because fat is a type of preservative, the fat won’t go bad and I just don’t use the very last bit of fat at the bottom of the jar. This is what is pictured above.
5. Or, to make it completely free of any broth or bits, pour into a wide container such as an 8 by 8-inch pan. Let re-harden in the refrigerator, and then remove from the pan and turn upside down. You can then scrape off any bits or broth from the bottom of the fat. Reheat to liquefy, and pour into desired container of choice.
Keep refrigerated. Will keep for at least several months when refrigerated (freeze for longer storage).
- Fat skimmed from the top of homemade beef stock
- After you have cooled your homemade beef broth in the refrigerator, there should be a layer of fat on the top. How much fat there is depends on what type of bones you use. Because we try to use at least some marrow bones in each batch, we typically have quite a bit. Scoop this fat off and place into a pot. (I use a small pot for one batch of fat.)
- Gently heat the fat over low heat until it is completely liquid.
- Pour over cheesecloth placed over a fine sieve over a heat safe bowl to strain out any bits.
- At this point, you can do the lazy method of simply pouring the fat into a mason jar and re-hardening it in the refrigerator. Any leftover bits or small drops of broth will go to the bottom of the jar, and because fat is a type of preservative, the fat won’t go bad and I just don’t use the very last bit of fat at the bottom of the jar. This is what is pictured above.
- Or, to make it completely free of any broth or bits, pour into a wide container such as an 8 by 8-inch pan. Let re-harden in the refrigerator, and then remove from the pan and turn upside down. You can then scrape off any bits or broth from the bottom of the fat. Reheat to liquefy, and pour into desired container of choice.
- Keep refrigerated. Will keep for at least several months when refrigerated (freeze for longer storage).
Related Posts:
- Beef Stock
- 10 reasons bone broth should be part of your diet
- How to make chicken broth of practically free
- Rich Roasted Broth
- The Healing Power of Broth
- My soup cookbook, Ladled: Nourishing Soups for All Seasons
Latest posts by KimiHarris (see all)
- 2 Ingredient Peppermint Bark - December 21, 2022
- Herbal Hibiscus Lemonade (Keto, THM) - March 16, 2022
- Creamy Curry Red Lentil Soup - December 8, 2021
My husband and I are raising our own grass-fed beef. Just last December I rendered some tallow from their suet for the first time. I expected it to make glorious cooking fat, but was very disappointed. When I sautéed some green beans in a few tablespoons of tallow, the fat congealed once the beans cooled and there were nasty, chalky chunks of fat all over the vegetables. And when I say cooled, I mean room temperature. They were impossible to eat minutes after being taken off the heat. Believe me, I am not faint-hearted–I eat beef liver and wobbly fat off the sides of pork chops and anything else most people would consider gross, but this tallow was too much for me. However, in all the research I’ve done no one mentions this cooling and texture problem. It was like coconut oil–that’s how hard it was. Do you have any advice for me as to how to avoid this? I ended up making the tallow into candles since no one in the family could stand to eat it.
Yikes, Catherine! I haven’t had that happen yet. Beef tallow DOES solidify at room temperature, so you would need to eat food while it’s hot to avoid this (though, granted, I haven’t had that happen yet to me – perhaps because our house can be rather hot, or because the vegetables I have sauteed using tallow have released enough moisture into the tallow to change things up in its properties).
Can you do the same thing with chicken broth? I Haven’t made beef broth…yet.
Holly,
Yes you can!
A wonderful way to get more tallow! I haven’t had to render the fat for tallow since I started doing this.
I keep it on the stove until it has stopped bubbling, otherwise some water will still be in the fat, which would lead to quicker spoilage.
Great idea, Krista! I did the same thing, just left it over the heat until the water bubbled off and then strained it and it was perfectly clean and clear. This is so easy and I would have just thrown all that beautiful fat away.
I don’t understand why you can’t use the hardened fat (top layer off the bone broth) as is instead of going through the extra process of reheating and straining. I’m very new to this and made my first batch of bone broth the other day. Still have the hardened fat in the fridge and was wondering if I could saute with it. Thanks
I add 2 pounds of fat trimmings to my stock as I make it, the bits of meat on the edges of fat add tons of flavor to the stock and I get a much thicker layer of tallow which I ise to cook virtually everything. When I runnout of tallow I decide its time to make more soup.