• Skip to primary navigation
  • Skip to main content
  • Skip to primary sidebar
  • Skip to footer

The Nourishing Gourmet

Nourishing. Satisfying. Gourmet.

  • About
    • Privacy
    • Contact
  • Recipes
  • Cookbooks
    • Everyday Nourishing Food
    • Salad Cookbook
    • Soup Cookbook

$10 Main

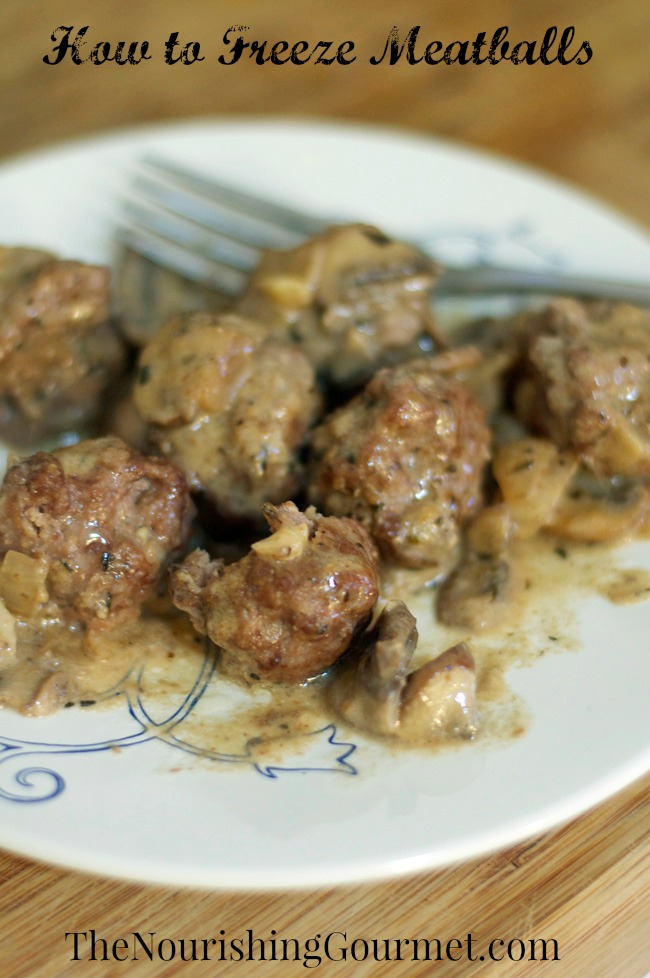
How to Freeze Meatballs

January 28, 2015 by KimiHarris 10 Comments

Follow this simple method to make your own freezer meatballs! You can take out as many as you like at a time. You can use your favorite recipe, or you can use this grain-free, egg-free Italian Meatball recipe. Yum!
Having frozen meatballs on hand is very convenient. You can easily take out just as many as you need and use them in a variety of recipes. However, I don’t know if I have yet seen meatballs made with the ingredients I’d like, in the store, let alone ones that would mesh well with our allergies/intolerances.

Thankfully, making your own frozen meatballs is very easy and simple to do! I used my recipe for grain-free, egg-Free, and dairy-free Italian Meatballs, and made up a massive batch for my freezer. You can use whatever recipe you’d like though! The method is the same regardless.

I lost several weeks to being under the weather recently, and as someone who is expecting to give birth in the next 2-4 weeks, I am playing catch up on both my rest and my chores! I had grand plans for freezer meals but have had to cut back on some of them because of lack of time. However, meatballs were on the “must do” list, and I was thankful to get them done this week.

It was actually some of you who put this idea into my head! Several of you have mentioned that my recipe for meatballs froze really well, and I was always planning on trying it “sometime”. I decided there was no time like the present! There was something so satisfying about putting that bag stuffed full of frozen meatballs into the freezer too. So thank you!

A few notes on the ingredients I used

We choose to use grassfed ground beef. I was thankful to be able to buy some locally for a decent price and we love the added health benefits to grassfed beef. I quadrupled the recipe, and I replaced one of the pounds of beef for chicken liver for even more nutrition. You can read about the nutritional benefits of liver here. You can also read more about nutrient dense foods in general (including liver) here.

How to make Freezer Meatballs

Make and shape meatballs according to the recipe you’ve chosen to use. I used my recipe for Italian Meatballs. I recommend making small meatballs (I make mine about the size of a pingpong ball or even smaller), not the large fist sized ones.

Bake in the oven (my recipe cooks at 400F for 12-18 minutes) until done. If you are using lean meat, use parchment paper or oil the pan lightly.
Remove from oven and let cool.

Place on a parchment covered bake sheet, making sure the meatballs aren’t touching. They will have shrunk in size when cooking, so I put two pans worth of baked meatballs onto one pan for freezing, and place in the freezer on a flat surface. This ensures that the meatballs won’t freeze sticking together. Freeze until hard.

Remove from freezer and pop into a freezer bag or desired container, and freeze! Use within three months.

How to reheat frozen meatballs

I’m told that a favorite way to enjoy frozen meatballs is to reheat them in a slow cooker in a favorite sauce(think sweet and sour or spaghetti sauce). It only takes 1-3 hours on high, and I like that this would help keep the meatballs moist while they reheat. They can also be dropped into a soup for meatball soup, reheated in a sauce on the stovetop, or reheated in the oven (350F for 15- 20, or until hot in the middle).
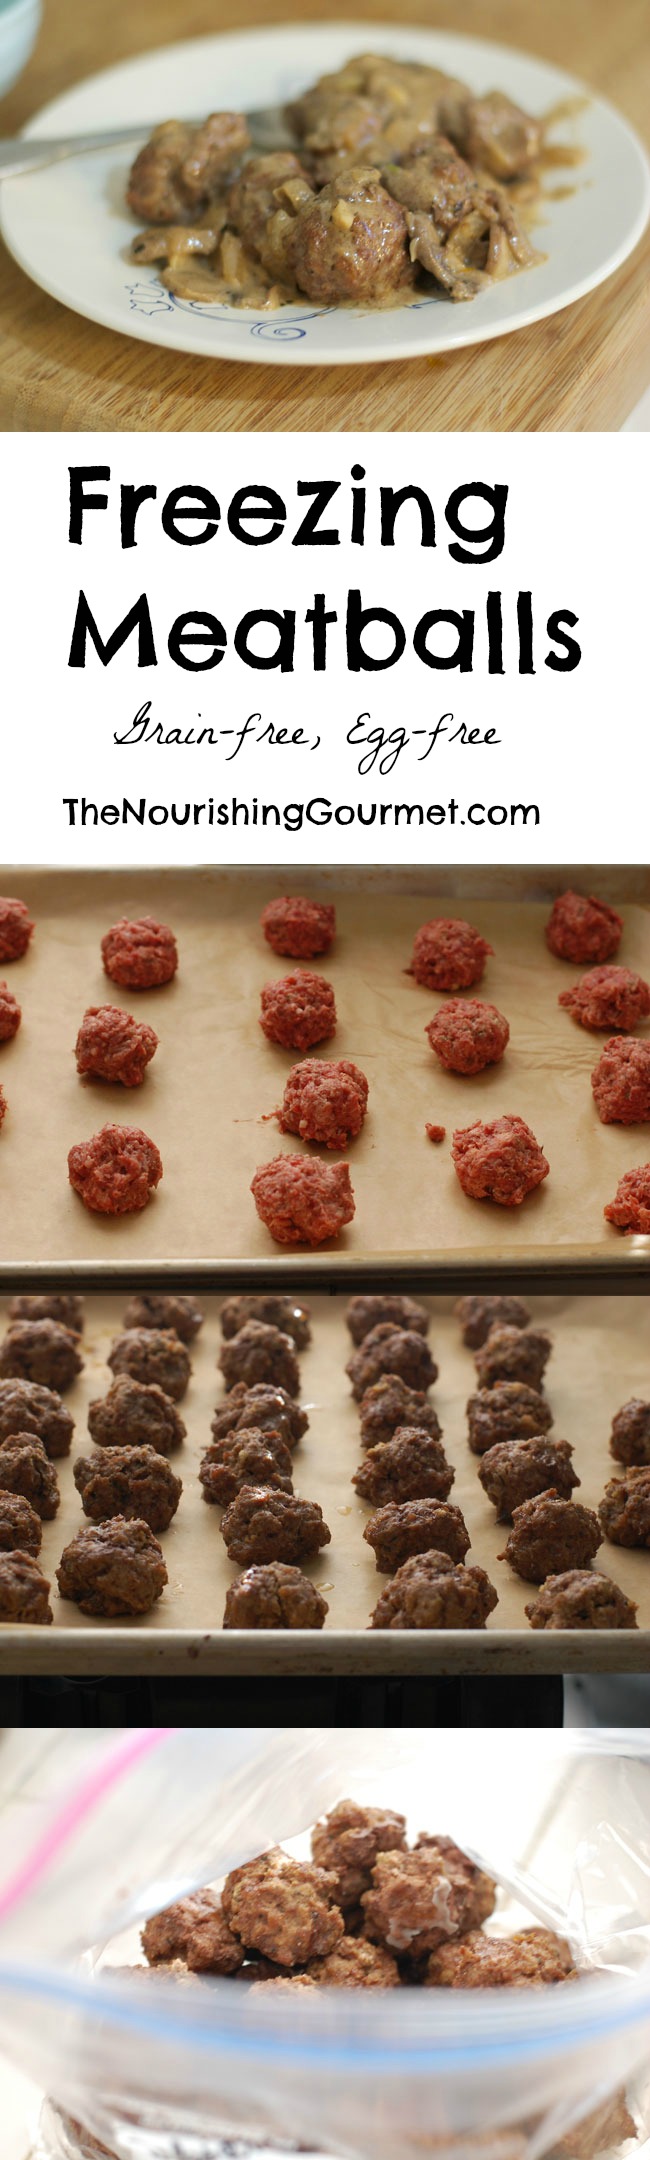
Follow this simple method to make your own freezer meatballs! You can take out as many as you like at a time. You can use your favorite recipe, or you can use this grain-free, egg-free Italian Meatball recipe. Yum!

Filed Under: $10 Main, Dairy Free, Egg Free, Gluten Free, Grain Free, Main Dishes, Nutrient Dense Foods

Easy Crock-pot Chicken Teriyaki (For Delicious Rice Bowls!)

January 2, 2015 by Katie Mae 12 Comments

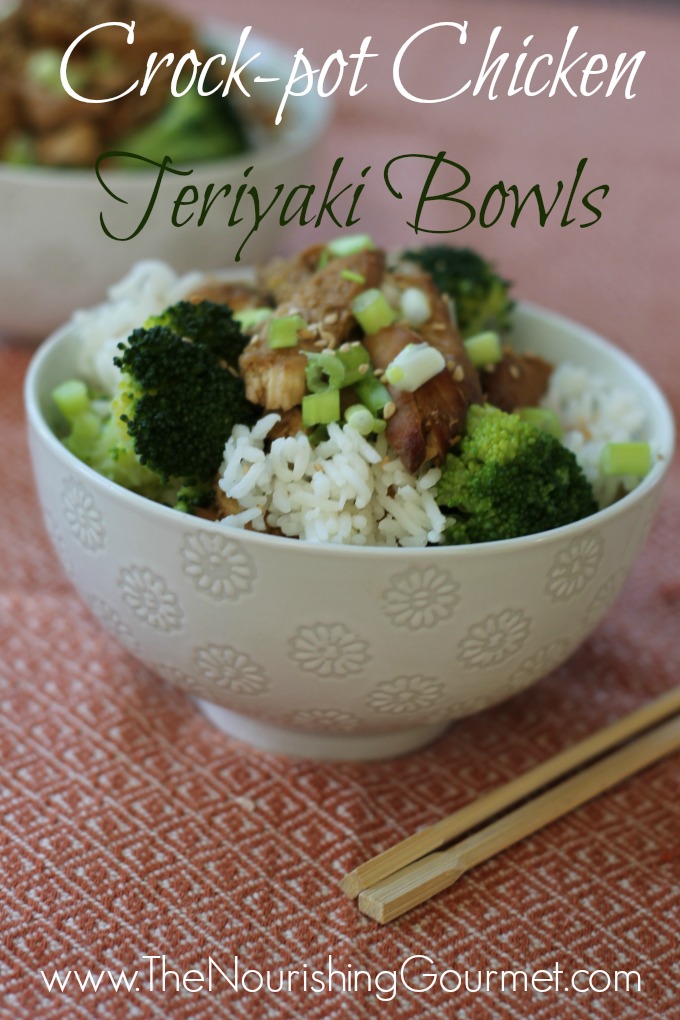
Crock-pot Chicken Teriyaki Blowls- The Nourishing Gourmet

By Katie Mae Stanley, Contributing Writer

Chicken is gently flavored with an easy and simple homemade teriyaki sauce and then cooked in a crock-pot. Serve with rice and steamed vegetables and you have a lovely meal for a busy night!

In our busy lives, it is very tempting to get food out or settle for processed foods to save on time. Those may be fine for the occasional treat, but our bodies need nourishing foods on a regular basis to thrive. Few things weaken the body more than poor food choices. But I understand those busy days where it’s hard to get food on the table. Believe me, I’ve had many of those days myself.

I want to share with you the two appliances that have been instrumental in getting nourishing food on the table in the busy seasons of life. My crock-pot (affiliate links, Hamilton Beach Slow Cooker is a great brand to use) and rice cooker (I love my Vitaclay Rice Cooker) are two of my best friends. Okay, maybe not my friends, but as far as appliances go they are right up there with my Blendtec and grain mill! Crock-pots and rice cookers allow you to prepare nourishing meals that you can fix and forget. Many of these appliances are now programmable to keep food hot for up to 12 hours after the food has finished cooking.

The options are endless when you are cooking in a crock-pot, but this teriyaki recipe is one of my favorites. Teriyaki is bursting with flavor with the perfect balance of sweet and savory. Kimi shared a tip for the easiest marinade ever, soy sauce (or tamari) and unrefined sugar of choice (such as coconut sugar). It can’t get any easier than that, right? For this dish, I followed that basic idea and added a bit of ginger since I love the pop of flavor it adds. If you don’t feel like adding ginger, it is totally optional.

Have you ever gotten teriyaki rice bowls? I remember loving them in high school, and they were so tasty! I haven’t had one in years but decided that is was time to have one again in the convenience of my home. My trusty crock-pot and rice cooker made this a very easy meal to throw together with almost no work. I chose to steam some broccoli for about 10 minutes to go with my rice bowl but you could use any vegetable you have one hand.

Here are a few more teriyaki dishes:

  • 3 Ingredient Pan Fried Teriyaki Chicken
  • Teriyaki Wings (Gluten and Refined Sugar Free)
  • Simple Teriyaki Wings
  • Crock-pot Chicken Teriyaki with Pineapple

Crock-pot Teriyaki Bowls
 
Author:
Katie Mae @ The Nourishing Gourmet
Recipe type: Main Dish
Cuisine: Japanese
Serves: 4-6 servings
Print
 
Ingredients
  • 2 pounds chicken breast or thighs, boneless and skinless
  • ¾ cup soy sauce or tamari (use tamari for gluten free option)
  • ⅓ cup sucanat or coconut sugar (palm sugar)
  • ¼ cup water
  • 1 inch fresh ginger, grated
  • 4 green onions, chopped (optional)
  • 2 tablespoons sesame seeds (optional)
Instructions
  1. Mix the soy sauce or tamari, sugar of choice, water and grated ginger in a cup or small bowl.
  2. Place the chicken in a crock-pot. Pour the sauce evenly over the chicken.
  3. Cover with the lid and cook on low for 5-6 hours or high for 2-3 hours.
  4. Slice the chicken once it is done cooking.
  5. Serve with white rice and steamed broccoli.
  6. If desired garnish with chopped green onions and sesame seeds. Enjoy!
3.2.2925


Filed Under: $10 Main, Gluten Free, Main Dishes

Grain-Free Pizza “Pockets”

September 13, 2014 by KimiHarris 4 Comments

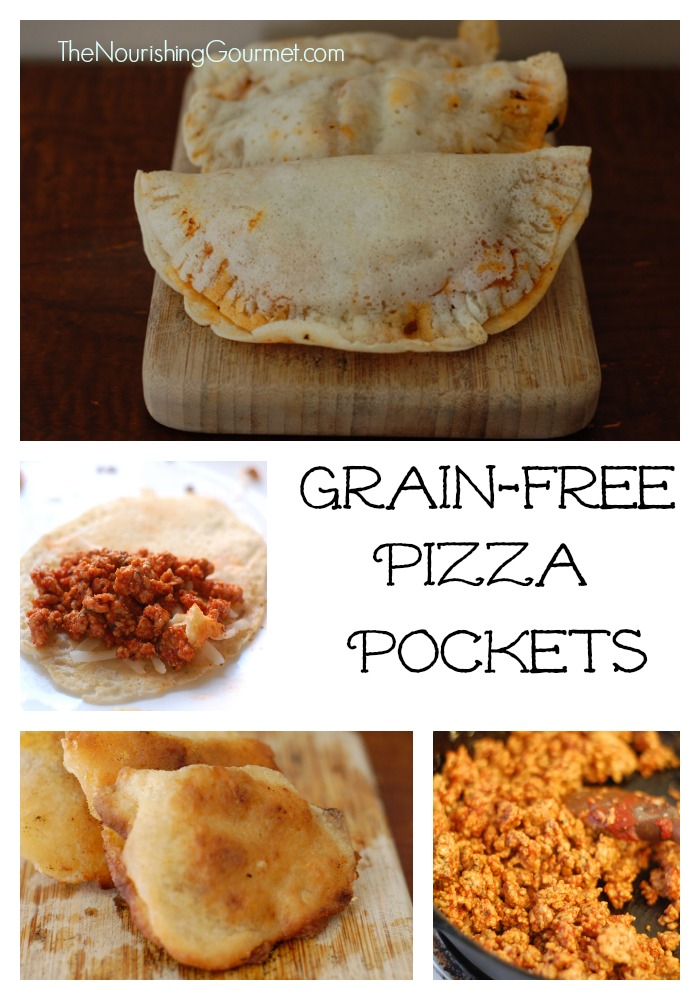
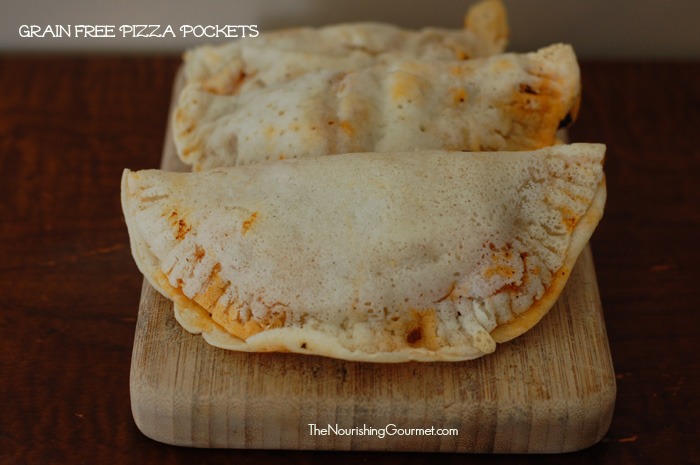
Grain free pizza pockets - These freeze well and are so fun!With a crunchy crust and a flavorful filling, no one complained about eating a grain-free meal last night! These flavorful pockets were very satisfying and filling, and make a very fun lunch or dinner (I’d recommend serving it with a homemade salad with a yummy homemade salad dressing!). We aren’t a grain-free family, but since we are gluten-free, our meals often end up being grain-free. And with beautiful foods like these homemade pockets, everyone is happy (even those in the family who CAN eat gluten!).

Proving that advertisement to children really does work, I still remember when “Hot Pockets” were a new and very cool product. I’m quite certain that I begged and begged my mother to buy me some. I think she did finally once, and I was pretty happy. But I’m not sure I was actually that pleased with the actual product. Regardless, I don’t remember much about my experience eating them, though I still remember exactly where they were placed in the freezer that day.

I think I will remember these ones for the flavor, not where I put them in my freezer ten years from now. 😉

Some links are affiliate. Thanks for supporting this blog! 

My Inspiration

As I talked about yesterday, I have been really inspired to freeze more foods lately. I talked about being inspired by two of the books in the Ultimate Healthy Living Bundle (only on sale for a couple more days, by the way). What I didn’t mention was that this project was already on the schedule for my first experiment! They were inspired by the Grain-free Grab and Go eBook by Hayley from Health Starts in the Kitchen. This book is also part of the bundle (hey, when you have 73 eBooks, you end up with a lot of good stuff in there!). She has some a-m-a-z-i-n-g recipes in there. She has pockets for breakfast, pockets for lunch, pockets for dinner. Some are very American, some are Ethnic. They all sound great. I knew I had to try them.

Here’s Hayley’s book, among the other books in one of the categories of the bundle.

Following my own advice, I wasn’t so much trying to make huge amounts to freeze, but try out a few recipes to see what we liked best. These were such a hit, I’m definitely adding them to my list of recipes that are “good to freeze.”

Here’s what I tried out

I made three crusts. I made a slight adaption of Hayley crust from her book (I didn’t have the same seasoning, so I substituted), which was a tapioca and almond flour based crust. Technically, almonds are a food I am not supposed to have a lot of, so I wanted to also try out a very interesting alternative – yuca root crust. The third crust was completely accidental! When attempting to make Hayley’s crust the first time, I accidently poured in potato starch instead of tapioca starch! Turns out, it works just as well! I figured that was a good substitution tip to share with you all.

The almond flour/starch based crust firms up nicely, and is quite crunchy and delicious when cooked. The taro root crust is quite soft, yet still manages to be “bread-like” when cooked. We also lightly pan-fried these pockets for a crunchy outside, and then they were perfect.

I don’t have permission to share’s Hayley’s beautiful crust recipe with you all, since it’s part of her lovely eBook. However, if you aren’t able to purchase her book or the bundle right now, you could try this similar recipe here (just be aware that the ratios are different and I haven’t actually tried this recipe yet). For the amount of filling below, I’d double it.  I DO want to share my own tips with on making them however, and my own filling recipe.

You can also buy the bundle by clicking on the button below.

Grain-free Pizza pockets - These freeze well and are so fun!

For an almond flour/starch batter:

  • Don’t expect your first few to look perfect. Like most things it takes a little practice. At first I wasn’t spreading out the batter in the pan thin enough, so my pockets were too small for the amount of filling I should have been using. My first few were not beautiful, but they were still delicious!
  • Don’t overcook the batter when pan cooking your pocket dough. If it gets too crunchy, it’s harder to press together (if that happens moisten your fork with a little water).
  • Instead of pressing the edges together in the hot pan, I removed it to a plate, poured in batter for the next pocket dough, and while the first side cooked, moved to the plate, and pressed the edges together.
  • Put some music on and relax while you are making them! It does take a little time, but once you get a rhythm going, it goes much faster.

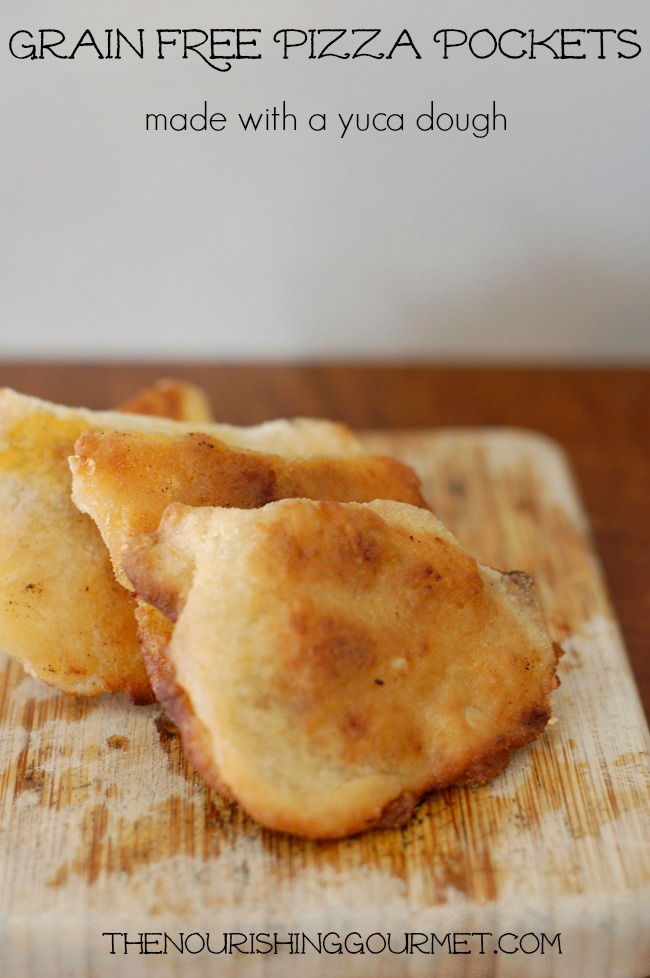
Grain Free Pizza Pockets - made with a yuca dough!

For the yuca crust

I got my recipe from Predominately Paleo, who I believe first created the “yuca dough.” Kudos to her for developing them!

A few notes:

    • The yuca has to be peeled, boiled, blended, and then cooled before you can work with it. This takes some time, but each step is very simple, and most of the time is not hands-on time, but waiting time.
    • The dough is very soft, and a fairly easy to break, so you have to make much smaller pockets.
    • Pan-frying them after cooking is the way to go. We also found that they could be cold in the refrigerator (as leftovers), and panfrying them warms them up perfectly. Win-win!
    • You absolutely should watch this video to see what you are going to be doing. It should take away any fears about the recipe.

  • Don’t overheat your blender when blending.
  • I loved the dough, but definitely think salt should be added to it. I’d recommend 1 teaspoon during the blending process.

To get the recipe for the dough (and another delicious filling) go here.

I also wanted to note that this method of freezing breakfast burritos would probably work great for these pizza pockets too!

Grain-Free Pizza "Pockets"
 
Print
 
Next time, I am thinking of adding a red pepper, cubed mushrooms, and olives to the mix! This is enough to fill one recipe of the almond/starch crust, or the yuca crust recipe. Our favorite was the pork. Follow the instruction for filling the crusts per recipe you’ve chosen to use.
Ingredients
  • ¾ pound ground beef or pork, grassfed preferred for the beef
  • 1 teaspoon dried basil
  • A generous pinch of thyme and oregano
  • 3 garlic cloves, peeled and finely minced or put through a garlic press
  • 4 tablespoons tomato paste
  • 1-2 cups of shredded cheddar cheese (we used goat), optional
Instructions
  1. In a large saucepan, brown the meat with the dried herbs and garlic. When cooked through, if needed, remove any grease with a spoon (tip the pan slightly to allow the grease to run to one side).
  2. Stir in the tomato paste and then salt generously to taste.
  3. If using the cheese, place a couple tablespoons on top of the meat filling before closing.
3.2.2708


Filed Under: $10 Main, Baked Goods, Dairy Free, Gluten Free, Main Dishes, Snacks

Honey Garlic Drumsticks (a simple summer crockpot meal)

July 10, 2014 by April Swiger 2 Comments

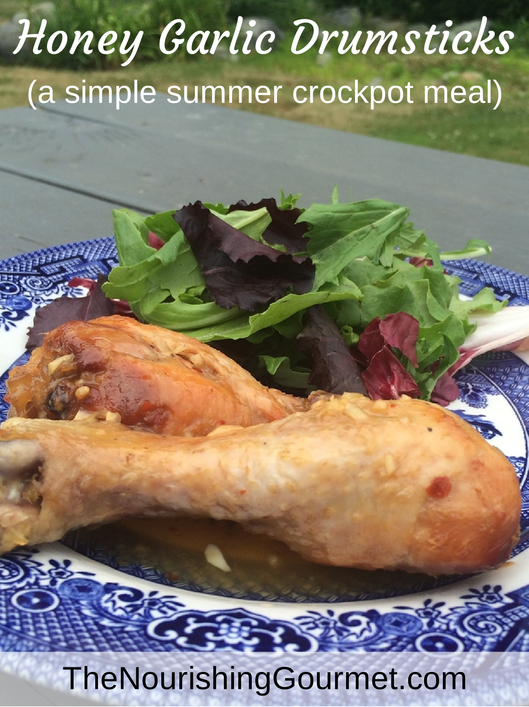
Honey Garlic Drumsticks (a simple summer crockpot meal)

By April Swiger, Contributing Writer

Sweet, tangy, and a little bit of red-pepper-kick, these honey garlic drumsticks are the perfect meal for a hot summer night. I love the flavorful dark meat that chicken legs have to offer. Not only are they an incredibly frugal cut of meat, but the seasoning possibilities are near endless. Add in the simplicity of a slow cooker/Crockpot, and you have a nourishing meal for the whole family, or a crowd, without much effort.

When the weather is beautiful and warm, it’s much more difficult to give up time outside for prepping meals. We don’t have central air in our home, so turning on the oven during the summer can be a little uncomfortable. It’s easy to forget that crockpots aren’t just for hearty wintertime soups, stews, and chillies! I’ve learned that it’s a great option to beat the summer heat, and a convenient way to enjoy a delicious meal after a fun day outside.

This recipe can be easily prepared in the slow cooker crock itself, minimizing the amount of dishes needed to be washed. It’s also easy to adapt based on how much “kick” you desire. You can thicken the sauce with a little cornstarch or arrowroot powder after the chicken is cooked. Pour it over the meat, or into a bowl for dipping. You definitely don’t want to skip this part as the sauce is absolutely delectable!

More time in the sun with family and friends, and less time in your kitchen – a win all around in my book! Keep it simple and serve these drumsticks with a side salad, carrot and celery sticks, rice or quinoa, or some sautéed veggies with butter or coconut oil.

Kimi uses this (affliate links)  slow cooker, and uses this clay cooker for making quinoa or rice on hot days.

Time at the stove: 10 minutes if you choose to sauté or steam some vegetables. 20 minutes if you make rice or quinoa. Or none if you serve it with cold vegetables or a salad.

Time at the oven: 5 minutes if you choose to broil the legs for a crispy skin.

Other drumstick/wing recipes:

  • Lemon Garlic Drumsticks
  • Teriyaki Chicken Wings

Other crockpot recipes:

  • Cook once, eat thrice with a slow cooker beef roast
  • Shawarma whole chicken in the slow cooker
  • Slow cooker baked pinto beans

Honey Garlic Drumsticks (a simple summer crockpot meal)
 
Author:
April Swiger
Recipe type: Main Dish
Print
 
These drumsticks are a perfect mixture of sweet and tangy, with a bit of kick! They are effortless to prepare and make a great summertime meal for your family, or a crowd.
Ingredients
  • 2 lbs chicken legs
  • ½ cup honey
  • 2 Tbls coconut oil, melted
  • 3 Tbls apple cider vinegar
  • 3-5 cloves of garlic, minced (garlic lovers use 5!)
  • 1 inch fresh ginger, grated, or about ¼ tsp dried
  • ⅛-1/4 tsp crushed red pepper
  • Salt and pepper
  • 1 Tbls arrowroot powder or cornstarch (used at the end to thicken the sauce)
Instructions
  1. In the crock of your slow cooker whisk together the honey, coconut oil, apple cider vinegar, minced garlic, ginger, crushed red pepper, and salt and pepper.
  2. Add the drumsticks to the crock, and toss them until they are fully coated with the sauce.
  3. Cook the drumsticks on low for 4-6 hours, or high for 2-4 hours.
  4. When the chicken legs are fully cooked, remove them from the crock, leaving the sauce inside.
  5. OPTIONAL - If desired, you can place the legs under the broiler at this point to crisp up the skin. About 5 minutes at 400 F should be sufficient.
  6. Ladle out ½ cup of the sauce into a small bowl, and whisk in the arrowroot powder or cornstarch (this step may not be necessary, but I find it's easier to get the lumps out in a smaller amount of sauce).
  7. Pour the sauce and arrowroot/cornstarch mixture back into the crock with the rest of the sauce. Whisk it in and allow it to thicken for a few minutes with the crock on 'high.'
  8. Serve the drumsticks with the sauce poured on top, or in a small bowl for dipping!
3.2.2708


Filed Under: $10 Main, Dairy Free, Gluten Free, Main Dishes, Nourishing Frugal Recipes Tagged With: Gluten Free, Grain Free, Nourishing Frugal Recipes

« Previous Page
Next Page »

Primary Sidebar

Follow Me

  • Facebook
  • Instagram
  • Pinterest
  • RSS

Search

Please Read:

The information you find here at The Nourishing Gourmet is meant to help you become a better cook! This site is primarily for sharing family friendly recipes. It's not meant to give medical advice or to make any health claims on the prevention or curing of diseases.This site is only for informational and educational purposes. Please discuss with your own, qualified health care provider before adding in supplements or making any changes in your diet. Also, any links to sponsors or affiliates (including Amazon) may give me a percentage of the sale or a pay per click. Thank you for supporting this site.

Categories

  • $10 Main (43)
  • $5 Dishes (43)
  • 52 ways to save money on a healthy diet (53)
  • AIP (23)
  • Baked Goods (84)
  • Beverages (72)
  • Breakfast and Brunch (63)
  • Condiments (8)
  • Dairy Free (498)
  • Desserts (185)
  • Dietary Needs (6)
  • Egg Free (14)
  • Egg Free (92)
  • For the Kids (70)
  • For the Love of Food and Books (18)
  • Gluten Free (491)
  • Grain Free (98)
  • Health (75)
  • Kitchen Tools (5)
  • Main Dishes (128)
  • Nourishing Frugal Recipes (169)
  • Nourishing Frugal Tips (70)
  • Nourishing Practices (57)
  • Nutrient Dense Foods (70)
  • Q and A (16)
  • Salads (40)
  • Sides (104)
  • Snacks (126)
  • Soups (50)
  • The Healthy $1 Menu (21)
  • The Low Energy Guide to Healthy Cooking (20)
  • THM (5)
  • Trim Healthy Mama (5)
  • Uncategorized (848)
  • Vegan (243)
  • Vegetarian (363)

Recent Posts

  • Eating for Comfort and Sustenance
  • Perfect Instant Pot Black and Brown Rice
  • What Worked and What Didn’t in My Cooking Life Last Year
  • Mocha Dark Chocolate Bombs (low sugar)
  • Gingerbread Caramel Corn
  • Thyme and Garlic Potato Stacks
  • The Great Big Holiday Salad
  • 30 Favorite Kitchen Stocking Stuffers
  • Luxurious DIY Lip Balm
  • Spicy Korean Beef and Cabbage

Recent Comments

  • Kim on Eating for Comfort and Sustenance
  • Michelle Sanders on Chile-Spiked Dark Chocolate Bark with Pepitas & Mango (Dairy Free)
  • KimiHarris on Eating for Comfort and Sustenance
  • KimiHarris on Eating for Comfort and Sustenance
  • KimiHarris on Eating for Comfort and Sustenance

Fresh: Nourishing Salads for All Seasons

Footer

Privacy

Copyright © 2026 · Foodie Pro & The Genesis Framework