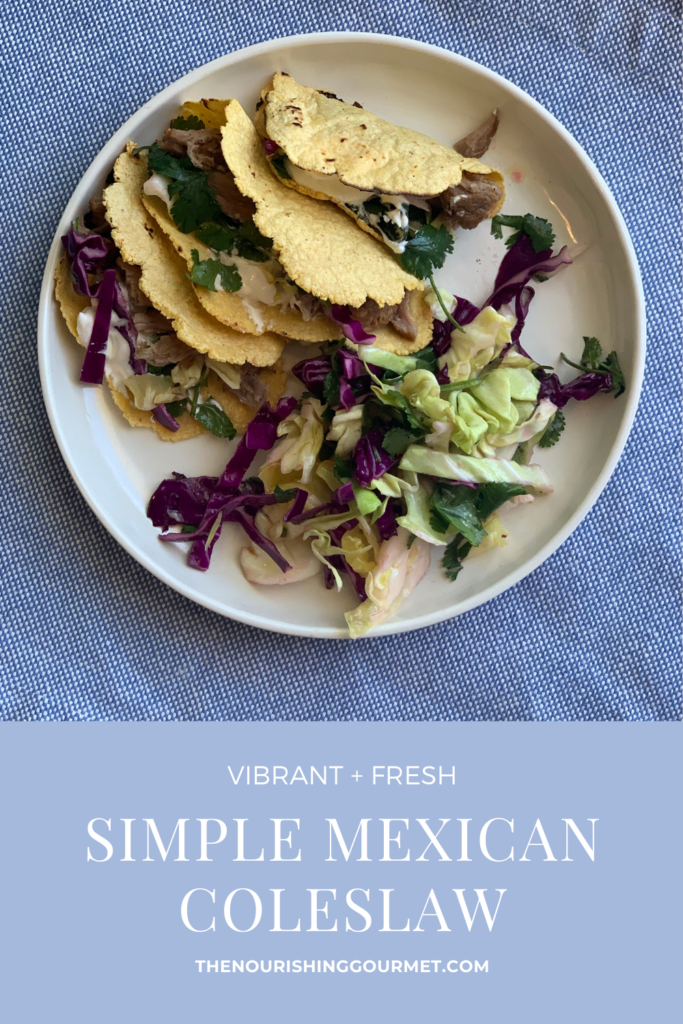
This easy and simple coleslaw is perfect for two things – topping tacos or using it as a flavorful base for a “taco salad.” Vegetable sides are regularly overlooked, but they shouldn’t be! They not only add a lot of important nutrition, antioxidants, and fiber, but they also add vibrant flavor.
That said, I like to keep my sides simple so that I can get dinner on the table quickly. This recipe fits the bill.
I make a large bowl of it, and serve it on taco night. For those in the family who regularly enjoy corn, they use it both in their tacos and as a side salad. For those of us who don’t always eat corn (or who are eating using keto or using Trim Healthy Mama principles), we use it as a base and then top it with top tender meat, salsa, avocado, sour cream, and cheese.
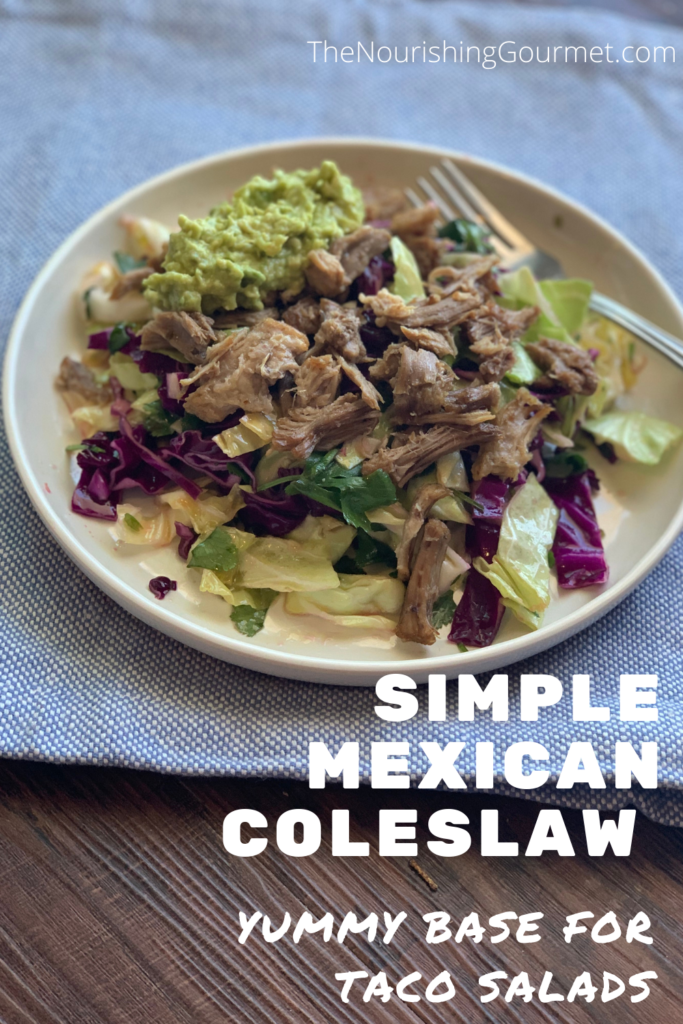
It’s a really delicious and satisfying meal, with taco shells or without, and is a regular part of our menu.
While cabbage dressed up this way is just delicious, I also love that the regular addition of cruciferous vegetables, such as cabbage, can help prevent or reduce inflammation (1, 2, 3). Also, consider using red cabbage! It has other benefits because of its anthocyanin content (1), and also looks beautiful.
Related Recipes:
• Mexican Chocolate Dairy-free Ice Cream
Simple Mexican Coleslaw
• 1 medium-large cabbage (I sometimes use half of a green, and half of a red)
• 1 bunch of cilantro, washed, stemmed and chopped
• ½ cup fresh lime juice*
• ¼ cup extra virgin olive oil
• 1 teaspoon salt
• 3-6 garlic cloves, peeled and finely minced
- Wash the outside of the cabbage, and then cut in half using a large, sharp knife. Thinly slice the cabbage after cutting out the core. Add to a large bowl, and then add the cilantro.
- Add the rest of the ingredients together in a small bowl or glass measuring cup, and stir together. Pour over cabbage and cilantro, and toss. Taste test, and add more salt, olive oil, or lime juice, as desired.
- Serve right away, or premake an hour or two beforehand and allow the flavor to meld, and the cabbage to slightly soften.
Variation: Cut the lime juice to ¼ of a cup and add ½ cup of orange juice for a more mild version. For a kick, add some red pepper flakes or cayenne pepper.