• Skip to primary navigation
  • Skip to main content
  • Skip to primary sidebar
  • Skip to footer

The Nourishing Gourmet

Nourishing. Satisfying. Gourmet.

  • About
    • Privacy
    • Contact
  • Recipes
  • Cookbooks
    • Everyday Nourishing Food
    • Salad Cookbook
    • Soup Cookbook

Marillyn Beard

How Soaking Nuts Helped My Digestion (Learn in 3 Simple Steps)

January 20, 2014 by Marillyn Beard 82 Comments

By Marillyn Beard, Contributing Writer

We all know how healthy nuts and seeds can be, but I used to cringe at them growing up. I wasn’t fond of the waxy, slightly bitter taste or the bland texture. My parents often put out a bowl of trail mix… I would always eat the M&M’s and dried fruits instead of the nuts. When I did force myself to eat a handful or two, I didn’t like how I felt afterwards… my stomach would sometimes feel heavy & aching. My head would hurt. My mouth sometimes felt funny and I often got tired & cranky.

I was told these guys were supposed to be healthy and a great source of energy for those who were active in sports!! Not so for me. I thought it was because I’m more of a “carb” person and couldn’t handle a lot of protein.

Fast forward to several years later, through research I learned that I was basically experiencing mild nut/seed allergies and that my body was telling me my digestive system was under a lot of stress trying to digest them.

Now, I can digest and throughly enjoy nuts with no problems! Allow me to share with you, as part of our 21 steps to a nourishing  diet series, what I learned about nuts & seeds and touch on three of the ten reasons why properly preparing them is vital.

KNOW YOUR NUTS AND SEEDS

Did you know that raw nuts and seeds have defense mechanisms made up of enzyme inhibitors, toxic substances (tannic acid & goitrogens) and phytic acid?

Yep, these natural components are there for their protection. Nature doesn’t want the seed to germinate prematurely or predators to consume them to the point where they become extinct. It is amazing how God designed nuts & seeds to have these defense mechanisms so they can continue to bring forth new plants for many, many years! Those natural components can be removed naturally only when there is enough moisture to sustain a new plant after the nut or seed germinates.

WHAT’S THE BIG DEAL ABOUT PHYTIC ACID, GOITROGENS & ENZYME INHIBITORS?

The biggest defense mechanism in nuts & seeds is the phytic acid. Every nut & seed have different levels of phytic acid with almonds, brazil nuts and sesame seeds having the highest percentage. When something that contains phytic acid is eaten, the acid binds itself to minerals like iron, magnesium, zinc, calcium, manganese and chromium in the gut, which prevents the digestive system’s ability to break the nut or seed or grain down properly (that’s why, often, when you eat nuts or seeds… you see undigested bits in your stool the very next day!).

If you struggle with anemia, low zinc levels, osteoporosis and other illness related to low mineral absorption… you should not be eating unsoaked nuts, especially walnuts, almonds & peanuts.

Recently, my grandfather was admitted into the hospital for extremely low hemoglobin. One habit my grandfather has, that I believe is one of the causes of his low hemoglobin & other health issues, is he eats several handfuls of raw/roasted nuts & seeds every day and has done so for years. He believes they are good sources of protein and energy, but they are really causing him more health issues and stealing away his lifespan & energy. For him and everyone else, soaking will help break down the phytic acid and increase the nutritional value without taking away vital nutrients needed for him to be healthy in his old age.

Even though phytic acid is the big, bad guy in nuts and seeds… goitrogens & enzyme inhibitors should not be overlooked either.

Goitrogens is are known to suppress the function of the thyroid gland by interfering with iodine uptake, which can cause a goiter (enlargement of the thyroid), slow down the thyroid, hypothyroidism and other autoimmune thread disorders. Soaking helps reduces goitrogens and actually increases the necessary minerals needed for a healthy thyroid!

Enzyme inhibitors neutralizes vital enzymes that your body naturally produces and can lead to many illnesses that results of an unhealthy, enzyme-depleted gut. Signs that your body is lacking enzymes are bloating, constipation, diarrhea, heartburn, irritable bowels and gas. A lack of just one enzyme in the body can lead to many problems and you will only live as long as your body has enzymes… which is why it is important to neutralize the enzyme inhibitors to keep them from decreasing your body of its natural enzymes. Soaking increases the natural enzymes within the nuts & seeds, helps provide greater absorption of the its’ nutrients and increases digestibility.

Basically, when you eat raw nuts or seeds or grains that have not be properly prepared… those “healthy” morsels are actually robbing you of vital minerals, vitamins and enzymes needed to sustain a healthy body!

I feel we should respect those defense mechanism by properly soaking nuts and seeds before consuming them.

How to soak nuts and seeds for better digestion

HOW TO PROPERLY PREPARE NUTS & SEEDS IN 3 SIMPLE STEPS

All you need to do is mimic nature’s germination system and give those nuts & seeds a good soak to deactivate the phytic acid, giotrogens and enzyme inhibitors!

You can make sure those natural components get properly minimized or eliminated by following these 3 simple steps:

1. Add your nuts/seeds to a glass jar or bowl and mix warm water & sea salt (make sure there’s enough water to cover the nuts completely). Soak them for the time required.

2. When done soaking, drain out the soak water and thoroughly rinse the nuts.

3. You can do one of two things: refrigerate the soaked nuts and consume within 24 hours OR dry in a dehydrator (or in oven set on the lowest temperature). Store in an airtight container.

Important note: The soak water should always be discarded and never used as water in a recipe or given to your animals.

HOW SOAKING WORKED FOR ME

Soaking & dehydrating nuts and seeds was one of the first things I learned to do after reading Nourishing Traditions and we decided to start up the path of preparing our food more traditionally to improve our overall health. I wanted to see if it would really make a difference and if I could tolerate nuts after being soaked & dehydrated. Honestly, I was a little skeptical.

It was my very first bite that won me over.

My first bite of an almond right out of the dehydrator was deliciously sweet & crunchy. I grabbed another and another and another and soon I was sitting at my kitchen table with a bowlful of warm, sweet, crunchy almonds. After indulging, I got nervous that I was going to have my usual reactions even though I normally start feeling them almost right away.

10 minutes passed… nothing.

20 minutes passed… felt great.

30 minutes passed… felt great and energetic.

An 1 hour passed and I still felt great! I was thrilled!

Of course, I ordered some walnuts and pecans to try next. These were my least favorite nuts, but after taking them through the 3 simple steps… I was won over by their wonderful buttery taste and crunchy texture. That is one of the many reasons why I am still faithfully soaking and dehydrating our nuts and seeds over 7 years later! It has become a normal routine where I would buy nuts & seeds in bulk once a month and follow my 3 simple steps. All that prep takes me less than 10 minutes!

I can say that it has made a difference to our overall health and my kids do not like to eat nuts or seeds that have not be properly prepared. They know the difference between raw & un-soaked nuts to raw & soaked nuts by their flavor, texture and how they feel after eating them. 

Think you are ready to take on the easy challenge of soaking your nuts and seeds?? Your gut will profusely thank you if you did!

Soaking Nuts & Seeds in 3 Simple Steps
 
Author:
Marillyn Beard
Print
 
All you need to do is mimic nature's germination system and give those nuts & seeds a good soak to deactivate the phytic acid, giotrogens and enzyme inhibitors!
Ingredients
  • Nuts and seeds of your choice
  • Warm water
  • Sea Salt (I use at least 1 Tbsp per 2 Lbs of nuts/seeds)
Instructions
  1. Add your nuts or seeds to a glass jar or bowl and mix in warm water & sea salt (make sure there's enough water to cover the nuts completely). Soak them for the time required.
  2. When done soaking, drain out the soak water and thoroughly rinse the nuts.
  3. You can do one of two things: refrigerate the soaked nuts and consume within 24 hours OR dry in a dehydrator (or in oven set on the lowest temperature). Store in an airtight container.
3.2.2208

10 RECIPES USING SOAKED NUTS & SEEDS

Cherries & Sunshine Trail Mix (grain-free)

Flourless Chocolate Almond Cookies (grain-free)

Honey Almond Dream w/ Blackberry Sauce

Spicy Ginger Snaps (grain-free)

 Grain-free Apple Elderberry Crumble Cake

 Almond Cookies (Made with whole, soaked and dehydrated almonds)

Almond Thumb Print Cookies 

Almond Orange Cookies 

Apple Cinnamon Nut Granola (Grain-free)

Lemon Curd Bars (Grain-free) 

references:

Nourishing Traditions by Sally Fallon

Food Enzymes for Health & Longevity by Dr. Edward Howell

http://www.whfoods.com/genpage.php?tname=george&dbid=250

http://www.westonaprice.org/food-features/living-with-phytic-acid

http://www.lef.org/protocols/prtcls-txt/t-prtcl-044.htm

http://science.howstuffworks.com/life/cellular-microscopic/cell2.htm

http://www.ajcn.org/content/47/2/270.full.pdf
Filed Under: Health, Nourishing Practices, Snacks Tagged With: Almond, Healthy Nuts, Nut, Nut And Seed, Phytic Acid, Soaking Nuts

Pumpkin Maple Baked Oatmeal

October 30, 2013 by Marillyn Beard 23 Comments

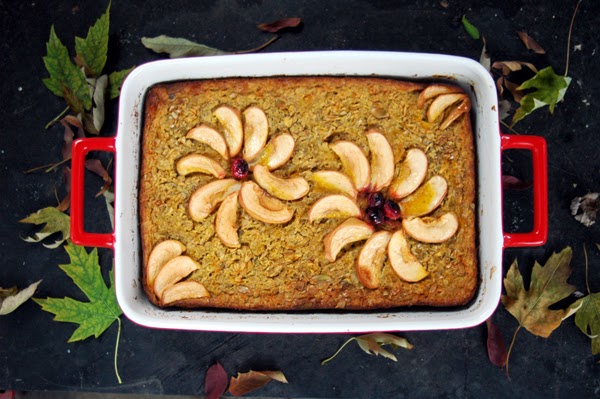
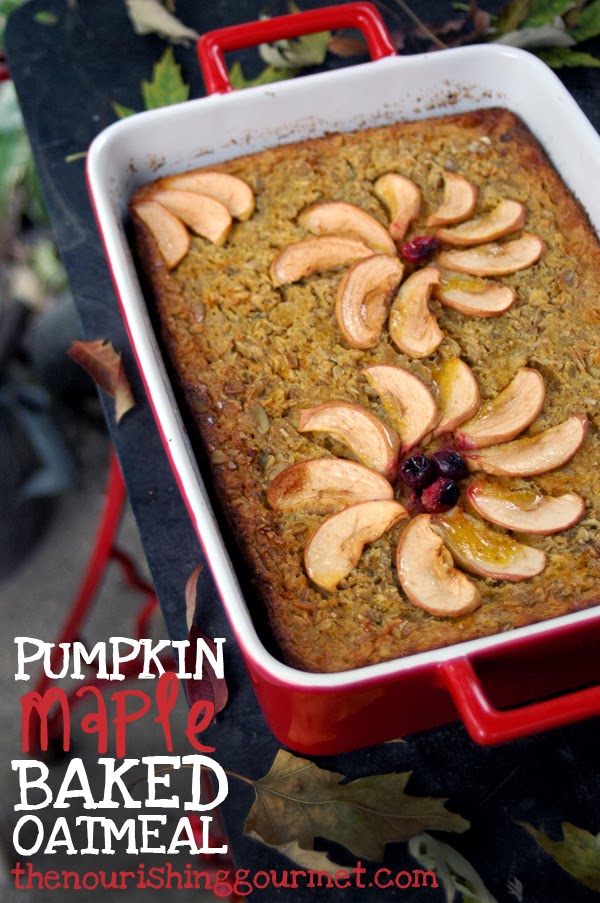
What about starting your day with a spiced pumpkin oatmeal bake, delicately laced with maple syrup and served warm? I don’t know about you, but that would help brace me for the upcoming day.

Breakfast is commonly a haste-driven affair of cold cereal, pre-bought baked goods, or frozen waffles. But breakfast can both treat your body – and your wallet – better. We like to enjoy soaked oatmeal, quinoa porridge, and  congee for breakfast, for example. I hosted an “Oatmeal Challenge” several years ago on this blog where my family ate oatmeal everyday for a week for breakfast to save us money!

I found that by starting our day with a very frugal food, we were able to save some needed money from our food budget. So for this week’s 52 tips for saving money on a healthy diet, consider your breakfast! When priced out, you just may be surprised at how well you can eat and how much you can save. And the following recipe is  yet another example of a delicious, nourishing breakfast. -Kimi 

My family loves a good baked oatmeal. It’s a frugal, hearty & nourishing way to start off our day… plus, the leftovers make great snacks, warm & cold. Baked oatmeal is awesome for making my mornings easy, especially on busy days or when I need a little extra sleep.

I typically like to prep it the night before and my hubby just pops it in the oven early in the morning (wondering how I plan ahead to accomplish that? Read my notes below in the recipe!). This is a great way for my husband to get the kids fed without needing to wake me up. Ahem, yeah, I’m not a morning person!  To make this a truly nourishing breakfast… I always soak the rolled oats for 12-24 hours and use nuts or seeds that have been soaked & dehydrated. With everything properly prepared, we can start off our day feeling good instead of feeling like bricks are sitting in our tummies.

I like to make baked oatmeal at least once a week and have created a variety of flavors. Our favorites right now are Spiced Cranberry Apple and Strawberry Pineapple. Now, we are adding Pumpkin Maple onto the list of favorites! The comforting combination of fresh pumpkin, maple syrup, pumpkin seeds & cinnamon truly reflect the flavors of Autumn. You will find this baked oatmeal lightly sweet with a kick of  cinnamon and vanilla along with a nice hint of pumpkin. …

Read More

Filed Under: $10 Main, 52 ways to save money on a healthy diet, Breakfast and Brunch, Gluten Free, Main Dishes, Vegetarian Tagged With: Breakfast and Brunch, Soaked Baked Good

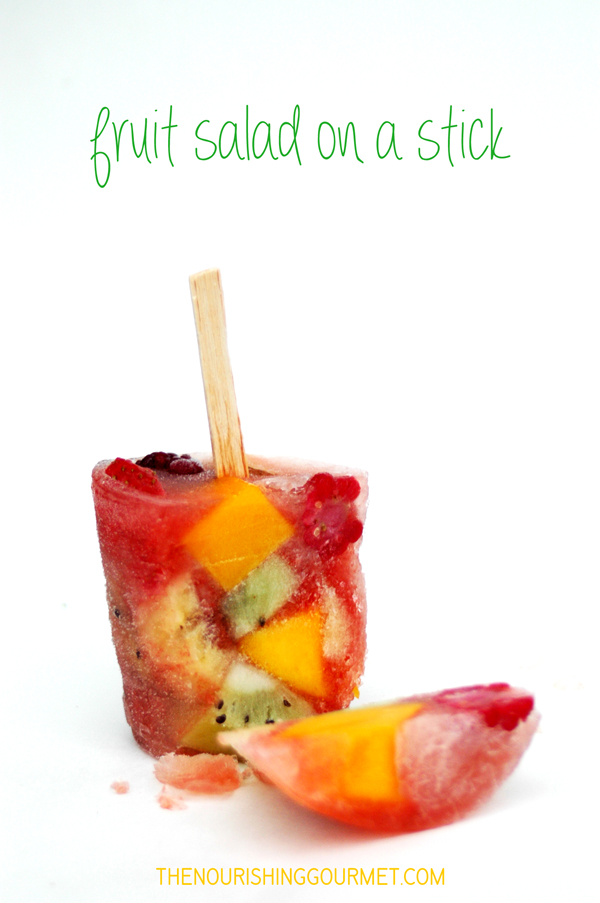
Paleta de Sandia y Frutas {fruit salad on a stick}

July 2, 2013 by Marillyn Beard Leave a Comment

With the 4th of July coming around the corner… are you looking for a fun, easy way to serve up a fruit salad?

How about serving it popsicle-style? Or should I say, paleta-style?

For those of you who are wondering, paleta is simply the spanish word for popsicle or to be more specific, it is a Latin American ice pop usually made from fresh fruit. The name comes from palo, or “stick”, and the diminutive ending -eta, referencing the little flat stick frozen into each item.

Walk into any paletería, you will find at least 50 different flavors of paletas… using natural ingredients and divided in two categories: cream-based and water-based. They are made from juices and often include bits of frozen fruit. Although most flavors are sweetened with cane sugar, some are not. It’s amazing.

Fortunately, we have a couple paleterías in Tegucigalpa. We love stopping by on our way home after a long day in the city, which is about once or twice a month. My favorite is the coconut and piña colada. I should try to make the piña colada myself at home one of these days… hmm.

Here I am going to share with you my version of paleta de sandia y frutas, using my homemade agua de sandia (lightly sweetened with honey). It is super easy to make and a fabulous way to use up all those juicy watermelons in season right now. Plus, in this case, it is perfect for making these paletas or you can simply freeze them in ice cube trays to use in smoothies later!

The fruit salad on a stick is best the Honduran way… in a small plastic cup with a wood stick because you can get more fruits in a cup then in a regular popsicle mold. You get to have little bit of everything and there is a wonderful mixture of tangy, sweet, creamy and chewy all in one paleta.

Enjoy and have a wonderful 4th of July!


Pelata de Sandia y Frutas {fruit salad on a stick}
 
Author:
Marillyn Beard
Print
 
Ingredients
  • small cups
  • wood sticks
  • diced fruits of your choice
  • Agua de Sandia
Instructions
  1. Put out the small cups on a plate or cookie sheet.
  2. Take flat pieces of fruit and stick your wood sticks into them (helps hold the sticks upright). Set inside the cups.
  3. Fill the cups with diced fruits (I used bananas, kiwi, strawberry, pineapple, blackberry, mango and coconut flakes).
  4. Pour agua de sandia into the cups and fill to the top (leave a little room for expansion). Put in the freezer.
  5. When frozen, run warm water over the cups to loosen and enjoy!!
3.2.1753

Marillyn Beard is a deaf missionary wife & mama living on a farm in Honduras with her wonderful husband and 4 beautiful kids. Together they are heading up a ministry called Rancho Oasis for Youth. Marillyn takes care of her family naturally by using herbs, homeopathy, essential oils and a wholesome diet. She loves to bake wholesome treats, whip up homemade ice cream, experiment with lacto-ferments, work in the garden and care for the farm animals with her family. Between washing diapers, cooking, and caring for her family she shares her interesting & noisy life at Just Making Noise.
Filed Under: Dairy Free, Desserts, Snacks, Uncategorized

How to Make Homemade Mayonnaise Simple & Nourishing

May 28, 2013 by Marillyn Beard 33 Comments

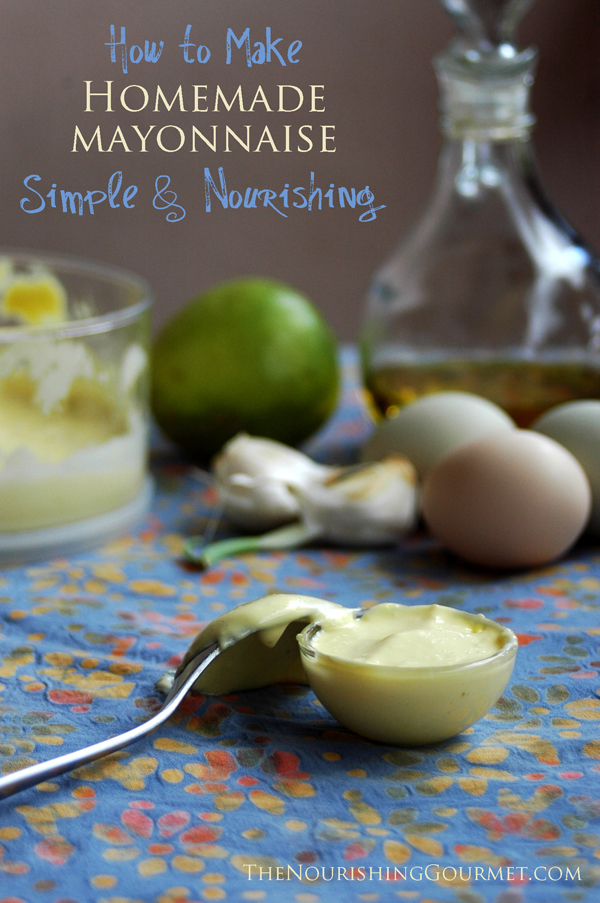
Homemade mayonnaise is so much better than store-bought mayo. Seriously.

Every time I make it, my family literally devours it and I basically become the mayo-police trying to make that jar of yummy, creamy mayo last more than a day!

We love drowning our salads, baked potatoes, sandwiches, tacos and much more with this creamy & nourishing condiment. All that yummy fat really makes everything taste so much better and did you know that mayo contains a superfood known to be a complete meal full of excellent protein, fats, vitamins & omega-3s?

You will find that homemade mayonnaise is pretty versatile in the many ways you can use it and within the recipe itself. You can change up the ingredients to suit your tastes. For example, I love adding in garlic and most will tell me that my version is really called aioli, but who says you can’t have fresh garlic in your mayonnaise and simply call it mayo?!

You can add in fresh herbs and spices. You can also play around with the fat to change up the flavors. I really like using a mixture of extra virgin olive oil and grapseed oil, but you can use regular olive oil (has a milder, buttery flavor), sesame oil, macadamia nut oil, coconut oil or any other other buttery flavored oil to that suits you.

Homemade mayo is so simple to whip up using only a handful of wholesome ingredients. Plus, you add in whey and lacto-ferment it to make it even more nourishing… is that possible? To make something nourishing even more nourishing?! Oh yeah!

Now, don’t waste any time and go make yourself some delicious homemade mayonnaise!
…

Read More

Filed Under: Dairy Free, Gluten Free, Nourishing Frugal Recipes

Primary Sidebar

Follow Me

  • Facebook
  • Instagram
  • Pinterest
  • RSS

Search

Please Read:

The information you find here at The Nourishing Gourmet is meant to help you become a better cook! This site is primarily for sharing family friendly recipes. It's not meant to give medical advice or to make any health claims on the prevention or curing of diseases.This site is only for informational and educational purposes. Please discuss with your own, qualified health care provider before adding in supplements or making any changes in your diet. Also, any links to sponsors or affiliates (including Amazon) may give me a percentage of the sale or a pay per click. Thank you for supporting this site.

Categories

  • $10 Main (43)
  • $5 Dishes (43)
  • 52 ways to save money on a healthy diet (53)
  • AIP (23)
  • Baked Goods (84)
  • Beverages (72)
  • Breakfast and Brunch (63)
  • Condiments (8)
  • Dairy Free (498)
  • Desserts (185)
  • Dietary Needs (6)
  • Egg Free (14)
  • Egg Free (92)
  • For the Kids (70)
  • For the Love of Food and Books (18)
  • Gluten Free (491)
  • Grain Free (98)
  • Health (75)
  • Kitchen Tools (5)
  • Main Dishes (128)
  • Nourishing Frugal Recipes (169)
  • Nourishing Frugal Tips (70)
  • Nourishing Practices (57)
  • Nutrient Dense Foods (70)
  • Q and A (16)
  • Salads (40)
  • Sides (104)
  • Snacks (126)
  • Soups (50)
  • The Healthy $1 Menu (21)
  • The Low Energy Guide to Healthy Cooking (20)
  • THM (5)
  • Trim Healthy Mama (5)
  • Uncategorized (848)
  • Vegan (243)
  • Vegetarian (363)

Recent Posts

  • Eating for Comfort and Sustenance
  • Perfect Instant Pot Black and Brown Rice
  • What Worked and What Didn’t in My Cooking Life Last Year
  • Mocha Dark Chocolate Bombs (low sugar)
  • Gingerbread Caramel Corn
  • Thyme and Garlic Potato Stacks
  • The Great Big Holiday Salad
  • 30 Favorite Kitchen Stocking Stuffers
  • Luxurious DIY Lip Balm
  • Spicy Korean Beef and Cabbage

Recent Comments

  • June on One-Pot Gluten-Free Mac and Cheese
  • Kim on Eating for Comfort and Sustenance
  • Michelle Sanders on Chile-Spiked Dark Chocolate Bark with Pepitas & Mango (Dairy Free)
  • KimiHarris on Eating for Comfort and Sustenance
  • KimiHarris on Eating for Comfort and Sustenance

Fresh: Nourishing Salads for All Seasons

Footer

Privacy

Copyright © 2026 · Foodie Pro & The Genesis Framework