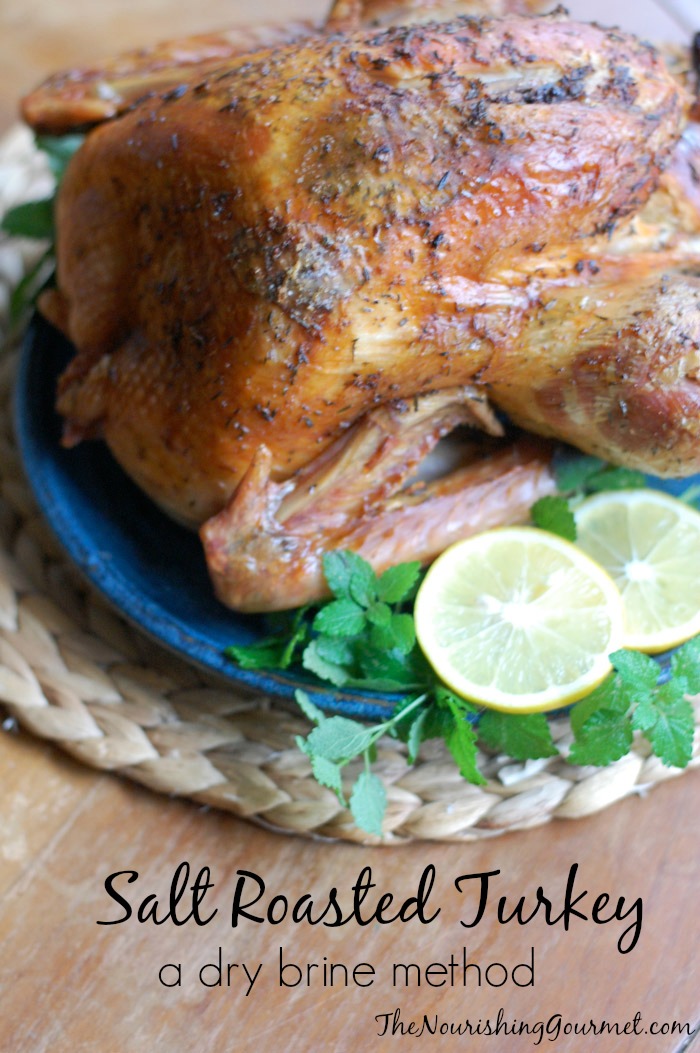
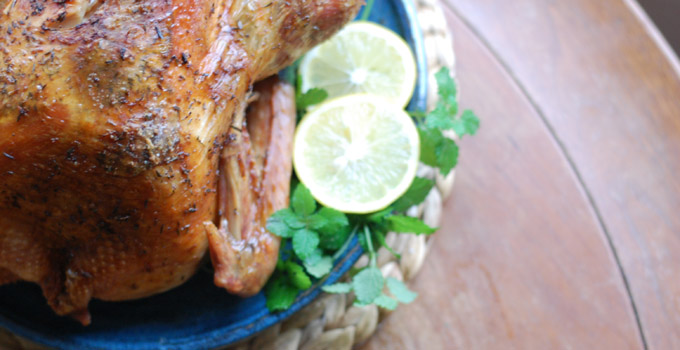
Salt roasted turkey is also sometimes called “dry-brining, ” and it gives you moist turkey meat and crisp skin and beautiful flavor. Plus, I love that this method is so simple!
You will mix kosher salt with dried herbs, lemon and orange zest, and garlic and gently massage into the turkey. Left to saturate overnight, the turkey ends up being well flavored as well as moist, and the turkey skin is browned nicely and crisp. What more can you ask for?
Wet Brine Vs. Dry Brine
The first turkey I made that I felt was a big success was a wet brine. It was plump, flavorful, and was finally a turkey that didn’t dry out. The biggest disadvantages we saw were the following.
1: It’s a bit of a pain to do, and you either need a giant stock pot or a brining bag.
2: The skin doesn’t get as browned and crisp as other methods because it never drys out as much.
3: It does dilute the turkey flavor. Harsher critics of the method say it waters it down. I still like wet brining turkeys, but I have to say that dry brining may be my new favorite.
Benefits of dry brining
1. Dry brining will give you beautiful turkey skin that is very delicious.
2. It’s incredibly easy to do, and you don’t need a brining bag.
3. While wet brining can dilute, dry brining concentrates flavors.
4. Dry brining creates its own brine as it draws moisture out of the bird, which the salt then melts into, and then the salty brine reabsorbs into the turkey.
A Couple More Thoughts on Dry brining
Be aware that this is a well-salted bird. We dislike meats that are under-salted, so this was a wonderful method for us. However, if you like dishes barely or lightly salted, this isn’t the method for you. A few people will rinse the turkey before cooking to cut down on saltiness, but this will make your turkey skin wet, cut down on the flavor a bit, and isn’t considered a safe practice unless you sterilize well afterward.
Dry Brining Method
- Start with a fresh turkey, not a frozen and defrosted one (most frozen turkey’s have already been injected with a salty mixture)
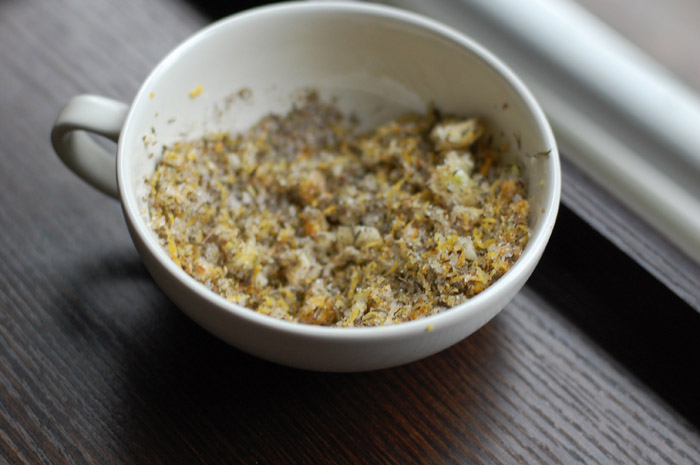
- Mix kosher salt with whatever extra flavors you’d like – dried or fresh herbs, citrus zest, garlic.
- Rub all over turkey (back and front) and sprinkle in the turkey cavity.
- Cover, and refrigerate for 12-18 hours. Uncover for the last couple of hours to allow the skin to start drying out for extra crispy skin.
- Stuff turkey, and baste with melted butter or avocado oil.
- Roast according to directions, and serve!
Things you’ll need:
- You can use regular kosher salt, but I used and recommend this unrefined kosher salt that hasn’t been bleached or processed but still has the natural minerals in it.
- I got a great stainless steel turkey pan from Ikea a couple of years ago. If you aren’t ready to fork over a couple hundred, there are more frugal ones to be had.
- A meat thermometer
- A zester or fine grater
I picked out the smallest turkey I could find (about 10 ½ pounds) for the above picture (I was just making it for our small family). The dry brine works for 10-13 pound turkey. (For a ten pounder, you don’t have to use quite all of the salt mixture) For a 14- 15 pound turkey, use a 1/3 a cup of kosher salt and heaping measurements of flavor proponents. For a twenty pound turkey, double the mixture.
Salt Roasted Turkey with Herbs and Garlic
Dry Brine Recipe
Take note that you can widely change this recipe up as long as you keep the salt the same. The salt will permeate furthest, the herbs and garlic will flavor just the skin and first layer of the meat.
Ingredients:
- ¼ cup kosher salt
- 2 teaspoons each of dried thyme and oregano (or 2 tablespoons each of fresh)
- 3-5 garlic cloves, peeled and pressed through a garlic press of finely minced
- Zest from 1 large lemon
- Zest from 1 large orange
Other possible additions or substitutions: ground pepper (not AIP), rubbed sage, basil, rosemary
Directions:
- Mix in a small bowl. Save lemon and orange for stuffing the turkey.
Preparing the Turkey.
Ingredient:
1 10-14 pound fresh turkey (I used organic, a free range organic would be even better), Notice notes above and below for bigger turkeys
Directions:
- Remove any gizzards and the neck bone (check both sides of the turkey). Set aside for broth making (or put in the freezer for later use). Remove metal or plastic insert that holds turkey legs. Pat dry with paper towels.
- Sprinkle about two tablespoons of the salt mixture inside the turkey cavity, and then rub the rest of the mixture on the turkey, front and back (you can also gently push some under the skin of the turkey).
- Place turkey on rimmed baking sheet or roasting pan and cover with plastic wrap. Or place in a brining bag and place on sheet.
- Refrigerate for 12-18 hours. Remove plastic wrap or brining bag for the last couple of hours to dry out skin, if desired.
Preparing Turkey To Roast
(Simply double all of the below ingredients if using a large turkey)
Ingredients:
- ¼ -1/2 cup of melted butter or avocado oil
- 1 large onion, peeled and thinly sliced
- The lemon and orange leftover from the dry brine
- 3 cups of water
Directions:
- Place oven rack at lowest position and pre-heat the oven to 425F.
- If not already, place turkey, breast side up, in middle of roasting pan on roasting rack. Slice the leftover orange and lemon, and stuff them, along with the sliced onion, into the turkey.
- Gently tie legs together (confession – I couldn’t find my kitchen twine when I was testing this recipe, and it still turned out okay) by crossing the legs and then tying. Drizzle liberally with melted butter or avocado oil. Pour water underneath the roasting rack in the turkey pan.
- Place in oven and cook for 20 minutes. Turn down heat to 325F and cook until a meat thermometer gets to 165F when stuck in the thickest part of the turkey thigh and the juices run clear. You may want to turn the turkey pan around half way through the cooking time. (Basting unnecessary) . Cover with foil if the skin is getting too dark.
- Approximate total cooking time: 8-12 pounds, 2 ¾ -3 hours; 12-14 pounds – 3 to 3 ¾ hours; 14 -18 pounds, 3 ¾ to 4 ¼; 18-20 pounds, 4 ¼ – 4 ½ hours; 20-24 pounds, 4 ½ -5 hours.
- Remove from oven and cover loosely with foil to keep warm, and let rest for about 15-30 minutes. (This gives you time to make the gravy). Carve and serve.
P.S. I’m planning on walking you through making a gravy with the drippings, but in case I don’t get to it, you need to dilute the drippings significantly as they will be very salty before turning it into gravy.
Some links may be affiliate links. I may earn a small commission on items purchased through my links.
Latest posts by KimiHarris (see all)
- 2 Ingredient Peppermint Bark - December 21, 2022
- Herbal Hibiscus Lemonade (Keto, THM) - March 16, 2022
- Creamy Curry Red Lentil Soup - December 8, 2021
Three questions: 1) You don’t say that you rinse the bird first , and yet that’s always been something I thought was necessary to do. Was that an oversight, or do you have a reason for leaving it out? 2) You wrote, “Gently tie legs together (confession – I couldn’t find mine when I was testing this recipe, and it still turned out okay) by crossing the legs and then tying.” What couldn’t you find? Surely not the legs! 3) Finally, I always roast my bird upside down to keep the breast meat from drying out while the darker meat continues to cook, but roasting it rightside up makes such a prettier presentation. Does this method really render the breast meat tender? I’d like to try this, but I’m keen to hear back from you about these things first.
Good questions!
First, I don’t rinse the bird because it reduces risk of food poisoning, and truthfully I’ve never been able to tell the difference when I did. You certainly could though.
Secondly, I’m laughing a little here, because I wrote that so awkwardly. I couldn’t find the TWINE, and thus didn’t tie the legs together. 😉
Third – I actually roast my chicken breast down and it DOES keep it more moist. I keep considering trying it with the turkey, but haven’t so far so it’s great to hear that it works for you! I keep roasting it breast side up because of presentation, as you mentioned. I do find that wet brining and dry brining helps keep the breast moist. However, breast side down will always, in my mind, be the safest way to ensure moist breast meat. That said, my family likes to eat their breast meat with crispy skin, and turning it breast side up ensures perfect skin over the breast.
The USDA recommends to cook stuffing in a casserole. stuffing the turkey can lead to food poisoning.
That was one reason why I didn’t stuff this turkey. The other being that I wanted to keep this recipe simple. 🙂
🙂
Fabulous! Will try dry brine instead of our usual wet brine method, this year. Thanks, Kim. I, too, love a crispy skin! If you don’t need a perfect-presentation- bird (carve it in kitchen instead then bring to table) try spatchcocking. Cut the backbone out and flatten bird, push hard to crack breast bone (I stand on a little stool for leverage). Bones down, on a celery/carrot/onion-lined backing sheet. Legs turned out and wings tucked under the breasts. Brush with butter and oil. 450 degree pre-heated oven. Bird cooks in about 60-80 minutes…yep… just oven an hour, depending on size. Huuuuge time saver on a busy-oven-day! One more blessing to count on Thanksgiving day!
Love it! That sounds wonderful. Thanks for sharing!
THANK YOU, I have a huge bird and was thinking of cutting in half but didn’t know quite how it would translate. Thank you… love the idea of saving $$ on electric too.
And thank you Kimi for that recipe… I’m also using your salt rub recipe. I’ve done salt rubs on chicken and they usually turn out fantastic!! So glad you posted this!
The photos look fantastic! I’m keen to try this recipe for Thanksgiving but am a little concerned my family may find it to be too salty (I LOVE salt, so not an issue for me!) Any thoughts on how salty this really is? What would happen if the salt was reduced?
Hey Hope!
So in my family of five (three of them kids), I was the only one who even questioned the saltiness. Everyone else thought it was perfect. The amount of salt used in the recipe above is consistent with other dry brined turkeys, so if you cut down too much on it, it may not “brine” it very well. However, you could be a little scant on the salt AND cut down on the amount of time between putting on the salt and placing it in the oven.
Do you think this would work with a roasting bag? I always use them to cut down on roasting time, and because that’s the way my mother baked her turkey.
Paula,
I’ve never used a roasting bag, but I see no reason why you couldn’t. 🙂
We maintain a kosher home. That means our turkey will have been soaked and salted when we buy it. Would this dry brine result in our turkey being too salted?
I would definitely be concerned that it would end up too salty. At the very least, you could cut down on how long it was brined, if you decided to try it.
Thank you very much for this recipe. I will try it out this year : ) I was wondering what was your recipe for your AIP gravy. I’m a turkey newbie ; )
I too am AIP . I too would really like your AIP gravy recipe.
Thank you for this recipe i am going to try the dry brine first because it sounds easier and second my daughter is cooking it in some special pot of water so it will be inside a bag . I’m glad to learn about the water brining and the taste reduction so I would not want to do anything more with water.
Our turkey is frozen but totally organic and vegetable fed .
Do you have a thawing methot you can recommend