Recipe Sponsored by: Organic Gemini
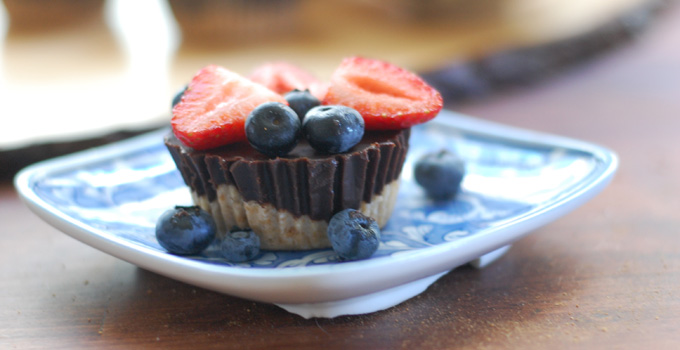
This chocolate tart has a cookie-like crust with a rich coconut oil based chocolate filling, and is served with fresh berries. It’s oh so delicious! Plus, this vegan and paleo friendly tart is dairy free, gluten free, grain free, egg free, and nut free!
This is the type of dessert I feel great about sharing with my family and friends. I also like that this recipe is very simple to throw together. It’s made with all natural and healthy ingredients, and it’s deeply satisfying. Plus, it’s made with a special and ancient ingredient – tigernut flour!
Intriguing history of tigernuts
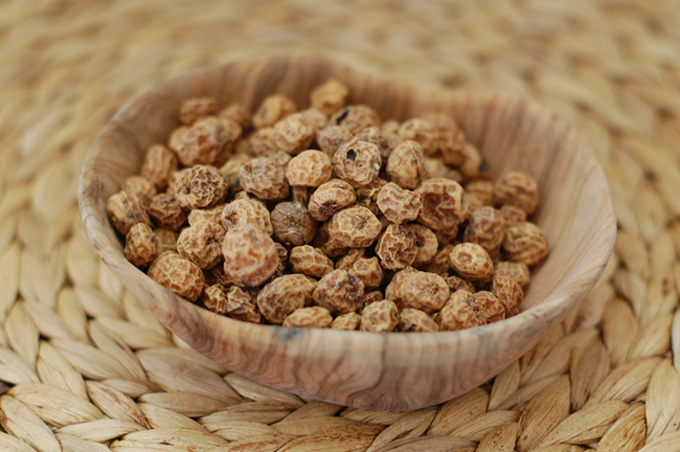
As longtime readers know, I’m a fan of traditional foods. So I was curious when I heard about tigernuts from some of my friends. (They are also called earth almonds and yellow nutsedges.) Tigernuts aren’t actually nuts, but a tuber. And here’s the interesting thing – they are thought to have been a mainstay in many ancient diets. They are native to much of the Western hemisphere and found in many other regions as well. Traces of tigernuts have been found on prehistoric tools, and are believed to have been an important source of food for a wide variety of ancient people groups. (1) This includes ancient Egypt, where they were used in a wide range of recipes and even buried in tombs. For example, a recipe for a sort of tiger nut sweet “ball” was found on an ancient piece of pottery in Egypt, where tigernuts were combined with dates, honey and spices. (2) Sounds lovely to me!
This widely spread plant is now often regarded as just a hardy weed – showing how often we disregard the natural bounty of the earth in favor of hard to grow crops. But these tigernuts deserve a comeback because not only do they grow really well all over the world, but they are delicious!
Nutritional value of tigernuts
Tigernuts are a good source fiber, carbohydrates, and minerals such as potassium and phosophorus, and vitamins such as E and C. Even more interesting to me is that tigernuts are very high in resistant starch. There has been a lot of attention on resistant starch in the last couple of years because of the possible health benefits. This article over at Chris Kresser is a helpful introduction to the topic and the research suggesting wide positive ramifications for diets high in resistant starch. All to say, my ears perked up when I learned about tigernuts being a good source of resistant starch.
How to enjoy tigernuts
While tigernuts can be enjoyed fresh, the easiest option is to get them dried (they make a great snack!). You can also rehydrate them so that they are softer OR you can use tigernut flour. Tigernut flour is surprisingly versatile, as shown in the tigernut tart crust. We also made tigernut cookies recently that were delicious!
We used tigernut flour from the sponsor of this post Organic Gemini. They also produce amazing tigernut horchata (I like the coffee and strawberry flavors the best) and tigernut oil which is a very cool ancient oil that also deserves to be brought back.
And I think this recipe shows that you don’t have to be a caveman to enjoy this lovely ancient tuber.
Notes on recipe:
- If you want smaller mini tarts, why not make 12 tarts in a mini muffin pan?
- An alternative crust idea would be using half the crust on this large chocolate tart.
- Instead of serving with fresh berries, try this honey sweetened raspberry sauce.
- You can get Organic Gemini tigernut flour here via my partner Amazon as well.
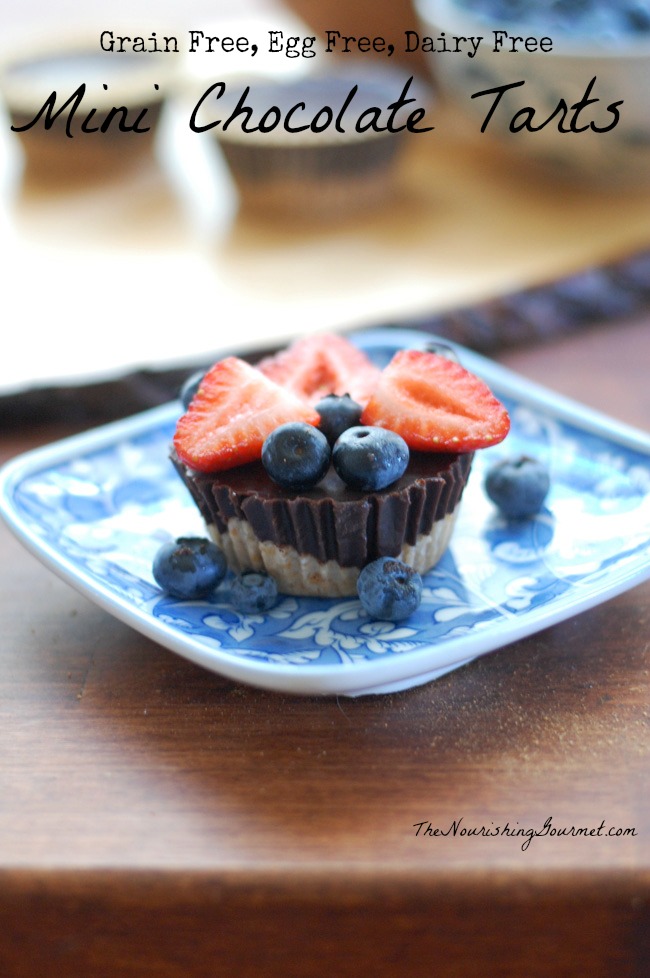
Mini Grain Free Chocolate Tarts
Crust:
- ½ cup tigernut flour
- ½ cup tapioca starch (sometimes called tapioca flour)
- ¼ teaspoon salt
- 3 tablespoons of unrefined sugar (I used coconut sugar)
- 1/4 cup coconut oil, gently melted
Filling:
- ½ cup of coconut oil, gently melted over low heat
- ½ cup of pure maple syrup
- ½ cup cocoa powder (fair trade and organic recommended)
- 1 teaspoon vanilla extract
- 1 pint of berries for serving
1. Preheat the oven to 350F. Mix the flour, tapioca starch, salt, and sugar together in a small bowl. Pour over the melted coconut oil, and mix together with a fork. Add small amounts of water to the mixture just until the dough is wet enough that it sticks together when you squeeze a ball of it in your palm (1 to 3 tablespoons.)
2. Divide into 6 even balls. Line a muffin pan with muffin tin liners. Press each ball evenly into the bottom of the muffin tin liner. This will be your crust. Put in the oven and cook for 10-12 minutes, or until the crust is cooked through.
3. Remove from oven and cool.
4. Whisk the filling ingredients together well (if the maple syrup causes the coconut oil to re-harden, simply reheat over low heat in a small pan until liquefied). Pour the filling evenly over the crusts.
5. Refrigerate for at least an hour, or until the filling is completely firm.
6. Serve with fresh berries of choice. I prefer to serve these with the muffin tin liners removed. Don’t leave out at room temperature, as the filling could start to soften too much in a warm room.

- Crust:
- ½ cup tigernut flour
- ½ cup tapioca starch (sometimes called tapioca flour)
- ¼ teaspoon salt
- 3 tablespoons of unrefined sugar (I used coconut sugar)
- ¼ cup melted coconut oil
- Filling:
- ½ cup of coconut oil, gently melted over low heat
- ½ cup of pure maple syrup
- ½ cup cocoa powder (fair trade and organic recommended)
- 1 teaspoon vanilla extract
- 1 pint of berries for serving
- Preheat the oven to 350F. Mix the flour, tapioca starch, salt, and sugar together in a small bowl. Pour over the melted coconut oil, and mix together with a fork. Add small amounts of water to the mixture just until the dough is wet enough that it sticks together when you squeeze a ball of it in your palm (1 to 3 tablespoons.)
- Divide into 6 even balls. Line a muffin pan with muffin liners (6). Press each ball evenly into the bottom of the muffin tin liner. This will be your crust. Put in the oven and cook for 10-12 minutes, or until the crust is cooked through.
- Remove from oven and cool.
- Whisk the filling ingredients together well (if the maple syrup causes the coconut oil to re-harden, simply reheat over low heat in a small pan until liquefied). Pour the filling evenly over the crusts.
- Refrigerate for at least an hour, or until the filling is completely firm.
- Serve with fresh berries of choice. I prefer to serve these with the muffin tin liners removed. Don’t leave out at room temperature, as the filling could start to soften to much in a warm room.
This post was a sponsored post. All opinions were mine, and some links may be affiliate links. As part of sponsorship I may have received free products to try out. Thanks for supporting my blog!
Latest posts by KimiHarris (see all)
- 2 Ingredient Peppermint Bark - December 21, 2022
- Herbal Hibiscus Lemonade (Keto, THM) - March 16, 2022
- Creamy Curry Red Lentil Soup - December 8, 2021
This sounds delicious! I was wondering as I read through the instructions, if there is supposed to be coconut oil listed as an ingredient in the crust as well as in the filling? If so, how much melted oil in the crust? Thanks!
Thanks for catching that omission! Not sure how that happened. I’ve corrected it above, but it’s 1/4 cup of gently melted coconut oil. 🙂