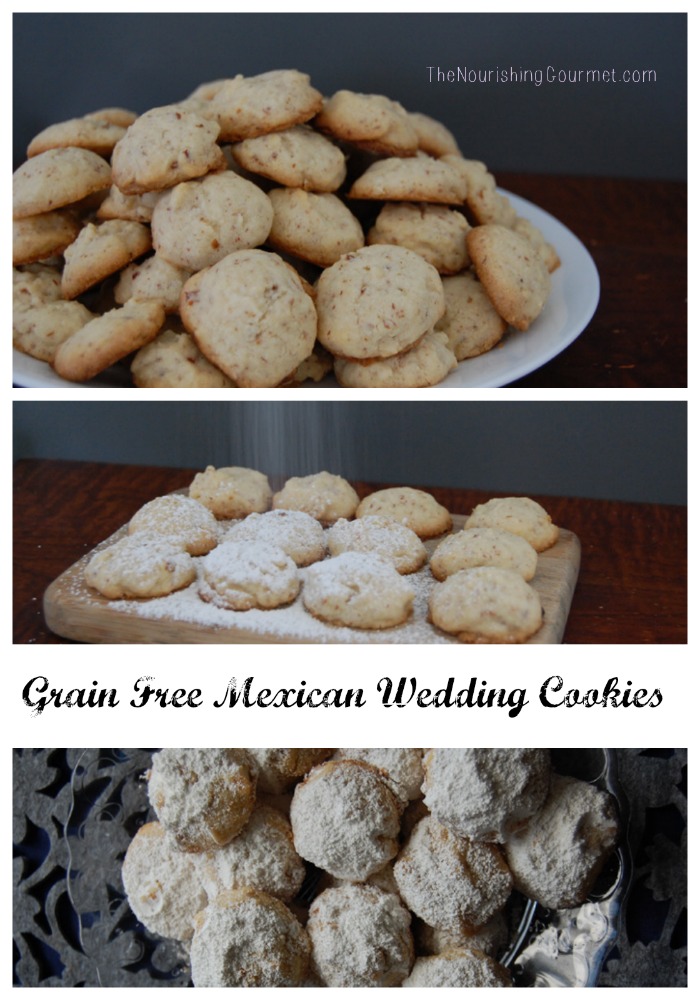
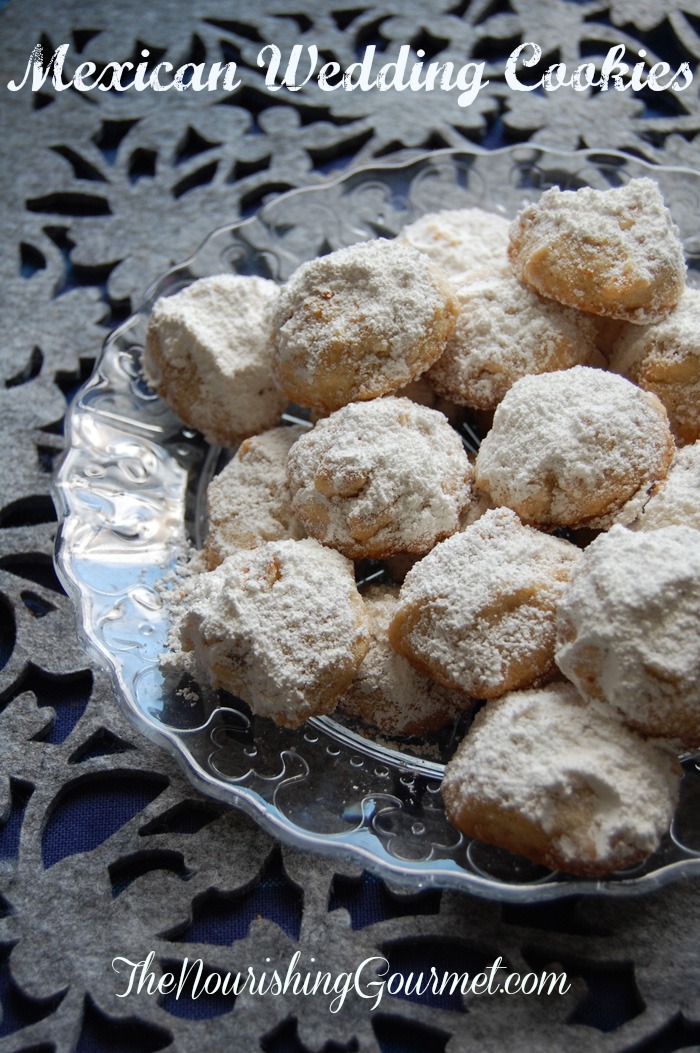
These cookies should come with a warning: Utterly addictive. Be forewarned. They are everything that I love about Mexican Wedding cookies – nutty, buttery, lightly sweet, with a melt-in-your-mouth texture. They also happen to be grain and gluten-free.
(These cookies are also commonly called Mexican Wedding Cakes or Russian Tea Cakes.)
If I was just going to make one cookie recipe a year, this one would be it. Mexican wedding cookies and I go way back. They are a deeply impended favorite, so I am thrilled that I finally have an allergy-friendly version to enjoy for a special treat!
We made these for our daughter’s “Frozen” themed birthday party – we went with a snowy theme, and “snowball cookies” fit into that well, and looked lovely on the table with the décor. But truthfully, I would eat these if they looked like reindeer poo’ because they simply have such a wonderful flavor!
I used just two flours in this recipe – almond and tapioca flour. I’ve been noticing many, many paleo-ish recipes using this combination, and so have started experimenting with it myself. It really works well in this recipe! I’m excited to continue to experiment with other recipes with this flour combination.
(Amazon links below are affiliate)
I adapted this recipe from The Joy of Cooking. I continue to be amazed that often I get better results adapting from old gluten-filled recipes, then when starting with a gluten-free recipe.
I use a very finely ground almond flour (like this one). I am not sure how they would turn out using a more coarsely ground flour. I also choose to go ahead and use organic powdered sugar for this recipe. Because I was making these for a crowd of friends, I wanted the flavor to be very similar to traditional Mexican Wedding Cookies. However, I think that they could be very delicious with coconut sugar! Coconut sugar tends to add a caramel undertone to baked goods that I actually like; it’s just not quite as delicate. You can also powder coconut sugar for a more delicate texture (and even add a little arrowroot powder to it to mimic store-bought powdered sugar). Regardless, one of the aspects I love about these cookies is that they aren’t very high in sugar.
I choose to use chopped almonds in place of the more traditional chopped pecans simply because I was making a double batch, and it was so much cheaper. However, they tasted just perfect! So use whatever nut you prefer.
I did use a food processor in this recipe, and made the cookies small (they will hold together the best this way – and they seemed very much like regular cookies!).
- 1 cup of coarsely chopped almonds (or pecans or walnuts)
- ½ pound (2 sticks) room temperature butter (I recommend organic and/or pastured butter)
- ¼ teaspoon salt
- ½ cup organic powdered sugar (see notes above)
- 2 teaspoons gluten-free vanilla extract
- 1¼ cup tapioca flour
- 1 cup finely ground almond flour
- Extra powdered sugar for dusting, as desired
- Preheat the oven to 350F degrees. On a large sheet pan, place the chopped nuts, and toast, stirring occasionally, for about 5-8 minutes, or just until you start to smell their aroma released. Set aside to cool, and turn off oven. Once cool, grind further in the food processor (you want fairly fine bits, not chunks). Don't over-process and make it oily or powdery.
- Dump out into a small bowl and set aside.
- Now place the butter, salt, ½ cup powdered sugar, and vanilla extract into the food processor and process (scrapping down the sides as needed) until smooth and fluffy. Add the nuts back in and process until combined. Now add the two flours. and process once more. If you have a small food processor that can't handle all of the ingredients, simply scrap out the butter/sugar mixture into a bowl, and hand mix the flours into it.
- Now place in the refrigerator for 30 minutes at least, or until the dough has firmed up enough to be able to roll into balls (You may find it necessary to leave for up to 2 hours, depending on how cold your refrigerator is).
- Once ready, preheat the oven again to 350F, and use a teaspoon to scoop out batter and roll lightly into balls, and place on a parchment covered sheet about 1-inch apart (there will be some spreading). Baking one sheet at a time (placing dough back into the fridge between batches), bake for about 10-12 minutes, or until the edges are just starting to brown.
- Remove from oven and allow to cool on sheet for about ten minutes to firm before removing to cool rack. Repeat rolling/baking/cooling process until all of the cookies are cooked.
- Using a sieve, lightly dust the cookies with powdered sugar, if desired, for that snowy sweet look.
Latest posts by KimiHarris (see all)
- 2 Ingredient Peppermint Bark - December 21, 2022
- Herbal Hibiscus Lemonade (Keto, THM) - March 16, 2022
- Creamy Curry Red Lentil Soup - December 8, 2021
I think I love you! 😉
Hehe!
These look awesome!!! A version of these is called ‘vanilkove rohlicky’ in Czech (my husband’s nationality) and they are his favorite cookie. Roughly transalated it means ‘vanilla half moons’. I’ve been making a GL version that passed the test but I think this one will be even better. I sure hope I can make them into moons.. otherwise it won’t be the same! Thank you so much for the recipe!!
Magda,
I *think* they should work fine as half moons – just make sure you get the dough firm enough to work with by refrigerating, and know that they will spread some when cooking too. 🙂 Thanks for sharing about “vanilkove rohlicky”! That’s so fun.
I’m wondering, whenever I’ve made GF cookies, they don’t crisp or have a crunch. Typically Mexican Wedding Cake cookies have a crisp or flakiness to them… do these? Curious.
Kathy,
These definitely had the typical melt-in-your-mouth texture that you’d expect from regular Mexican Wedding Cookies. It seemed like some of our guests who are not on a GF diet didn’t even know the difference – even those who had long loved Mexican Wedding Cookies. 🙂 The one difference is that they spread a little more when cooking.
I love you …….that is all <3
These did not turn out well for me. I followed the recipe, but they turned out really flat. They tasted fine, but didn’t have the right shape or texture. Can’t figure out what I did wrong. Only thing I can think of is that the pecans were chopped pretty fine rather than rough chopped. Blame my 4-year-old’s over zealous food processor pulsing.
Betsy,
Oh, so sorry! I made the recipe several times before posting, just to double check amounts, etc. but even with that, I’ve found that some grain free recipes are just finicky. What almond flour did you use? That could also make a difference. I use a brand that take out the almond hull and then makes is very very fine. You will notice in mine, that they do flatten out a bit. So that will always happen. Two things you could also try – you could use more of the starch, in place of some of the almond flour. You can also cook for longer, as they tend to get crisper and flaker if *almost* over cooked. And a third thing you could try, is making sure you leave the dough in the refrigerator for a a good while, so that the dough isn’t soft at all when it goes into the oven.
Tried it, loved, HIGHLY recommend it. Made it with pecans and a mix of cornstarch and arrowroot – what we had on hand, and wow! Peaking it with frangelico. A match made in heaven!
These turned out really well! People had no idea they were gluten-free, which is always awesome. They flattened a bit so maybe I needed a little extra flour. I used arrowroot instead of tapioca, which also could’ve contributed, but the taste was amazing. Next time I’m going to try the powdered coconut sugar idea. Thanks so much!
I also made these and they did not rise and I followed the recipe to a T. these we so flat they were too thin to eat:(
I just made these exactly as the recipe said and they turned out amazing. They spread a little, but they were cold so they still had a nice thickness. They are flaky and delicate. I look forward to seeing how they store over the next day or two, but tonight we sure are enjoying them!