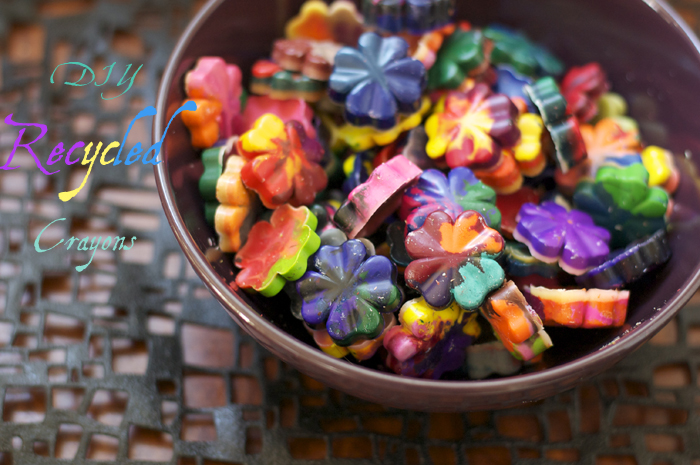
Today I am going to share another “non-food” recipe, that goes with our “Back to School” spirit we’ve been in lately. These last few weeks have been consumed with finding our rhythm with our school schedule, my husband’s work, and my writing work. But this week we took out some time to take care of a bag full of broken crayons that I somehow had collected the last 4 years. I was amazed at how many we had! I didn’t want to throw them away, so I kept the bag, but the girls didn’t really like to use the little bits and pieces left. I saw very expensive “recycled crayons” at the store, and thought, “We could do that!” The crayons were swirled with different colors, which made them fun too.
I felt ours were a big success! We love how they turned out, and they are going to be part of the party favors for my little girl’s b-day party.
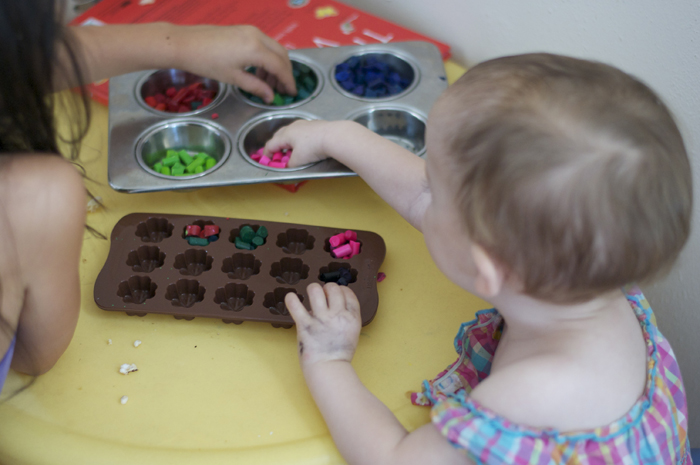
After reading different people’s methods, I decided to simplify the process as much as possible. I choose to cut up the crayons, and let my girls put them into an ovenproof mold. Then all I had to do was melt in the oven, cool, remove the new crayons and start the process over again. Some people use muffin tins for the mold, however, there are complaints that the regular size muffin tins make the crayons too large for little hands. I used a silicone Chocolate Flower Mold from Amazon, which I also plan on using for chocolate and homemade candies. A mini muffin pan could work too, I am sure. The other method would be to melt the crayons in a double boiler made out of a tin can, and then pour into chocolate molds.

My girls had so much fun making these, and I was glad that we didn’t waste all of those crayon parts.

Recycled crayons
What you need:
Crayons, peeled of all paper (we did this while watching a movie!)
Ovenproof Mold
- Preheat oven to 350F.
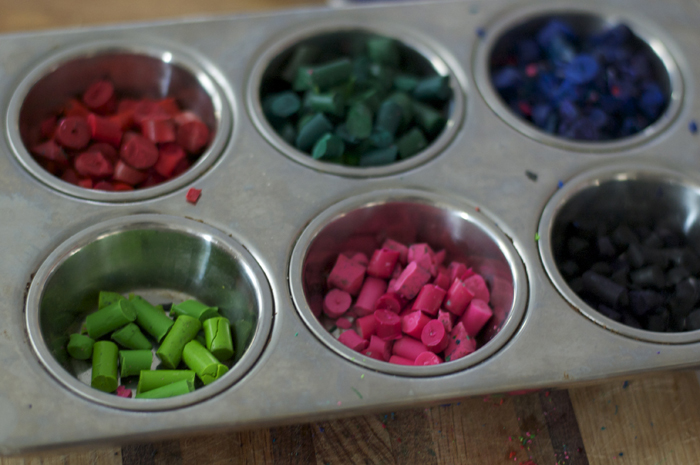
- Chop crayons into small pieces with a sharp knife. I put all of my pieces into muffin tins to keep the colors separate.
- Fill mold with crayon pieces.
- Place in oven to melt (about 5-7) minutes. Take out as soon as all of the crayon pieces are melted, otherwise they could burn.
- Let cool. (After they are cool to the touch, I place in the freezer for about 10 minutes to speed up the process). Remove and repeat as desired!
Latest posts by KimiHarris (see all)
- 2 Ingredient Peppermint Bark - December 21, 2022
- Herbal Hibiscus Lemonade (Keto, THM) - March 16, 2022
- Creamy Curry Red Lentil Soup - December 8, 2021

Kimi, I love this post! I love your food posts, but I really enjoy your DIY and life posts. What program do you use to write on your photos? Cute kids and cute crayons!
Are you concerned about using the mold for food after melting crayons in it?
Thanks Archer@ You are so sweet. 🙂
The crayons slip out easily, but if there was anything left, it rinses off with hot water. I am truthfully not sure of what I think about silicone itself, but decided it seemed much safer than plastic. 🙂
I use silcone molds all the time… they work great.. Also great for making chalk in..love to see what others come up with
They turned out so cute! These would make a great party favor. Thanks.
I love that you’re going to do a party favor with the flower ones! Fantastic idea! That makes me want to figure out a boy version for my son’s bday. Thanks!
You can buy candy molds that are shaped like Legos.
Perfect… thanks!
How cute! What a great idea. Thanks!
Those are beautiful, what a fun activity for littles!
So cute, I have looked for the same mold and can’t seem to find it, do you remember where you got it?
Adorable! I just made recycled crayons and used them for my son’s birthday favors! He’s a train man, so I found a train mold, but unfortunately it couldn’t go into the oven, so I melted the crayons in cupcake liners in the toaster oven, poured them into the mold, cooled them, and popped out awesome crayons. I also used the mold for candy after crayon making; the mold can’t go into the dishwasher, so I washed it REALLY well…several times…and felt ok about the candies. I also made a train coloring book to go with the crayons for the favor bags.
That is such a great idea!
I work with kids and I’m sure they would love it too!
Thanks 🙂
Cute! I think they seem more fun than normal crayons! 🙂
Very cute idea! Worth getting some fun shape pans and recycling 🙂 Just hit the facebook like…come on over & check my page out too! http://www.hipandhealthykids.com or http://www.facebook.com/HipHealthyKids
Call them 4 leaf clovers for boys, they don’t pay that close of attention.
Cute idea! When my daughter was young, we grated old crayons and put each color in a separate dish. Each friend that came to her party brought a plain pillowcase. We let the girls create their own designs with the colors and covered with wax paper and ironed the colors on the pillowcases. (newspaper inside the case to keep the colors from bleeding through). It would also make cute shirts, aprons, etc. Just another idea :o)
Those are so cute and a great idea… I have an old bag of crayons myself, and I was thinking of making candles (don’t have kids). Seems like you could easily throw a wick into the molds before pouring melted wax in and have some lovely floating candles!
what a super idea…I have this bag of crayons in my drawer that have been in there forever! And I also have some candy molds…project for a rainy day! Thanks!
Those are so cute! I know some granddaughters who would just love to make those and then color with them. When their parents were young we melted crayon bits in muffin tins, but as you said, they were kind of big and clumsy for little hands. The little molds make recycling crayons a fresh new idea!
SO COOL!!!!!! I have a large BOX of broken crayons that i keep adding to for years. Just looked at it last week and thought “I dont know why I save these things” But coudnt make myself get rid of them and I tucked them away again. Now I know what to do with them!!! When my grandkids come over, they will love them! THANK YOU!!! love your site!
I am a retired nursery school teacher. During the Fall we went on ” nature walks”, collecting leaves, branches, seeds,etc… Then we would make ” stained glass windows” with grated crayons and wax paper. Take a large piece of wax paper and fold in half; working on one side, sprinkle on some grated crayon, leaves, seeds, etc.., sprinkle on some more grated crayon, fold over unused side, cover with an old towel and iron until the crayon and wax melts and fuses the sides together. Once they were cooled we hung them around the room and taped to our windows. The children loved them.
I loved doing that when I was a kid!
Hello!
Thank you for the awesome read! After reading this, I am more convinced to try this out to give out as wedding favors to kids for my wedding.. But can I ask, how many pieces can I make from one box of crayons? ‘Cos for the wedding, I need an estimated amount of a few hundred of these.. (I hope not a few hundred, but previous experiences at weddings have proved me otherwise.. ) I hope you could advise me on this.. Thank you! 🙂
Hello!
Thank you for the awesome read! After reading your article, I am more convinced to do these crayons for wedding favours on my wedding day! But, I need to know, how many pieces can I make from a box of crayons? ‘Cos for the weddings in the Asian countries, it is usually a big affair and I am estimating a few hundred pieces are needed to be given out. I hope you can advise me on this.. Thank you! 🙂
Hi!
Thank you for the awesome read! Now, I am more convinced to do these as wedding favours for children on my wedding day! 🙂 But, can I just ask, how many pieces can I make from a box of crayons? I need to estimate how many boxes I need to make for a few hundred pieces.. I hope you could advise me on this! Thank you!
Oops! Sorry, I didn’t know that the comments would be under moderation, ‘cos from earlier on, whenever I click submit, the screen goes to error, so I didn’t know whether my comments had been posted. Sorry!