• Skip to primary navigation
  • Skip to main content
  • Skip to primary sidebar
  • Skip to footer

The Nourishing Gourmet

Nourishing. Satisfying. Gourmet.

  • THM Coaching
  • About
    • Privacy
    • Contact
  • Recipes
  • Cookbooks
    • Everyday Nourishing Food
    • Salad Cookbook
    • Soup Cookbook

KimiHarris

Herbal Hibiscus Lemonade (Keto, THM)

March 16, 2022 by KimiHarris Leave a Comment

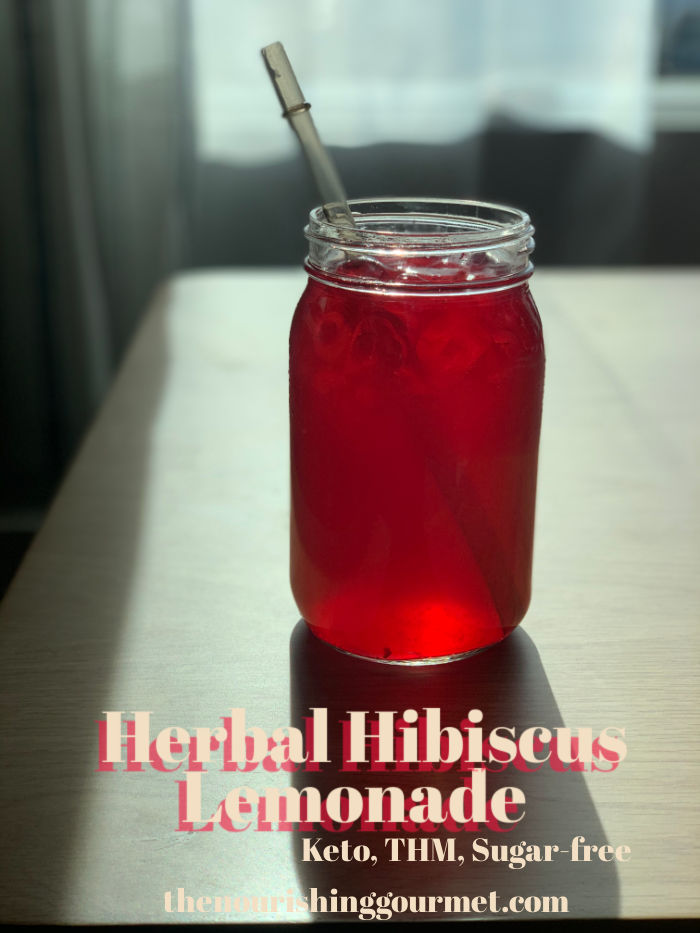
The tart and floral flavors of hibiscus, chamomile, peppermint, and (optional) rosebuds or lavender make this stevia-sweetened hibiscus lemonade special. While I’ve been enjoying this flavorful drink through the cold dark winter, it will be even more welcome on warm spring days and hot summer days. It’s a lovely, antioxidant-rich beverage that will keep you hydrated without adding calories and sugar.

Because hibiscus lends so much flavor and tartness, you won’t need as many lemons for this lemonade. By the way, you can make this using just the hibiscus as well, though I love the more subtle and complex flavors the other herbs add. Each of these special herbs and flowers adds its own flavor, as well as benefits. 

This is sweetened with pure stevia for a sugar-free option. This is a great choice because there is already an herbal flavor to this lemonade, and lemon also hides stevia well. Other options include pure monk fruit, or, to go old-school, you could sweeten with simple syrup. Because I drink this almost daily, I like to keep mine sugar-free. 

For those on THM, make sure that you use pure stevia powder or pure monk fruit powder. 

This drink is a wonderful way to stay hydrated, but you also get gentle support from these herbs, along with the lemon. There are many benefits to each. As always, it’s good to make sure that there are no contraindications with any medicines you may be taking or other considerations (including if pregnant or breastfeeding), before adding any herbs regularly. But these herbs are generally considered safe for most people, and herbal infusions are a gentle way to consume them while getting many of their benefits. A friend’s nutritionist recommended daily hibiscus infusions as part of her protocol for lowering high blood pressure, and I’ve been intrigued since. 

For example, a few of the possible benefits include: Hibiscus is full of antioxidants and can support the liver and lower high blood pressure (if you have low blood pressure, ask your doctor about whether this is appropriate for you). Chamomile and hibiscus both have been studied for possible anti-cancer benefits. Chamomile and peppermint can aid your digestion, while chamomile can help lower blood sugar. Sources 1, 2, 3

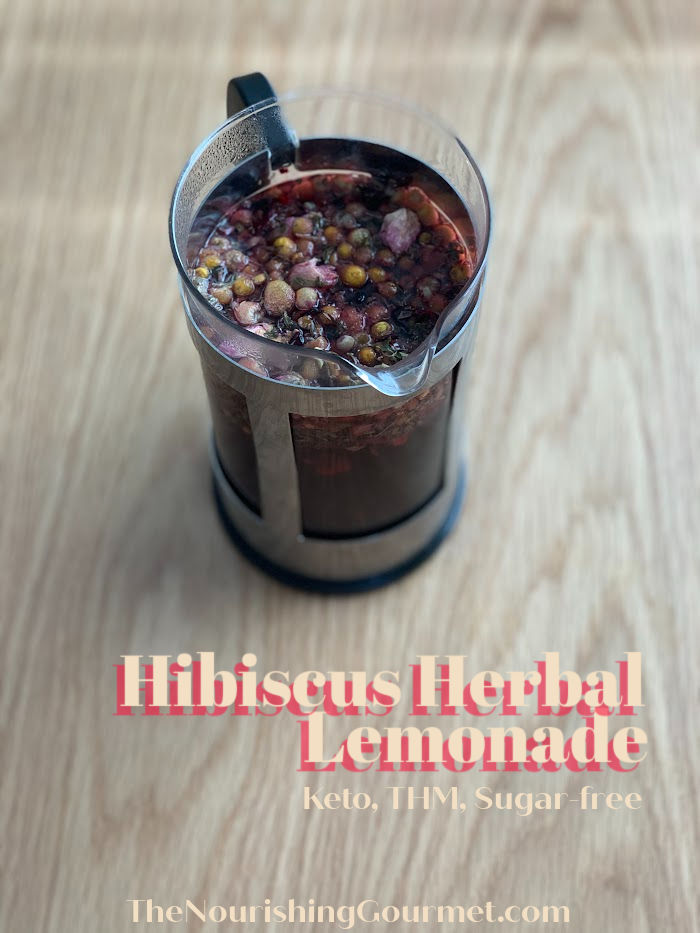
A simple way to make this? I just use my French Press! Here’s the one I own. Any eight-cup (34 oz) French press will work. OR, steep in any heat-safe container, and pour through a strainer when finished.

Where to source herbs

I was able to find mine at a local co-op/store where they provide herbs and spices in bulk. This is an excellent path when experimenting and deciding what you like and don’t like. Long-term, you may want to buy in bulk as it will be a cheaper option. Do so by buying through a trusted company (Frontier co-op and Mountain Rose Herbs both have good reputations). Rose petals or rose buds are harder to source, as well as more expensive, so they are optional. I would be very wary of buying online through companies that don’t have a strong reputation.

Helpful kitchen items: 

  • I like to sip my herbal lemonade slowly using these silicone straws.
  • Wide mouth quart mason jars
  • Lid to make mason jar into a cup
  • Pure NOW Organic Stevia (no fillers)

Other Delicious Healthy Beverages:

  • Does lemon water offer benefits (and how to enjoy it)
  • Fresh Ginger Tea
  • Lemon Mint Tea (using a whole lemon)
  • Iced Golden Milk Latte
  • Energizing Nettle and Peppermint Tea

Herbal Hibiscus Lemonade 

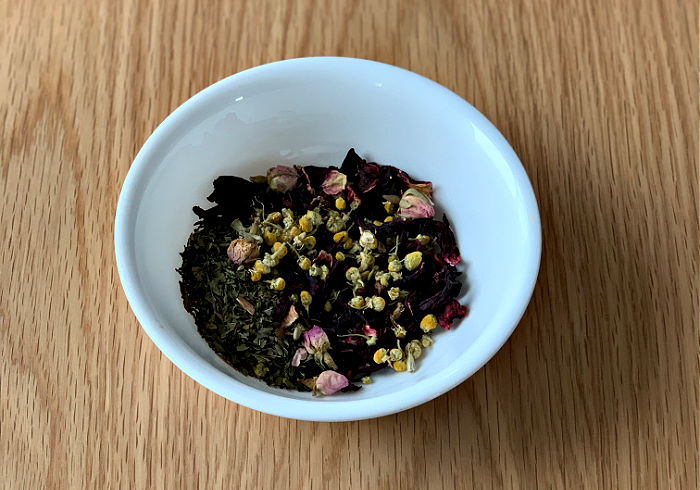
  • 2-4 tablespoons hibiscus petals 
  • 1 tablespoon chamomile blossoms 
  • 1 tablespoon dried peppermint 
  • 5 edible dried rosebuds (or 1 tablespoon dried rose petals), OR 1 heaping teaspoon dried lavender, optional*
  • 2 lemons 
  • Pure Stevia Extract (no fillers) 

Put all of the herbs into the French press. Two tablespoons of hibiscus will make a more mild and gentle version. 4 tablespoons is very bright and flavorful (and it may need a little extra stevia to counteract the tartness). 

Add hot water to fill line and allow to steep for twenty minutes without the lid on. Stir once or twice to ensure all of the herbs are submerged. 

Once the herbal infusion is lukewarm or room temperature, press down with the plunger on the French Press. Fill two mason jars ¾ full of ice. Add the juice of one lemon to each jar. Add a heaping 1/16 teaspoon or a scant ⅛ teaspoon of Now Pure Stevia extract to each quart. Split herbal infusion between the two jars and fill to the fill line with water, if needed. Stir well, making sure the stevia is dissolved. Add more stevia to taste, if needed. Enjoy!

*Rosebuds/petals will give a light floral flavor. Lavender will be more pronounced.

Filed Under: Beverages, THM, Trim Healthy Mama

Creamy Curry Red Lentil Soup

December 8, 2021 by KimiHarris 4 Comments


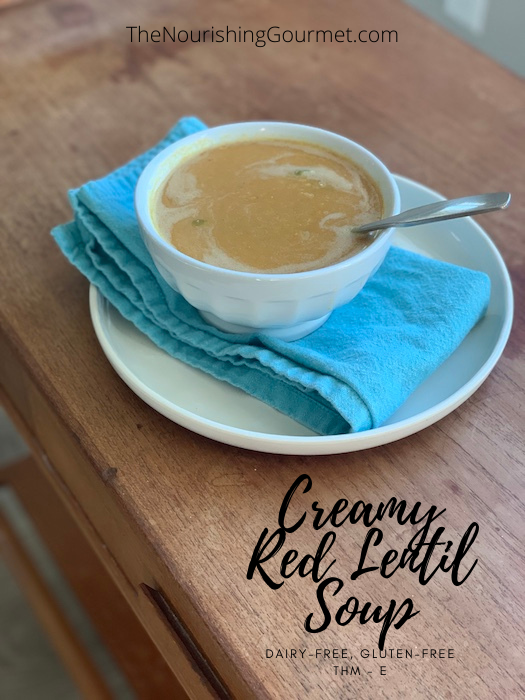
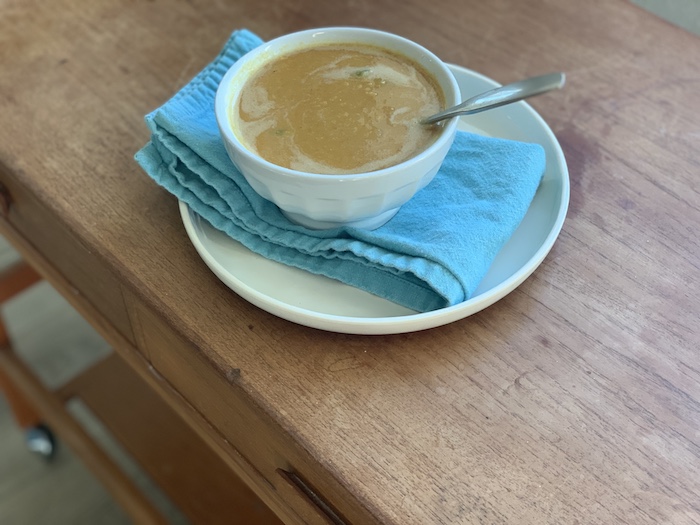
This creamy, dairy-free soup is frugal and comforting on a cold winter’s night. Cumin, garlic, ginger, and curry powder all help give this soup a robust flavor profile, while the balsamic vinegar provides just the right tang. 

Red lentils cook up in a hurry, making this a wonderful last-minute meal. I love lentils as they are full of essential nutrients, a frugal source of protein, and are delicious too! 

I add gelatin to the soup to add more protein, but that’s optional. This soup is easily made with broth or water, vegetarian or not. 

Serve with muffins, bread, or over brown rice, and a large salad for a complete meal. For those on THM, this makes a wonderful “E” Meal.

Tips

For easy blending, use an immersion blender.

For more protein and collagen, use the optional gelatin. This is a good brand.

I like to keep all of the ingredients for this soup on hand. They are easily made into a variety of dishes, and I can also make this soup for last-minute meals!

Other Soup Recipes 

  • Egyptian Red Lentil Soup with Caramelized Onions
  • Simple Thai Broth
  • Golden Turmeric Sipping Broth

Creamy Curry Red Lentil Soup

  • 1-2 tablespoons fat or oil of choice 
  • 3 carrots, peeled and thinly sliced 
  • 1 onion, peeled and chopped 
  • 3 celery, thinly sliced 
  • 3-6 garlic cloves, peeled and minced 
  • 2 cups red lentils, rinsed in a fine sieve (remove any small pebbles, if there are any)
  • 8 cups broth or water 
  • 1 heaping teaspoon cumin 
  • 1 heaping teaspoon dried ginger or one tablespoon finely grated fresh ginger 
  • 2 teaspoon curry powder 
  • ¼ cup of gelatin in 1 cup of cool water, optional
  • Around 1 – 2 tablespoons of salt 
  • 2 tablespoon balsamic vinegar 

1. In a large pot, add the fat/oil (just enough to lightly cover the bottom of the pot) and turn on medium heat until the fat is just hot. Add the carrots, onion, and celery, and lightly sprinkle with salt. Stir here and there, and cook until the vegetables start to soften (about five minutes) and add the garlic and cook for one or two more minutes. 

2. Add the red lentils and broth/water, turn heat to high, and bring to a simmer. Turn down to keep at a gentle simmer. Remove with a large spoon any foam that may come to the surface of the soup. 

3. Add the spices. Simmer for around twenty minutes, or until the lentils are soft. 

4. Stir together the gelatin and the water, soften for a few minutes. Stir into the soup, along with salt (to taste, you will need more if you used water) and balsamic vinegar. 

5. For a creamier texture blend part or all of the soup. The easiest way to accomplish this is to use an immersion blender, which you can put right into your pot for easy blending. OR, carefully scoop out some of the soup, and blend in a blender (follow procedures for your specific blender for how to do this safely. For my blender, I vent it, and only fill halfway, and blend on low to start). For blending in a blender, you will need to do at least several batches. I blend about half of the soup. 

6. Check the flavor, and adjust with salt, vinegar, or pepper, and enjoy!

Filed Under: $10 Main, Dairy Free, Egg Free, Gluten Free, Grain Free, Nourishing Frugal Recipes, Soups, The Low Energy Guide to Healthy Cooking, THM, Trim Healthy Mama

One-Pot Gluten-Free Mac and Cheese

December 2, 2021 by KimiHarris 4 Comments

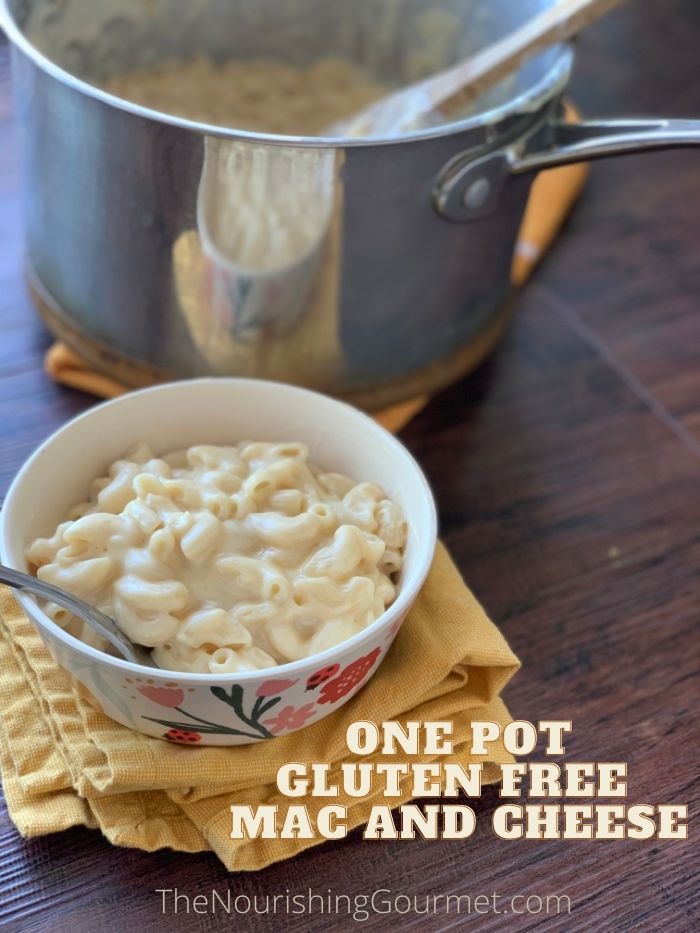
This one-pot super creamy and delicious gluten-free mac and cheese is finished in less than 15 minutes. It’s so simple! 

My kids aren’t really into sandwiches, unfortunately, but this pasta dish is something they love as a last-minute meal. If my husband has an evening meeting, and I’m eating a dairy-free (THM) meal, I can whip this together with minimum fuss. Since I homeschool our kids currently, they also ask for it for lunch. 

You only need a few basic ingredients: Milk (I use whole), chicken broth, pasta, cheese, and salt. That’s it! 

How it works: Instead of boiling the pasta in water and making a cheese sauce, this recipe boils the pasta in the chicken broth and milk, and the starch released from the pasta thickens the sauce as it cooks. It’s a little magical. To compare it to a more traditional mac and cheese method, check out this recipe (also gluten-free, but using goat cheese!).

Notes: 

  • You can have fun trying this with different cheeses. Our favorite so far is half Colby Jake and half Pepper Jake. Yum! 
  • You can use all milk instead of half broth. I love my homemade broth, so this is a chance to get some more in. But I also think the flavor is better and more complex with half broth. If you are using homemade do pre-salt it, otherwise it will be too bland. 
  • Pick a gluten-free pasta brand you know stays together well for this recipe, and cook until just tender. Because different brands may vary in how much starch they give off, you may need to adjust the amount of liquid if it ends up too liquidy. Just remember that you can give it a quick boil at the end to remove excess liquid, if necessary.  

One-Pot Gluten-Free Mac and Cheese

  • 12 oz dry gluten-free pasta (shells, elbows, or other short pasta) (about 4 cups of dry pasta) I tested this with Field Day Gluten-free Brown Rice pasta
  • 2 cups of whole milk 
  • 2 cups of chicken broth (homemade or storebought) 
  • 2 teaspoon salt 
  • 2 cups of shredded cheese (my kids like Colby, or one of our favorites, Pepper Jack! I like to use half of each. Use cheddar for a more traditional flavor)

Directions

Place the pasta, milk, chicken broth, and salt in a medium or large pot. Bring to a low simmer, and simmer until just tender (for the brand of brown rice pasta I use, that took about 7-10 minutes. Look at the package and follow their time suggestions). 

Because you are using less liquid, you will need to stir more often to make sure the pasta isn’t sticking on the bottom of the pan. Not quite constantly, but pretty often, especially as it begins to cook. 

Once the pasta is getting close to being done, you can turn up the heat a little to boil away any extra moisture there is, if necessary (again, making sure you don’t let the pasta stick on the bottom of the pan). When it looks thick enough to be a sauce-y mac and cheese, turn off the heat, and add your cheese. Stir in (it should melt easily), and let sit for a minute or two, and serve! The sauce will continue to thicken as it sits.

Filed Under: Uncategorized

Healthy Pumpkin Spice Granola

September 26, 2021 by KimiHarris Leave a Comment

bowl of pumpkin spice granola

This granola is gently spiced, sweetened with pure maple syrup, stuffed with goodness, and is the perfect fall breakfast or snack. I’ve long been a big fan of granola on top of yogurt, but my kids love it with milk. Either way, it’s delicious! We’ve also been known to snack on it plain too.

For those using Trim Healthy Mama (THM) principles, make sure you check out my other version for my THM Pumpkin Spice Granola recipe. 

One note: 

I’ve included two options here. One with pumpkin, and one with a nut or seed butter. It’s a bit of a hot debate, but really, when we call a recipe “pumpkin spice” it’s referring to the spice blend, also known as “pumpkin pie spice.” You don’t have to have the pumpkin, for it to be considered a “pumpkin spice” recipe! 

I made many batches of this granola while I was recipe testing, and here is the difference between the two: The version using pumpkin is just slightly less crunchy, but all of my family favored it a little more than the nut or seed-butter version. The pumpkin flavor will be subtle here, and not overpowering, but still there. 

The seed or nut-butter version is wonderful because of that added protein, and the heartiness it adds, so is another good option, especially when you don’t have any pumpkin on hand! 

Not a fan of the spice blend? You can also just use cinnamon! 

granola bar with fruit and yogurt

Serving Suggestion: 

You can serve this as fancy or as simple as you like. For a fun little spread, you can make a granola “bar” using chopped fruit, yogurt, and milk. 

Healthy Pumpkin Spice Granola (Gluten-free, nut-free option) 

  • 3 cups rolled oats (gluten-free, organic, if desired, you can also use sprouted)
  • 1 cup of pumpkin or sunflower seeds OR chopped nut of choice, such as pecan or walnut (optional) 
  • 1 teaspoon ground cinnamon 
  • ½ teaspoon pumpkin pie spice 
  • ¼ teaspoon salt 
  • ¼ melted coconut oil
  • ¼ cup + 2 tablespoons pure maple syrup 
  • ¼ cup canned or fresh pumpkin puree OR ¼ cup nut or seed butter of choice (we recipe tested with sunflower seed butter, for a nut-free option. 
  • 1 teaspoon vanilla 
  1. Preheat the oven to 300F. Line a jelly roll pan or cookie pan with parchment paper. 
  2. In a large bowl, combine the oats, seeds, spices, salt and mix gently. 
  3. Melt the coconut oil until just melted in a coffee cup in the microwave, or in a small saucepan on the stove over low. Stir in the maple syrup, pumpkin or seed butter, and vanilla. Pour over oat mixture, and gently stir until coated. 
  4. Scrap onto pan, and spread evenly. Cook for twenty minutes, stir gently, and then cook for another ten minutes. Check the granola. If it seems like it is crisping up, remove. If it seems moist, cook for another ten minutes. In our testing, it was perfect with the seed butter at 30 minutes, and with the pumpkin at 40 minutes. It will continue to crisp after you remove it from the oven. 
  5. Cool and serve. Store in an air-tight container.

Filed Under: Egg Free, For the Kids, Gluten Free

Next Page »

Primary Sidebar

ConvertKit Form

Get Every Recipe

And the insider's view from our kitchen

Success! Now check your email to confirm your subscription.

There was an error submitting your subscription. Please try again.

We won't send you spam. Unsubscribe at any time. Powered by ConvertKit

Follow Me

  • Facebook
  • Google+
  • Instagram
  • Pinterest
  • RSS

Search

Please Read:

The information you find here at The Nourishing Gourmet is meant to help you become a better cook! This site is primarily for sharing family friendly recipes. It's not meant to give medical advice or to make any health claims on the prevention or curing of diseases.This site is only for informational and educational purposes. Please discuss with your own, qualified health care provider before adding in supplements or making any changes in your diet. Also, any links to sponsors or affiliates (including Amazon) may give me a percentage of the sale or a pay per click. Thank you for supporting this site.

Categories

  • $10 Main (42)
  • $5 Dishes (43)
  • 52 ways to save money on a healthy diet (53)
  • AIP (23)
  • Baked Goods (83)
  • Beverages (72)
  • Breakfast and Brunch (61)
  • Condiments (8)
  • Dairy Free (491)
  • Desserts (183)
  • Dietary Needs (6)
  • Egg Free (11)
  • Egg Free (85)
  • For the Kids (66)
  • For the Love of Food and Books (18)
  • Gluten Free (484)
  • Grain Free (95)
  • Health (75)
  • Kitchen Tools (4)
  • Main Dishes (126)
  • Nourishing Frugal Recipes (167)
  • Nourishing Frugal Tips (70)
  • Nourishing Practices (56)
  • Nutrient Dense Foods (70)
  • Q and A (15)
  • Salads (39)
  • Sides (101)
  • Snacks (123)
  • Soups (50)
  • The Healthy $1 Menu (21)
  • The Low Energy Guide to Healthy Cooking (18)
  • THM (2)
  • Trim Healthy Mama (2)
  • Uncategorized (846)
  • Vegan (240)
  • Vegetarian (360)

Recent Posts

  • Herbal Hibiscus Lemonade (Keto, THM)
  • Creamy Curry Red Lentil Soup
  • One-Pot Gluten-Free Mac and Cheese
  • Healthy Pumpkin Spice Granola
  • Crispy Pumpkin Spice Granola (oil-free)
  • Why I Use THM Principles Now
  • Vietnamese Beef Noodle Salad
  • Coconut Flour Pancakes
  • Instant Pot Mexican Shredded Chicken
  • Tender Instant Pot Carnitas (shredded pork for tacos)

Recent Comments

  • KimiHarris on How to make heavenly coconut milk whipped cream (with an isi dispenser)
  • KimiHarris on Autumn Beef Stew (Tomato Free)
  • KimiHarris on How to make heavenly coconut milk whipped cream (with an isi dispenser)
  • Milia on Our Experience Using Activated Charcoal When We had the ‘Stomach Bug’
  • Sharon on How to make heavenly coconut milk whipped cream (with an isi dispenser)

Fresh: Nourishing Salads for All Seasons

Get Every Recipe

And the insider's view from our kitchen

Success! Now check your email to confirm your subscription.

There was an error submitting your subscription. Please try again.

We won't send you spam. Unsubscribe at any time. Powered by ConvertKit

Footer

Privacy

Copyright © 2022 · Foodie Pro & The Genesis Framework