• Skip to primary navigation
  • Skip to main content
  • Skip to primary sidebar
  • Skip to footer

The Nourishing Gourmet

Nourishing. Satisfying. Gourmet.

  • About
    • Privacy
    • Contact
  • Recipes
  • Cookbooks
    • Everyday Nourishing Food
    • Salad Cookbook
    • Soup Cookbook

Nourishing Practices

3 Tips for Sharing Food with Others (Even When Life is Crazy)

November 10, 2015 by KimiHarris 7 Comments

It's so important to offer hospitality and to bring food to those going through hard times. But how do you do that when your life is crazy? I'm with you there. I share 3 tips here on how to get it done. -- The Nourishing Gourmet

We’ve had some very peaceful time periods. But if I’m honest, more often than not life has seemed very busy, hectic, and at times, stressful too. During the midst of stressful times, it can be hard to rip your eyes off of your own situation and share and serve others. I know it is for me.

But I want to share food with others (and serve them in other ways too). Why? Because people have done that for me. For example: When I was 16, I was in charge of my younger siblings while my mother recovered from a serious surgery and my dad helped take care of her and worked regular long hours. Our community rallied around us by bringing us dinners for weeks on end. To this day, I remember the support and help that brought us during a stressful time and am thankful for it. Years later I was pregnant with my second child and went through premature labor. I was hospitalized for two weeks until I stabilized. Friends brought me dinner every night so that I wouldn’t have to live off of hospital food. Once again, I still remember and am thankful for that tangible support.

That’s why for my very first Periscope, I shared on the topic of Sharing Food with Others During Busy Times. It’s a topic dear to my heart not because I am a rockstar in this area (I’m not), but because I have been greatly blessed when others have done that for me.

I loved sharing these tips on Periscope, so I wanted to share them here too!

(You can follow me here to watch future scopes! For those who aren’t familiar, it’s an app that allows you to broadcast live stream videos, and it allows you to respond in the text box in real time too! It’s very fun.)

Don’t be a perfectionist when sharing food

It can be easy to allow fears to derail our good intentions. We may wonder if others will like our cooking, or whether they will think our food is good enough, for example. When you are known as a “good cook” or (the horror of it) are a food blogger and cookbook author, expectations can be high, and that can put a lot of pressure on you. Once we invited a couple over for dinner, and when the husband walked through the door he said, “I feel like I’m in a dream. I can’t believe I am eating dinner with The Nourishing Gourmet.” I just about died right there and hoped that dinner was especially good. (I think it was a success, or perhaps my guests were just very good actors as they talked about how yummy it was!).

Sometimes that pressure has held me back, because, in all honesty, we eat plain and simple food most of the time! Nothing fancy! But then I realized that it was my pride holding me back. I don’t have a responsibility for people’s reactions to my actions, but I do have the responsibility to share and serve those around me. And you know what I’ve found? People are always thankful for you sharing food with them. I think our fears are unfounded. Even if they don’t love the food you brought to them, they will love the heart behind it.
Sometimes it takes a small amount of courage to share with others, and that’s okay. It’s worth the bravery to share life and love with others.

All you need is one meal

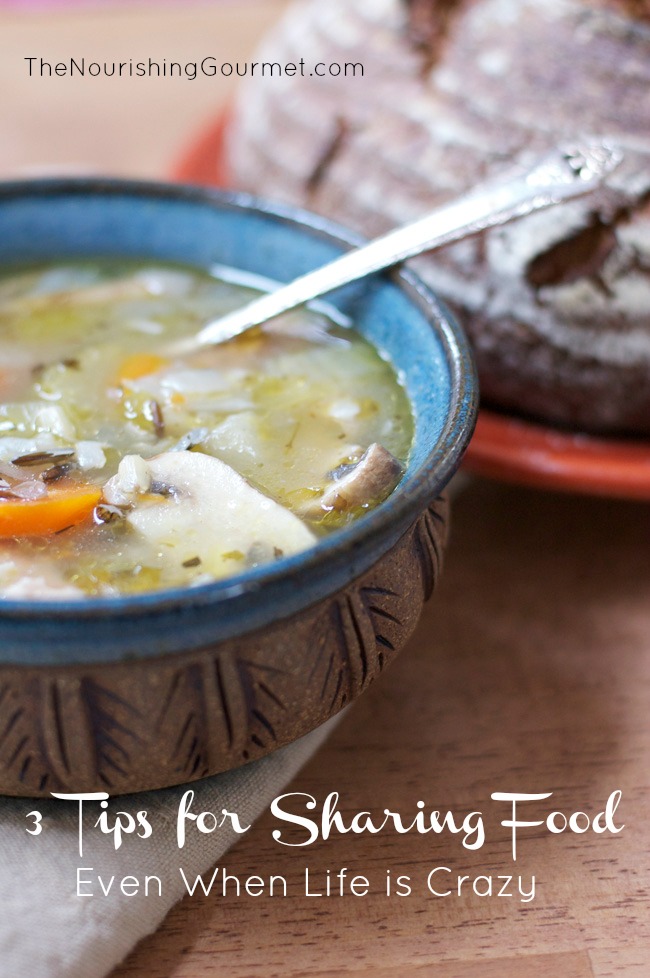
Some of the people who are the best at bringing food to others during times of need have one meal they always bring. It’s delicious, they know the meal so well they could make it in their sleep, and it’s generally frugal and family-friendly. For example, one lady I know cooks up a pot of rice, steams some vegetables, and bakes teriyaki chicken. She then layers the cooked rice, vegetables and chicken in a casserole dish to bring to someone. It’s delicious! Another brings makings for a healthy taco salad, and that’s always popular too. Another brings a big pot of hearty soup and homemade bread. Homemade pizza is popular as well.

The point is this, if you just figure out just one meal that is well-liked and that you can fit in your budget, it won’t be stressful at all to share that meal with others – whether they are coming over for dinner, or you are bringing them a meal.

Bonus points if the meal is allergen-friendly, as then you can serve it to a wider base of people. For example, it’s easy to make gluten-free teriyaki and even soy-free and gluten-free teriyaki!

Make it serve you (and your family) too

My sister recently had a baby, and although my life seemed very chaotic at the time, it was important to me that I offer help and support. While I wasn’t able to do all that I wished to do (I also have a nine-month-old baby, and she had a runny nose at the time, so we didn’t want to expose her newborn), I at least wanted to help provide meals for her during that happy, but fragile newborn stage.

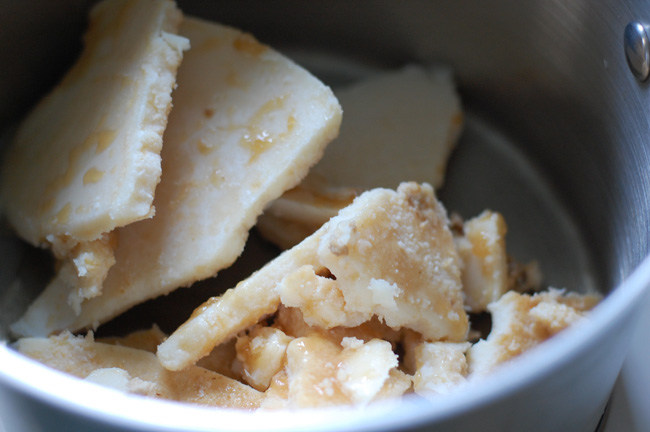
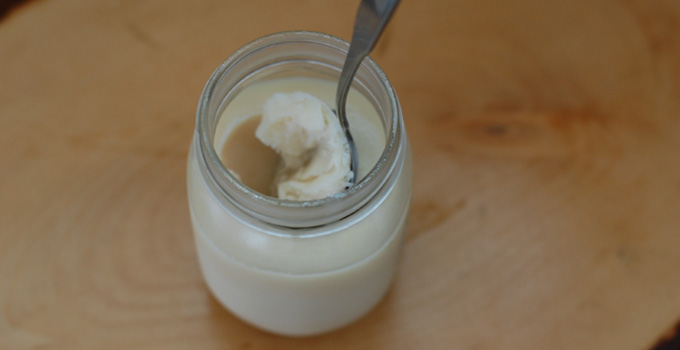
So this is what I did. I set aside a couple of hours and got in a good cooking rhythm. I whipped up some hearty soups from my cookbook, Ladled: Nourishing Soups for all Seasons. I made a homemade marinara sauce with Italian sausage, and bought some nice organic noodles for her husband to cook up to go with it. I made teriyaki chicken and rice. I made granola and bought a whole milk organic yogurt to go with it for breakfast or snacks. I picked up some fruit too. My sister-in-law made another soup to add to the box, and then I was able to send over a whole box of food for her.

But here’s the deal. While I was doing all of that cooking, I doubled everything so that my family also had plenty of food for the upcoming week. It was heavenly to have all of the food already prepared and ready to be enjoyed. I was able to serve not only her but my family as well.

If you deal with health issues, or just have a busy lifestyle, being able to kill two birds with one stone will be very helpful.

Finally, this list of gluten-free freezer meals may come in handy as well when sharing food with others. I often share freezer meals with others. This allows me to cook when I am able and then share when a need comes up.

What meals do you like to share with others? Has there been a time when people brought you meals? I’d love to hear about it!

Filed Under: For the Kids, Nourishing Frugal Tips, Nourishing Practices

How to Make Carrot Juice With a Blender

November 3, 2015 by Chloe Breczinski 17 Comments


How to make carrot juice without a blender - easier than you think, and so helpful for those of us without juicers! -- The Nourishing Gourmet

By Chloe, from How We Flourish

Here’s the thing: I have a very small kitchen. I’m also on a tight budget. I don’t have the option of having a kitchen filled with small appliances. However, I had heard a lot about the benefits of juicing. A morning carrot juice is also an important about of the GAPS Intro Diet, so I learned how to make carrot juice with a blender.

If you ask most people, they will tell you that you need a real juicer for juicing. To truly receive the benefits of juicing, commercial juice is not an option as it is pasteurized. Juices must be freshly pressed to preserve the enzymes and nutrients that makes vegetable juices so good for us. But not everyone can afford a big fancy masticating juicer! I’d love to have one, of course, as it is certainly less work than making juice with a blender. But when that is not an option, you do not need to worry. You can still get the benefits of juicing for a lot less money.

Why Juicing

I was never a fan of juice before GAPS. But I learned that juicing can help support detoxification, and the vitamins and minerals from the juiced vegetables can be quickly absorbed. It can be a great remedy for constipation! This might be TMI, but that is why I have taken such a liking to juicing. It helped for me very much, so it’s a tool I like to keep in my back pocket.

Interested? If you would like to test the benefits of juicing without the investment, read on to learn how to juice without a juicer.

How to Juice without a Juicer

The following tutorial is for 100% fresh carrot juice, which is the starting point for juicing on GAPS Intro. How many carrots you need will depend on how much juice you want – 2-3 carrots usually makes a decent sized glass for me. This method of making juice in a blender will also work for all types of juices!

  1. Wash and chop the carrots.
  2. Add them to the blender. Any type of blender should work fine.
  3. Add a small amount of filtered water. With more watery vegetables, you may not need any. If you like your juices more dilute, add more. For carrot juice, add enough water to come slightly less that halfway up the carrots. It just needs to be enough to help get things moving.
  4. Blend on medium until the ingredients are well pulverized.
  5. Place a nut milk bag in your desired cup/container and pour in the blended ingredients.
  6. Squeeze as much liquid out of the nut milk bag as possible. Save the leftover pulp in the freezer to be used in other recipes.
  7. Enjoy your juice! It is best to drink on an empty stomach, such as first thing in the morning before breakfast.

Tip: If you enjoy the benefits of juicing, but find that it spikes your blood sugar, try adding fat and protein to your juice. One of my favorite ways to do this with with the so-called “GAPS Milkshake.”

Want to make a large batch? It is recommended to always drink juice fresh. However, I believe that if you are experiencing benefits with juicing, less-than-optimal juice may be better than no juice at all. Try freezing the juice immediately and thawing it in a water bath when you want it.

Are you interested in learning more about healing your gut with GAPS Intro? Learn more about how I did just that (without going crazy!) in my book Healing Patiently.

How to Make Carrot Juice With a Blender
 
Author:
Chloe
Recipe type: Beverage
Print
 
Carrot juice is a delicious and nourishing drink. Learn how to make it fresh, even if you do not have a juicer!
Ingredients
  • 2-3 carrots
Instructions
  1. Wash and chop the carrots.
  2. Add them to the blender. Any type of blender should work fine.
  3. Add a small amount of filtered water. With more watery vegetables, you may not need any. If you like your juices more dilute, add more. For carrot juice, add enough water to come slightly less that halfway up the carrots. It just needs to be enough to help get things moving.
  4. Blend on medium until the ingredients are well pulverized.
  5. Place a nut milk bag in your desired cup/container and pour in the blended ingredients.
  6. Squeeze as much liquid out of the nut milk bag as possible. Save the leftover pulp in the freezer to be used in other recipes.
  7. Enjoy your juice! It is best to drink on an empty stomach, such as first thing in the morning before breakfast.
3.3.3077

 Do you juice? What is your favorite type of juice to make?

Filed Under: Beverages, Dairy Free, Egg Free, Egg Free, Gluten Free, Grain Free, Nourishing Practices, Nutrient Dense Foods, Vegan, Vegetarian

Stuffed Butternut Squash with Bacon, Brown Rice, and Mushrooms

September 23, 2015 by April Swiger 2 Comments

Stuffed Butternut Squash with Bacon, Brown Rice, and Mushrooms -- The Nourishing Gourmet

By April, from AprilSwiger.com

Savory bacon with hearty mushrooms and smooth butternut squash present a nourishing and filling meal for any night of the week. This seasonal delicacy could be a lovely side dish for any fall gathering as well. With about two minutes of preparation the night before, the soaked brown rice becomes an easier-to-digest element of this recipe, although white rice could be used in its place.

I love simple meals, especially when they are nourishing and easy on the budget. This stuffed butternut squash with bacon has a few different elements to it, but is truly a cinch to put together. When the weather begins to turn, butternut squash is a go-to for me. I love the color, sweetness, and heartiness it brings to our cool weather menu. I also think it’s a wonderfully filling addition to any gluten or dairy free lifestyle.

With a little bit of planning, this meal is very easy to put together any night of the week. I know that anything “stuffed” is usually intimidating for me, but don’t let this one scare you off! It’s simplicity at its finest, and the vibrant mixture of flavors will wow most palettes.

Stuffed Butternut Squash with Bacon, Brown Rice, and Mushrooms

Ingredients:

  • 1 large butternut squash
  • 2 cups short grain brown rice
  • 2 tablespoons apple cider vinegar
  • 1 teaspoon salt
  • 7 slices of bacon, chopped
  • 1/2 an onion, chopped
  • 2 cups chopped mushrooms
  • 1 teaspoon dried thyme
  • Salt and pepper to taste

Directions:

1. The night before, place your rice in a bowl with 2 cups of warm water, and the ACV. Allow it to soak overnight, or up to 24 hours.

2. Preheat your oven to 400. Cut your butternut squash in half lengthwise, and scoop out the seeds. Drizzle with olive oil, salt and pepper, and place cut-side-down on a baking sheet. Cover with foil and bake for approximately 45-60 minutes, or until it’s cooked.

3. While the squash is cooking drain and rinse the rice. Add it to a pot with 4 cups of water, and 1 tsp of salt. Bring it to a boil, cover, and allow to simmer 45-50 minutes until cooked. The rice and squash should be done about the same time.

4. Place the chopped bacon in a skillet and cook on medium-high until almost crisp. Remove the bacon from the pan when done and leave about two tablespoons of bacon grease remaining. Saute the onions until translucent, then add the mushrooms, thyme, and salt and pepper to taste. Cook until the mushrooms are soft, about 10 minutes.

5. Stir the bacon pieces, and the mushroom mixture, into the rice. When the squash is cooked place the two pieces on a plate, cut-side up, and fill them with the rice mixture. You will have extra rice to serve on the side.

Stuffed Butternut Squash with Bacon, Brown Rice, and Mushrooms
 
Author:
April Swiger
Recipe type: Main
Print
 
Savory bacon with hearty mushrooms and smooth butternut squash present a nourishing and filling meal for any night of the week. This seasonal delicacy could be a lovely side dish for any fall gathering as well.
Ingredients
  • 1 large butternut squash
  • 2 cups short grain brown rice
  • 2 Tbls apple cider vinegar
  • 1 Tsp salt
  • 7 slices of bacon, chopped
  • ½ chopped onion
  • 2 cups chopped mushrooms
  • 1 tsp dried thyme
  • Salt and pepper to taste
Instructions
  1. The night before, place your rice in a bowl with 2 cups of warm water, and the ACV. Allow it to soak overnight, or up to 24 hours.
  2. Preheat your oven to 400. Cut your butternut squash in half lengthwise, and scoop out the seeds. Drizzle with olive oil, salt and pepper, and place cut-side-down on a baking sheet. Cover with foil and bake for approximately 45-60 minutes, or until it’s cooked.
  3. While the squash is cooking drain and rinse the rice. Add it to a pot with 4 cups of water, and 1 tsp of salt. Bring it to a boil, cover, and allow to simmer 45-50 minutes until cooked. The rice and squash should be done about the same time.
  4. Place the chopped bacon in a skillet and cook on medium-high until almost crisp. Remove the bacon from the pan when done and leave about two tablespoons of bacon grease remaining. Saute the onions until translucent, then add the mushrooms, thyme, and salt and pepper to taste. Cook until the mushrooms are soft, about 10 minutes.
  5. Stir the bacon pieces, and the mushroom mixture, into the rice. When the squash is cooked place the two pieces on a plate, cut-side up, and fill them with the rice mixture. You will have extra rice to serve on the side.
3.3.3077


Filed Under: Dairy Free, Gluten Free, Main Dishes, Nourishing Frugal Recipes, Nourishing Practices

How to Render Tallow from Your Beef Broth

June 11, 2015 by KimiHarris 9 Comments

After you make homemade beef stock/broth, there is always a lovely layer of tallow on the top of the broth. Learn here how you can render and save it for lots of cooking projects! Don't waste it! It's an excellent cooking fat. --- The Nourishing Gourmet

So, you’ve made a delicious, nutritious, homemade beef broth, and it now has a glorious layer of beef fat on the top. Now what? Don’t waste it! With just a few short steps, you can render it for a delicious cooking fat! This lovely cooking fat is stable at high temperatures, making it lovely for sautéing or roasting vegetables and meats, and many other uses!

As long-time readers know, I try to balance using quality, good ingredients, with a realistic budget. A practical way to make that happen is by not wasting anything. Certainly, saving and using this quality fat is a great way to eat well AND save money! Because we try to only buy top quality oils and fats, this helps tremendously in how much we spend on our oils/fats.

And don’t worry. It’s simple to make!

How to Render Tallow from Beef Broth

After you make homemade beef stock/broth, there is always a lovely layer of tallow on the top of the broth. Learn here how you can render and save it for lots of cooking projects! Don't waste it! It's an excellent cooking fat. --- The Nourishing Gourmet

1. After you have cooled your homemade beef broth in the refrigerator, there should be a layer of fat on the top. How much fat there is depends on what type of bones you use. Because we try to use at least some marrow bones in each batch, we typically have quite a bit. Scoop this fat off and place into a pot. (I use a small pot for one batch of fat.)

After you make homemade beef stock/broth, there is always a lovely layer of tallow on the top of the broth. Learn here how you can render and save it for lots of cooking projects! Don't waste it! It's an excellent cooking fat. --- The Nourishing Gourmet

2. Gently heat the fat over low heat until it is completely liquid.

After you make homemade beef stock/broth, there is always a lovely layer of tallow on the top of the broth. Learn here how you can render and save it for lots of cooking projects! Don't waste it! It's an excellent cooking fat. --- The Nourishing Gourmet

3. Pour over cheesecloth placed over a fine sieve over a heat safe bowl (or 4 cup measuring cup) to strain out any bits.

After you make homemade beef stock/broth, there is always a lovely layer of tallow on the top of the broth. Learn here how you can render and save it for lots of cooking projects! Don't waste it! It's an excellent cooking fat. --- The Nourishing Gourmet

4. At this point, you can do the lazy method of simply pouring the fat into a mason jar and re-hardening it in the refrigerator. Any leftover bits or small drops of broth will go to the bottom of the jar, and because fat is a type of preservative, the fat won’t go bad and I just don’t use the very last bit of fat at the bottom of the jar. This is what is pictured above.

5. Or, to make it completely free of any broth or bits, pour into a wide container such as an 8 by 8-inch pan. Let re-harden in the refrigerator, and then remove from the pan and turn upside down. You can then scrape off any bits or broth from the bottom of the fat. Reheat to liquefy, and pour into desired container of choice.

Keep refrigerated. Will keep for at least several months when refrigerated (freeze for longer storage).

How to Render Tallow from Your Beef Broth
 
Serves: 1 cup
Print
 
You will need a fine sieve and cheesecloth for this recipe.
Ingredients
  • Fat skimmed from the top of homemade beef stock
Instructions
  1. After you have cooled your homemade beef broth in the refrigerator, there should be a layer of fat on the top. How much fat there is depends on what type of bones you use. Because we try to use at least some marrow bones in each batch, we typically have quite a bit. Scoop this fat off and place into a pot. (I use a small pot for one batch of fat.)
  2. Gently heat the fat over low heat until it is completely liquid.
  3. Pour over cheesecloth placed over a fine sieve over a heat safe bowl to strain out any bits.
  4. At this point, you can do the lazy method of simply pouring the fat into a mason jar and re-hardening it in the refrigerator. Any leftover bits or small drops of broth will go to the bottom of the jar, and because fat is a type of preservative, the fat won’t go bad and I just don’t use the very last bit of fat at the bottom of the jar. This is what is pictured above.
  5. Or, to make it completely free of any broth or bits, pour into a wide container such as an 8 by 8-inch pan. Let re-harden in the refrigerator, and then remove from the pan and turn upside down. You can then scrape off any bits or broth from the bottom of the fat. Reheat to liquefy, and pour into desired container of choice.
  6. Keep refrigerated. Will keep for at least several months when refrigerated (freeze for longer storage).
3.3.3077

Related Posts:

  • Beef Stock
  • 10 reasons bone broth should be part of your diet
  • How to make chicken broth of practically free
  • Rich Roasted Broth
  • The Healing Power of Broth
  • My soup cookbook, Ladled: Nourishing Soups for All Seasons

Filed Under: Dairy Free, Egg Free, Gluten Free, Grain Free, Nourishing Frugal Recipes, Nourishing Frugal Tips, Nourishing Practices, Nutrient Dense Foods

« Previous Page
Next Page »

Primary Sidebar

Follow Me

  • Facebook
  • Instagram
  • Pinterest
  • RSS

Search

Please Read:

The information you find here at The Nourishing Gourmet is meant to help you become a better cook! This site is primarily for sharing family friendly recipes. It's not meant to give medical advice or to make any health claims on the prevention or curing of diseases.This site is only for informational and educational purposes. Please discuss with your own, qualified health care provider before adding in supplements or making any changes in your diet. Also, any links to sponsors or affiliates (including Amazon) may give me a percentage of the sale or a pay per click. Thank you for supporting this site.

Categories

  • $10 Main (43)
  • $5 Dishes (43)
  • 52 ways to save money on a healthy diet (53)
  • AIP (23)
  • Baked Goods (84)
  • Beverages (72)
  • Breakfast and Brunch (63)
  • Condiments (8)
  • Dairy Free (498)
  • Desserts (185)
  • Dietary Needs (6)
  • Egg Free (14)
  • Egg Free (92)
  • For the Kids (70)
  • For the Love of Food and Books (18)
  • Gluten Free (491)
  • Grain Free (98)
  • Health (75)
  • Kitchen Tools (5)
  • Main Dishes (128)
  • Nourishing Frugal Recipes (169)
  • Nourishing Frugal Tips (70)
  • Nourishing Practices (57)
  • Nutrient Dense Foods (70)
  • Q and A (16)
  • Salads (40)
  • Sides (104)
  • Snacks (126)
  • Soups (50)
  • The Healthy $1 Menu (21)
  • The Low Energy Guide to Healthy Cooking (20)
  • THM (5)
  • Trim Healthy Mama (5)
  • Uncategorized (848)
  • Vegan (243)
  • Vegetarian (363)

Recent Posts

  • Eating for Comfort and Sustenance
  • Perfect Instant Pot Black and Brown Rice
  • What Worked and What Didn’t in My Cooking Life Last Year
  • Mocha Dark Chocolate Bombs (low sugar)
  • Gingerbread Caramel Corn
  • Thyme and Garlic Potato Stacks
  • The Great Big Holiday Salad
  • 30 Favorite Kitchen Stocking Stuffers
  • Luxurious DIY Lip Balm
  • Spicy Korean Beef and Cabbage

Recent Comments

  • Kim on Eating for Comfort and Sustenance
  • Michelle Sanders on Chile-Spiked Dark Chocolate Bark with Pepitas & Mango (Dairy Free)
  • KimiHarris on Eating for Comfort and Sustenance
  • KimiHarris on Eating for Comfort and Sustenance
  • KimiHarris on Eating for Comfort and Sustenance

Fresh: Nourishing Salads for All Seasons

Footer

Privacy

Copyright © 2026 · Foodie Pro & The Genesis Framework