• Skip to primary navigation
  • Skip to main content
  • Skip to primary sidebar
  • Skip to footer

The Nourishing Gourmet

Nourishing. Satisfying. Gourmet.

  • About
    • Privacy
    • Contact
  • Recipes
  • Cookbooks
    • Everyday Nourishing Food
    • Salad Cookbook
    • Soup Cookbook

Dairy Free

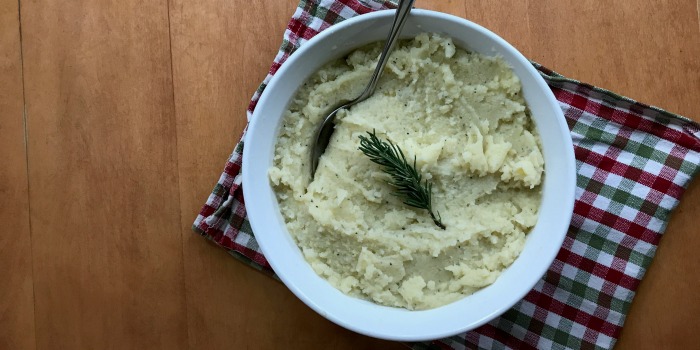
Creamy Instant Pot Rosemary Garlic Mashed Potatoes (Dairy-free options)

November 21, 2017 by KimiHarris 6 Comments

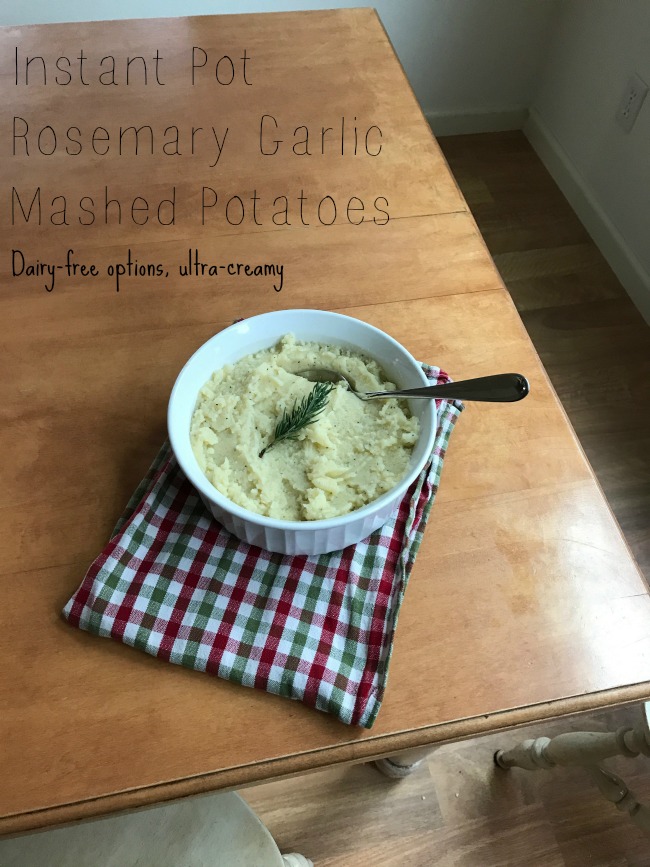
These creamy mashed potatoes made in the Instant Pot are flavorful, easy, and lip-smacking good! Dairy-free options, as well. -- The Nourishing Gourmet

The secret to these amazing mashed potatoes is the rosemary and garlic simmered in the milk. Between the rich coconut milk, butter and the flavorful herbs, this is hard to stop eating! I used coconut milk, and we were surprised at how much the herbs and garlic mellowed the flavor of the sweet milk. Regardless of what milk you choose to add (whole milk, homemade almond, or coconut), this rosemary and garlic milk mixture is a lovely secret to great mashed potatoes. Of course, the butter doesn’t hurt either.

I do not recommend store bought almond milk in this recipe, but you can make what is essentially an almond milk “cream” that is very mild in flavor but ultra-creamy.

I can’t take credit for the idea as I learned about this little trick from a Bon Appétit video, and then adapted the recipe to the below. Thank you Bon Appétit!

To make this completely dairy-free, I have had good success using a mild extra virgin olive oil in the past. Because it will still have a stronger flavor, I wouldn’t add the same amount as the butter I used in the recipe, but rather add to taste and texture. Start with ¼-½ cup and then add to desired taste.

Needed Equipment and Ingredients:

  • Aroy-D Coconut Milk(I love this brand because the taste isn’t too strong, and no “gums”)
  • Instant Pot 6 Quart or Instant Pot 8 Quart
  • Potato Masher

These creamy mashed potatoes made in the Instant Pot are flavorful, easy, and lip-smacking good! Dairy-free options, as well. -- The Nourishing Gourmet

Instant Pot Creamy Rosemary Garlic Mashed Potatoes

  • 5 pounds of potatoes ( I used russet potatoes)
  • 2 cups of coconut milk, or homemade almond milk (Or use whole milk, half and half, or part whole milk and part cream).
  • 1 whole head of garlic
  • 1 large sprig of rosemary
  • 1 teaspoon of pepper
  • 2 teaspoon of salt (plus more)
  • 2 sticks of butter, cut into 1 tablespoon pieces (see note above for replacing with olive oil)

1. In a large instant pot, place either the rack that comes with the standard Instant Pot or a steamer. Add 1 cup of purified water.

2. Peel the potatoes, rinse them, and then cut into quarters. Place in the Instant Pot. Put the lid on, and put the little knob to “sealing”. Hit “manual” and then set for 8 minutes on high pressure. Once they are done, push the knob on the top of the lid to “venting” (carefully as steam will come bursting out), and allow to de-pressurize. Once that’s done, take off the lid and check to make sure the potatoes are fully cooked by poking a fork into a large piece. If for any reason they aren’t fully cooked, put the lid back on, put knob to “sealing” and manually add 1-3 minutes to finish the cooking time.

3. While the potatoes are cooking, add the coconut milk to a small pot. Carefully cut the head of garlic in half by turning the garlic on it’s side with the roots on one side of the knife and the tip of the garlic on the other. Add to the pan, along with the sprig of rosemary, pepper, and the 2 teaspoons of salt. Bring to a low simmer, and simmer softly for 5 minutes. Remove from heat.

4. When potatoes are done, remove the steamer pan or the rack, and add the potatoes right back into the pot. Add the two cubes of butter. Reheat the coconut milk, if it has cooled all the way, and then pour slowly into the potatoes through a metal fine sieve to remove any floating rosemary or garlic (OR, you can remove the rosemary and garlic with a spoon). Add about half of the milk mixture, and start mashing with a potato masher. Continue to add the milk mixture until the desired texture is reached. Adjust salt and pepper to taste, and serve!

Printable version:

Creamy Instant Pot Rosemary Garlic Mashed Potatoes (Dairy-free options)
 
Print
 
Ingredients
  • 5 pounds of potatoes ( I used russet potatoes)
  • 2 cups of coconut milk, or homemade almond milk (Or use whole milk, half and half, or part whole milk and part cream). http://www.thenourishinggourmet.com/2011/09/rich-and-creamy-homemade-almond-milk.html
  • 1 whole head of garlic
  • 1 large sprig of rosemary
  • 1 teaspoon of pepper
  • 2 teaspoon of salt (plus more)
  • 2 cubes of butter, cut into 1 tablespoon pieces* (see note above for replacing with olive oil)
Instructions
  1. In a large instant pot, place either the rack that comes with the standard Instant Pot or a steamer. Add 1 cup of purified water.
  2. Peel the potatoes, rinse them, and then cut into quarters. Place in the Instant Pot. Put the lid on, and put the little knob to “sealing”. Hit “manual” and then set for 8 minutes on high pressure. Once they are done, push the knob on the top of the lid to “venting” (carefully as steam will come bursting out), and allow to de-pressurize. Once that’s done, take off the lid and check to make sure the potatoes are fully cooked by poking a fork into a large piece. If for any reason they aren’t fully cooked, put the lid back on, put knob to “sealing” and manually add 1-3 minutes to finish the cooking time.
  3. While the potatoes are cooking, add the coconut milk to a small pot. Carefully cut the head of garlic in half by turning the garlic on it’s side with the roots on one side of the knife and the tip of the garlic on the other. Add to the pan, along with the sprig of rosemary, pepper, and the 2 teaspoons of salt. Bring to a low simmer, and simmer softly for 5 minutes. Remove from heat.
  4. When potatoes are done, remove the steamer pan or the rack, and add the potatoes right back into the pot. Add the two cubes of butter. Reheat the coconut milk, if it has cooled all the way, and then pour slowly into the potatoes through a metal fine sieve to remove any floating rosemary or garlic (OR, you can remove the rosemary and garlic with a spoon). Add about half of the milk mixture, and start mashing with a potato masher. Continue to add the milk mixture until the desired texture is reached. Adjust salt and pepper to taste, and serve!
3.3.3077


Some links may be affiliate links. I may earn a small commission on items purchased through my links. 

Filed Under: Dairy Free, Egg Free, Gluten Free, Grain Free, Sides, Vegan, Vegetarian

Instant Pot Ginger and Garlic Broth

October 31, 2017 by KimiHarris 6 Comments

“Flavorful Ginger and Garlic Instant Pot Broth is so simple and easy to make! It also makes a wonderful full meal soup when poured over rice and shredded cooked chicken. Yum! Paleo, AIP, and grain free friendly soup! -- The Nourishing Gourmet

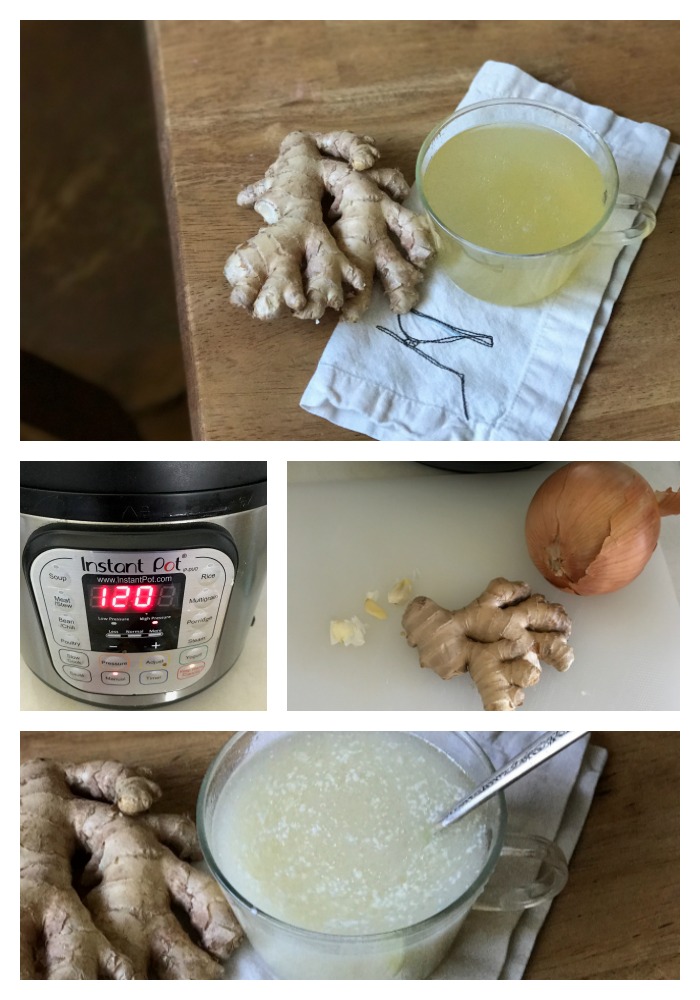
I love this gingery broth with hints of garlic. It’s perfect to sip on as a sipping broth (like this turmeric one!), but also makes a lovely simple soup. This easy broth is a cinch to make in the Instant Pot, and results in a flavorful broth full of good-for-you-ingredients. To dress it up, sometimes I add coconut milk or coconut cream, and squeeze fresh lime juice into my bowl or cup. Yum!

To make it into a main dish soup, you can serve over cooked rice and shredded cooked chicken. Top with chopped cilantro and fresh lime juice. Yum!

I make this with a leftover chicken bones from when I roast a whole chicken, but I’ve also use 3- 5 pounds of chicken legs (another inexpensive option).

I love to add ginger and garlic into my food any time of the year, but they are especially soothing in this broth during the cold and flu season (and I love their immune building properties too!).

This is the Instant Pot that I own, Instant Pot 6 Quart, (if you are buying one and are making food for a family, I’d recommend going even bigger to this model, Instant Pot 8 Quart).

For those who don’t have an Instant Pot, yes, you can make this on the stove! I’d gently simmer it on the stove top for 6-12 hours to get close to the same richness as the Instant Pot recipe. I’m sure that you could make this in the slow cooker as well (I’d try low for 12 hours).

This recipe works great for those on a paleo or AIP diet too.

Flavorful Ginger and Garlic Instant Pot Broth is so simple and easy to make! It also makes a wonderful full meal soup when poured over rice and shredded cooked chicken. Yum! Paleo, AIP, and grain free friendly soup! -- The Nourishing Gourmet

Equipment and Ingredients:

  • Skimmer Ladle: These are PERFECT for removing the bones and vegetable remnants with little hassle. (We also use it to get noodles out of the pot once they are done cooking). We’ve been using this Asian Spider Strainer. If you want an even clearer broth, using a skimmer ladle like this Super Fine Mesh Strainer Ladle.
  • Instant Pot 8 Quart or Instant Pot 6 Quart
  • I love this guar gum-free coconut milk (you can also use this coconut cream).

Instant Pot Ginger and Garlic Broth

Variation: You can also add some fresh turmeric root (or 2 teaspoons powder).

Ingredients:

  • Bones leftover from one roasted chicken or 3-5 pounds of chicken legs or drumsticks
  • 2-3 inches of fresh ginger root, rinsed and thinly sliced
  • 3-5 garlic cloves, peeled
  • 1 medium onion, peeled and the roots cut off, cut into quartered
  • Salt and pepper
  • Filtered Water
  • 1 cup of Coconut milk and fresh limes for serving, optional

Directions:

1.Place the chicken, sliced ginger, and garlic in instant pot insert. Add a scant tablespoon of unrefined salt and a couple large pinches of freshly ground pepper (leave pepper out if AIP).

2. Fill water to slightly under the fill line.

Edit:While most Instant Pot Recipes online fill the pot high for broth making, it’s recently come to my attention (through an article) that filling your Instant Pot to the Max fill line is NOT recommended. According to the manual,  “For all pressure cooking programs, do not fill the unit over 2/3 full. When cooking foods that expand during cooking such as grains, beans, and dried vegetables, do not fill the unit over 1/2 full. Overfilling may cause a risk of clogging the pressure release valve and developing excess pressure. Please see “Cooking Preparation”.” So I would only fill your pot 2/3s full of water for this recipe.

3. Press manual, and set time to 2 hours on high.

4. Let get to pressure and let it run through the pressure cycle.

5. Allow broth to naturally release pressure for 20-30 minutes.

5. Carefully release pressure. Carefully pour through a fine sieve into a heat safe bowl or pot, OR, my favorite, use a skimmer ladle to remove the bones and vegetables and place in compost. If you used fresh drumsticks, then you can also remove the meat from the bones once they are cool enough to handle, and use the meat in the broth or another recipe.

6. Adjust salt to taste.

7. To finish: Optional: Pour in about 1 cup of coconut cream or coconut milk and serve with quartered limes for squeezing into individual bowls.

Variation: Serve over cooked rice and shredded cooked chicken, and top with chopped cilantro and fresh lime juice. Yum!

Printable Version:

Instant Pot Ginger and Garlic Broth
 
Print
 
Instant Pot Ginger and Garlic Broth Bones leftover from one roasted chicken or 3-5 pounds of chicken legs or drumsticks 2-3 inches of fresh ginger root, rinsed and thinly sliced 3-5 garlic cloves, peeled 1 medium onion, peeled and the roots cut off, cut into quartered Salt and pepper Filtered Water 1 cup of Coconut milk and fresh limes for serving, optional
Instructions
  1. Place the chicken, sliced ginger, and garlic in instant pot insert. Add a scant tablespoon of unrefined salt and a couple large pinches of freshly ground pepper (leave pepper out if AIP).
  2. Add water until the pot is about ⅔'s full.
  3. Press manual, and set time to 2 hours on high.
  4. Let get to pressure and let it run through the pressure cycle.
  5. Allow broth to naturally release pressure for 20-30 minutes
  6. Release pressure. Carefully pour through a fine sieve into a heat safe bowl or pot, OR, my favorite, use a skimmer ladle to remove the bones and vegetables and place in compost. If you used fresh drumsticks, then you can also remove the meat from the bones once they are cool enough to handle, and use the meat in the broth or another recipe.
  7. Adjust salt to taste.
  8. To finish: Optional: Pour in about 1 cup of coconut cream or coconut milk and serve with quartered limes for squeezing into individual bowls.
  9. Variation: Serve over cooked rice and shredded cooked chicken, and top with chopped cilantro and fresh lime juice. Yum!
3.3.3077

Some links may be affiliate links. I may earn a small commission on items purchased through my links. 
Filed Under: $10 Main, AIP, Dairy Free, Egg Free, Gluten Free, Grain Free, Soups, The Low Energy Guide to Healthy Cooking

Black Citrus Ice Cream

October 18, 2017 by KimiHarris 11 Comments

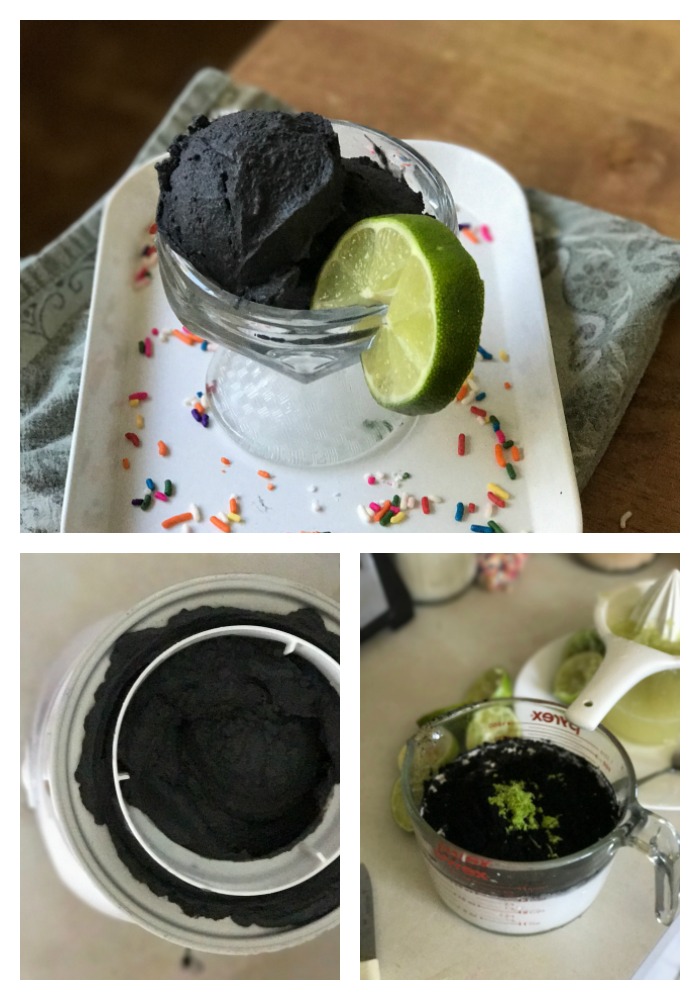
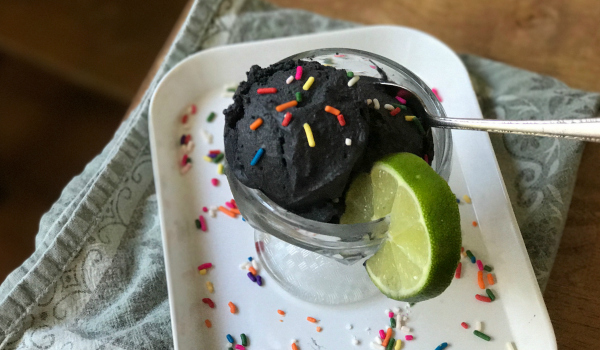
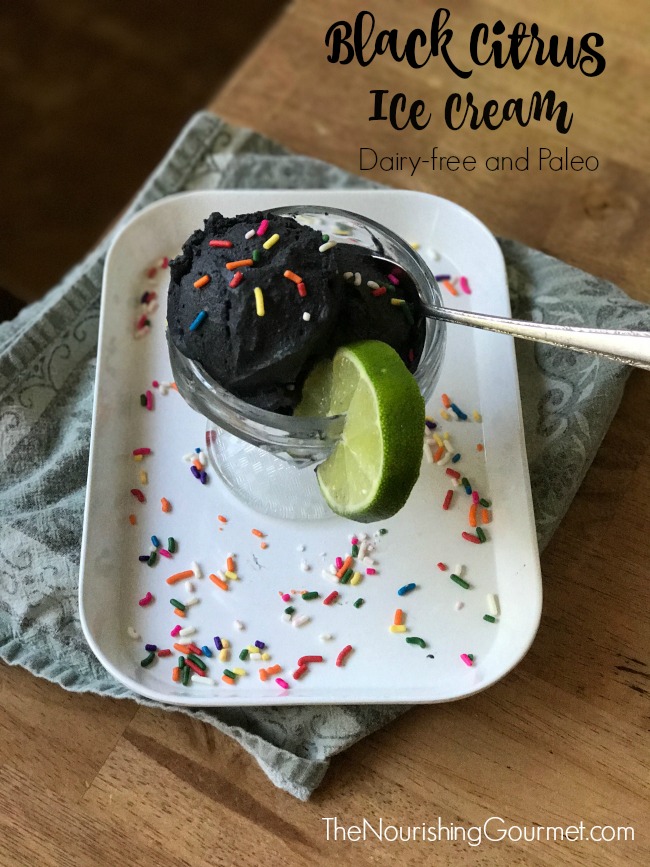
Amazing color and citrus flavor! This vibrant dairy free ice cream is colored with activated charcoal and is bursting with lime zest and juice. Yum! -- The Nourishing Gourmet

This vibrant ice cream has a deep black color and a tangy and sweet lime flavor! Not only does this gloriously and naturally colored ice cream make the perfect Halloween ice cream, but it also offers benefits as well. Upset tummy? This is what I turn too. This paleo version is dairy-free and egg-free, so it is suitable for many diets.

Black Ice Cream and Activated Charcoal Craze

Have you heard about the black ice cream craze? I know of several high-end ice cream stores that have offered black ice cream as a novelty item, but it’s so easy to make at home. The secret to black ice cream is not black dye (no thank you!), but activated charcoal. Activated charcoal is popular in everything from face masks, toothpaste, supplements, drinks, and food items! (I got this finely ground, food grade activated charcoal powder for a great deal).

What Activated Charcoal Does

While the black color lends itself well to a gag treat for Halloween, it also makes the perfect dessert to serve after consuming food that has unhealthy ingredients in it, or perhaps foods that you mildly react to such as food dye, gluten, dairy, or other trigger foods. That’s because activated charcoal acts like a mop in your digestive track. (Please note, if you are constipated, don’t take activated charcoal! It can make you constipated, or your make your constipation worse because of how it works in the intestine.)

In scientific terms, activated charcoal “adsorbs” certain materials.

“The word adsorb is important here. When a material adsorbs something, it attaches to it by chemical attraction. The huge surface area of activated charcoal gives it countless bonding sites. When certain chemicals pass next to the carbon surface, they attach to the surface and are trapped.” Source: How Stuff Works

Practically speaking, activated charcoal is used as an important part of many water filters to remove impurities, and is even used in hospitals to treat specific poisonings (they use high amounts under supervised medical care, and it is not suitable for all cases of poisoning). You can read more about that use from Poison Control.

My doctor has me using activated charcoal as a supplement, but I’ve also become interested in reports of people finding it helpful in dealing with digestive complaints after exposure to problem foods. I’m not sure if that’s because it adsorbs gas in the digestive tract or the actual food, but it does seem to help with the after effects. When not dealing with an actual allergy, but with foods that cause gas, digestive discomfort, etc., activated charcoal does seem to be helpful for us. We also use it when we have stomach bugs as it helps settle the stomach.

IMPORTANT NOTE: It’s very important not to take medication or supplements with activated charcoal, because it can adsorb them. Time them a couple of hours away from taking activated charcoal or consuming drinks or foods that contain them.

Other Important Notes: A friend commented below that they experienced some “detox” symptoms when adding in activated charcoal, so serve small servings and be aware of any side effects if you have never taken it before. Also, don’t take or eat foods or drinks with activated charcoal if you are constipated or have any health condition that slows food through the intestine. Please read about any side effects of activated charcoal here, and talk to your health care provider about any concerns.

For KIDS: If you serve this to children, you need to keep servings very small! Our kids have had small amounts of activated charcoal before, so I knew they didn’t have any problems with it, but I still wouldn’t serve them a huge scoop of this. This is a lot of activated charcoal, so keep servings small. (I’m always surprised that the ice cream shops who serve this don’t have some sort of warning label on it, considering the fact that it can adsorb medication and make you constipated if you eat too much of it!)

Special Supplies:

  • You can use coconut activated charcoal or hardwood. I recommend finely ground (the ice cream will have a little texture to it because of the charcoal, but you don’t want it to be overly gritty). As of right now, this 30 dollar’s worth of finely ground activated charcoal powder is only 10 dollars.
  • My ice cream maker is one of my favorite kitchen tools! I have this ice cream maker.
  • I love this guar gum-free coconut milk (you can also use the coconut cream).
  • For zesting a lime, this is my favorite tool.

We had fun coming up with crazy names for this black ice cream: Dementor Ice Cream (Harry Potter inspired), Santa’s Black Coal Ice Cream, Black Dwarf Ice Cream (Narnia), Black Cat Ice Cream, Spooky Ice Cream. Do you have any to add? I’d love to hear!

Amazing color and citrus flavor! This vibrant dairy free ice cream is colored with activated charcoal and is bursting with lime zest and juice. Yum! -- The Nourishing Gourmet

Black Citrus Ice Cream

This dairy-free, egg-free and paleo version of black ice cream is delightfully limey. If you would like to make a simple vanilla version, leave out the lime juice and lime zest and add 2 teaspoons of vanilla extract instead.

Other variations: Use lemons instead of limes for a lemonade ice cream. Or try an orange juice and orange zest for a creamy orange ice cream!

  • 3 cups of coconut milk (I used this guar gum free milk)
  • The zest of one lime
  • ½-¾ cup of freshly squeezed lime juice (I used the full ¾ cup for extra lime flavor, yum! But if you want it a little more subtle, use the ½ cup).
  • ⅔ cup of organic cane sugar, or ½ cup of honey
  • ¼ cup finely ground activated charcoal

1: Add all ingredients into a blender, and blend until smooth.
2: Optional: Chill in the refrigerator until cold.
3: Pour into ice cream maker and make according to manufacturer’s directions. My ice cream maker takes about 20 to 25 minutes.
4: Serve right away as soft serve, or put into a container and place in the freezer.
5: Remove from freezer 20 minutes before serving.


Printable version:

Black Citrus Ice Cream
 
Print
 
This dairy-free, egg-free and paleo version of black ice cream is delightfully limey. If you would like to make a simple vanilla version, leave out the lime juice and lime zest and add 2 teaspoons of vanilla extract instead. Other variations: Use lemons instead of limes for a lemonade ice cream. Or try an orange juice and orange zest for a creamy orange ice cream!
Ingredients
  • 3 cups of coconut milk (I used this guar gum free milk)
  • The zest of one lime
  • ½-¾ cup of freshly squeezed lime juice (I used the full ¾ cup for extra lime flavor, yum! But if you want it a little more subtle, use the ½ cup).
  • ⅔ cup of organic cane sugar, or ½ cup of honey
  • ¼ cup finely ground activated charcoal
Instructions
  1. Add all ingredients into a blender, and blend until smooth.
  2. Optional: Chill in the refrigerator until cold.
  3. Pour into ice cream maker and make according to manufacturer's directions. My ice cream maker takes about 20 to 25 minutes.
  4. Serve right away as soft serve, or put into a container and place in the freezer.
  5. Remove from freezer 20 minutes before serving.
3.3.3077


Some links may be affiliate links. I may earn a small commission on items purchased through my links. 

 

Filed Under: AIP, Dairy Free, Desserts, Egg Free, For the Kids, For the Love of Food and Books, Gluten Free, Grain Free

Why I Started Adding Okra into My Smoothie ( And Fruit Okra Recipe)

October 4, 2017 by KimiHarris 10 Comments

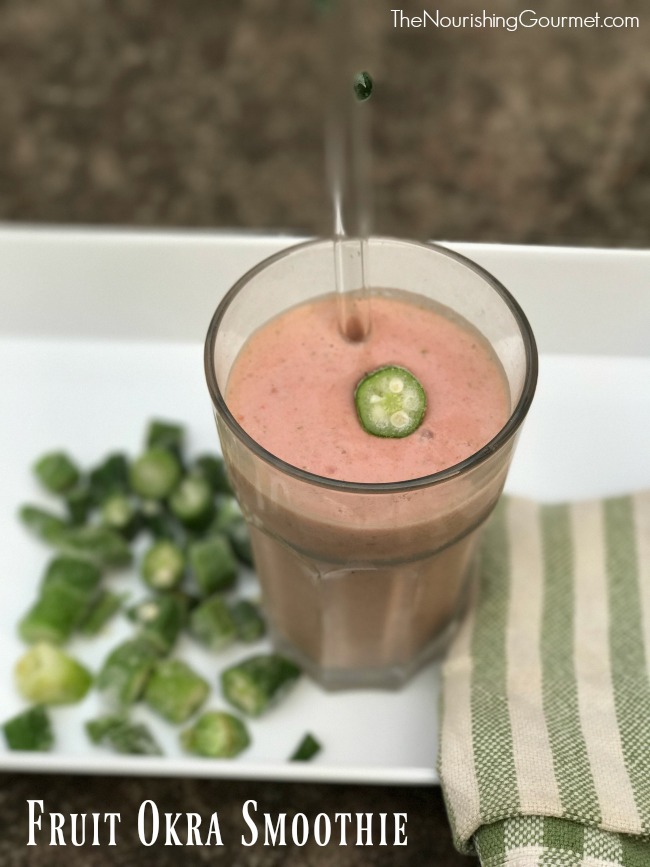
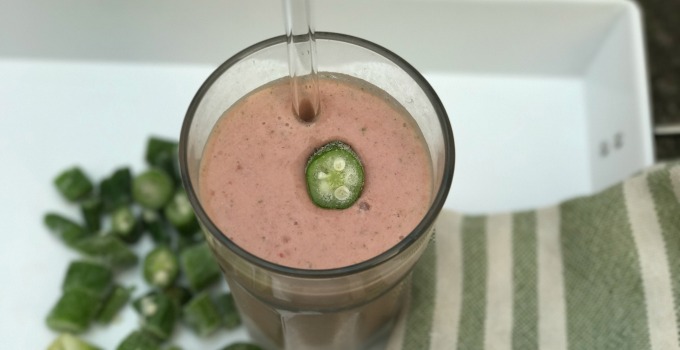
Fruit Okra Smoothie - this green smoothie is full of important nutrients! Okra has well documented heath promoting attributes, and adds a lot of body to smoothies!

This beautiful fruit smoothie has a green secret that adds important minerals and vitamins to it, as well as making a frothy texture – okra!

Okra is an unlikely contender for smoothies, yet here I am throwing it into my smoothies. It’s known for being a popular vegetable in many southern dishes, but certainly isn’t known as a typical smoothie addition. So why am I adding it to mine? Besides the fact that it’s an excellent source of whole food fiber, vitamin C and K, and folate, there are some interesting studies looking into possible benefits.

What is Okra?

First, what is okra? It’s a flowering plant from the mallow family. The mallow family boasts of the following well-known family members: cacao, cotton, hibiscus, okra, and durian. Okra is the edible fruit of a variety of hibiscus (so it’s not technically even a vegetable!). Did you notice that “mallow” sounds like “marshmallow”? That’s because the original marshmallow was developed from the gelatinous properties of marshmallow roots, from the mallow family. Okra also can produce a gelatinous texture.

Health Benefits and Studies on Okra

  • Okra helps diabetic symptoms and lowers blood sugar (Source)
  • A lectin from okra may help fight or prevent some cancers. (Source) (Also good information here on contradictions – make sure you check them out!)
  • Could help protect the liver (Source)
  • Okra could also help prevent stomach ulcers (Source)
  • Plus,it could also be helpful for your gut health – both in promoting good gut bacteria and soothing inflammation. (Source)

Speaking from a culinary perspective, it adds a lot of creamy texture to the smoothie because of its gelatinous (otherwise known as mucilage) texture. I love the texture, and it only adds a mild taste to the smoothie. However, I will warn you that my children have all informed me that they are not a fan of the “weird green vegetable” I put into the smoothies. Although, I’ve heard reports of many children not even noticing it in their smoothies, mine have been too perceptive for me to add it without them noticing. I may try to sneak in very small amounts next time to see if they notice, but for now, I’ve been making my own personal smoothies stuffed full with it! UPDATE: Adding only a small amount was the key! My kids have now drunk several smoothies with small amounts of okra in it without knowing it was there. 

A Notes on Ingredients and Blenders:

I use pre-steamed and pre-frozen sliced okra. It works well and is easy to use. Although technically you could use raw, this recipe suggests pre-steaming it to reduce a slimy texture.

Secondly, you should have a powerful blender to properly blend frozen vegetables. I use a Blendtec, but any brand that can pulverize ice well should work great.

Lastly, for extra nutrition, I’ve been adding two things lately. First gelatin. I like many brands, but lately I’ve been using Super Collagen . Supposedly it’s in in a smaller peptide form so that it is easier to digest. What I like about it is that it is so fine that there is no added grittiness from it. Sadly, it’s not from pastured animals. The other addition I’ve been adding is colostrum from this company – which is a wonderful immune booster. Although some in the family are sensitive to dairy, it appears that we all do fine with it!

Finally, take note that okra is high in oxalates. If you are sensitive to okra, be careful. I don’t seem to be sensitive, but with all things being done in moderation, I don’t eat okra, or other high oxalate foods every day.

Fruit Okra Smoothie - this green smoothie is full of important nutrients! Okra has well documented heath promoting attributes, and adds a lot of body to smoothies!

Okra Fruit Smoothie

PDF for Printing

Makes 1 large or two small smoothies. This recipe can have so many variations! Have fun with it.

  • ½ cup of frozen fruit (such as blueberries, raspberries, mango, or peach slices)
  • ¼-½ cup of frozen and sliced okra
  • ½ cup each of kombucha and coconut cream/milk (or 1 cup of desired liquid – kefir, milk, juice, coconut water, etc.), plus extra, as needed
  • ½ teaspoon vanilla extract
  • 1 small ripe banana (adds a lot of sweetness, but sometimes I leave out because they are a bit high in sugar for me)

Add all of the ingredients into a blender and blend on high until very smooth. Stop to scrape sides, if needed, and add more liquid as needed (I often use more).

Some links may be affiliate links. I may earn a small commission on items purchased through my links. 
Filed Under: Beverages, Breakfast and Brunch, Dairy Free, Egg Free, Gluten Free, Grain Free, Nutrient Dense Foods, Vegan, Vegetarian

« Previous Page
Next Page »

Primary Sidebar

Follow Me

  • Facebook
  • Instagram
  • Pinterest
  • RSS

Search

Please Read:

The information you find here at The Nourishing Gourmet is meant to help you become a better cook! This site is primarily for sharing family friendly recipes. It's not meant to give medical advice or to make any health claims on the prevention or curing of diseases.This site is only for informational and educational purposes. Please discuss with your own, qualified health care provider before adding in supplements or making any changes in your diet. Also, any links to sponsors or affiliates (including Amazon) may give me a percentage of the sale or a pay per click. Thank you for supporting this site.

Categories

  • $10 Main (43)
  • $5 Dishes (43)
  • 52 ways to save money on a healthy diet (53)
  • AIP (23)
  • Baked Goods (84)
  • Beverages (72)
  • Breakfast and Brunch (63)
  • Condiments (8)
  • Dairy Free (498)
  • Desserts (185)
  • Dietary Needs (6)
  • Egg Free (14)
  • Egg Free (92)
  • For the Kids (70)
  • For the Love of Food and Books (18)
  • Gluten Free (491)
  • Grain Free (98)
  • Health (75)
  • Kitchen Tools (5)
  • Main Dishes (128)
  • Nourishing Frugal Recipes (169)
  • Nourishing Frugal Tips (70)
  • Nourishing Practices (57)
  • Nutrient Dense Foods (70)
  • Q and A (16)
  • Salads (40)
  • Sides (104)
  • Snacks (126)
  • Soups (50)
  • The Healthy $1 Menu (21)
  • The Low Energy Guide to Healthy Cooking (20)
  • THM (5)
  • Trim Healthy Mama (5)
  • Uncategorized (848)
  • Vegan (243)
  • Vegetarian (363)

Recent Posts

  • Eating for Comfort and Sustenance
  • Perfect Instant Pot Black and Brown Rice
  • What Worked and What Didn’t in My Cooking Life Last Year
  • Mocha Dark Chocolate Bombs (low sugar)
  • Gingerbread Caramel Corn
  • Thyme and Garlic Potato Stacks
  • The Great Big Holiday Salad
  • 30 Favorite Kitchen Stocking Stuffers
  • Luxurious DIY Lip Balm
  • Spicy Korean Beef and Cabbage

Recent Comments

  • June on One-Pot Gluten-Free Mac and Cheese
  • Kim on Eating for Comfort and Sustenance
  • Michelle Sanders on Chile-Spiked Dark Chocolate Bark with Pepitas & Mango (Dairy Free)
  • KimiHarris on Eating for Comfort and Sustenance
  • KimiHarris on Eating for Comfort and Sustenance

Fresh: Nourishing Salads for All Seasons

Footer

Privacy

Copyright © 2026 · Foodie Pro & The Genesis Framework