• Skip to primary navigation
  • Skip to main content
  • Skip to primary sidebar
  • Skip to footer

The Nourishing Gourmet

Nourishing. Satisfying. Gourmet.

  • About
    • Privacy
    • Contact
  • Recipes
  • Cookbooks
    • Everyday Nourishing Food
    • Salad Cookbook
    • Soup Cookbook

Dairy Free

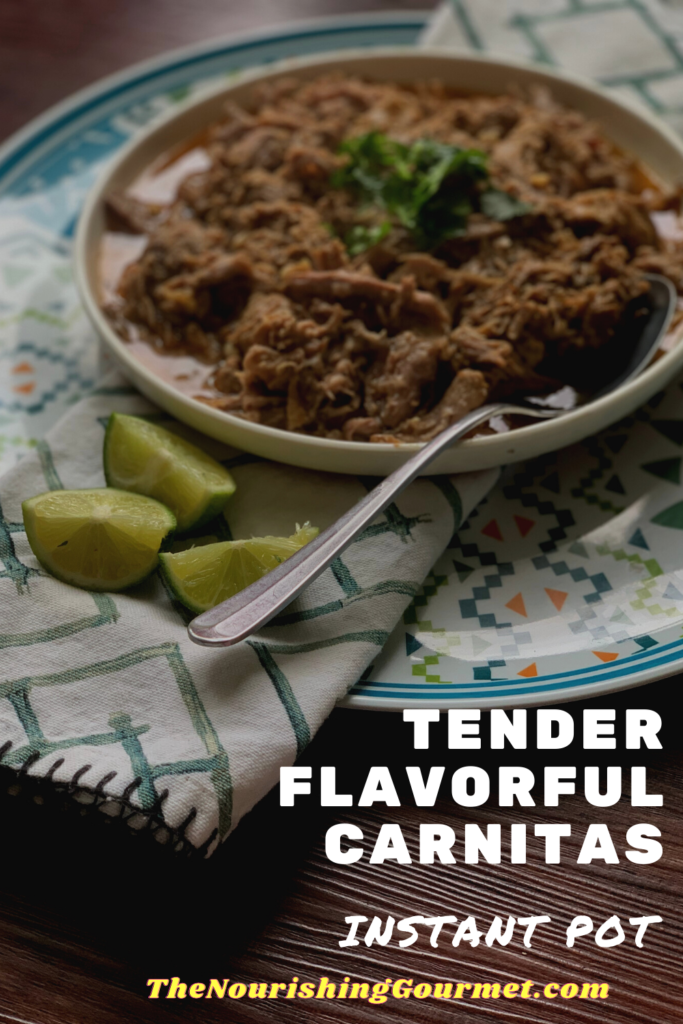
Tender Instant Pot Carnitas (shredded pork for tacos)

April 15, 2021 by KimiHarris Leave a Comment

One of my kids told me after my last tweaks to this recipe, “Mom, this is so good! I feel like I’m at Chipotle!” and that was highest praise from this particular child. My kids usually grow tired of recipes I’m testing for this blog. But this was one they happily ate as I continued to perfect it.

This recipe for carnitas has been on our table repeatedly in recent weeks. Cooked to perfection in a pressure cooker, carnitas can be used for tacos, burritos, burrito bowls, or taco salads. 
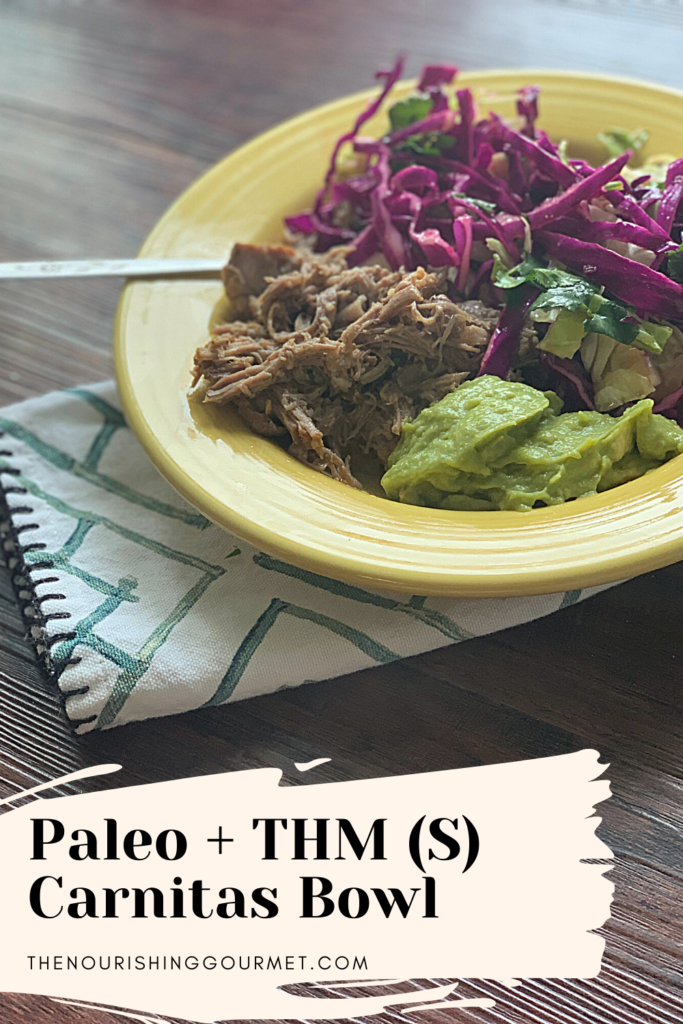
Our kids enjoy their carnitas in tacos with all of the toppings, while I make mine into a grain-free carnitas bowl using my Simple Mexican Coleslaw recipe, along with guacamole and salsa. When I’m eating dairy, I’ll also add sour cream and cheese. So good! This makes a Trim Healthy Mama “S” meal.

I tested this recipe in a pressure cooker, the large Instant Pot. This is where pressure cookers really shine, as they cook meat quickly, and it comes out so tender. However, I also have provided notes on how to make this in a slow cooker, or stove/oven. 

It’s worth noting that traditionally carnitas were slow-cooked in lard until tender and crispy, with not quite as many spices as this recipe has. That is a lovely way to enjoy a traditional recipe. But this recipe is easier for me to put together, and I find it plenty fatty enough just from the fat produced from the roast. 

Related Recipes:

  • Simple Mexican Quinoa Bowls
  • Mexican Quinoa Salad
  • Mexican Chocolate Dairy-free Ice Cream
  • Lacto-Fermented Escabeche
  • 7 Layer Mexican Dip

Tender Instant Pot Carnitas

  • 3-6 pound pork butt roast or shoulder roast
  • Salt and pepper
  • Avocado oil, or oil/fat of choice
  • 2 teaspoons onion powder (optional)
  • 1 heaping tablespoon chili powder
  • 1 heaping tablespoon ground cumin
  • 8 garlic cloves, peeled, and minced
  • 2 heaping teaspoons dried oregano
  • 1 cup chicken broth 
  • ½ cup lime juice (orange juice is more traditional, and delicious as well, but we preferred lime).
  • 2 teaspoons salt and generous amount of freshly ground black pepper
  1. Cut roast into, roughly, largish two-inch squares (mine were very irregular, and that’s fine). If they are very wet, pat dry, salt and pepper generously.
  2. Using the sauté function, heat enough oil in the Instant Pot until hot (but not smoking), and using tongs, place some of the squares into the bottom of the pan. Don’t overlap, and do multiple batches. Turn once, browning both sides. Remove to plate, and then repeat until you have finished all of the meat.
  3. Turn the sauté function off, add meat back into the IP, and add the rest of the ingredients.
  4. Put lid on, and hit “manual” and set for 40 minutes on high. Once done, let it release for 10-15 minutes.
  5. Remove lid, and remove meat into a large bowl. Shred with two forks (my kids like doing this!). We also remove any fatty pieces.
  6. Put into a serving dish and pour some of the sauce over it, and serve.
  7. OR, if you would like it browned, you can place on a large sheet pan, and brown it in the oven on broil for around five minutes. The other options would be browning it in a large frying pan on the stove. My kids prefer it straight from the IP.

Directions for slow cooker: Brown meat in a pan in as many batches as needed. Place in slow cooker, and add the rest of the ingredients. Cook on low for 6-8 hours, or on high for 3-5 hours, until the meat is fork tender.

Directions for stovetop/oven: In an oven-safe dish with a lid, brown meat in as many batches as needed. Add the rest of the ingredients, put the lid on, and place in a preheated oven at 300F, and bake for 3 to 4 hours until the meat is fork tender.
Filed Under: Dairy Free, For the Kids, Gluten Free, Grain Free, Main Dishes, The Low Energy Guide to Healthy Cooking

Why I’m Spatchcocking My Turkey This Year

November 26, 2019 by KimiHarris 6 Comments

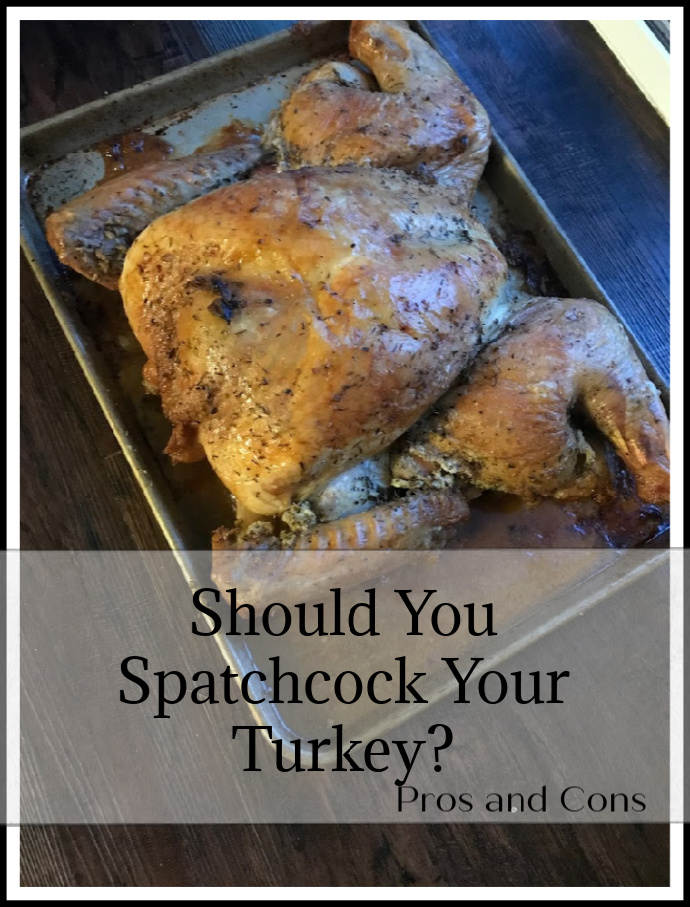
This method has many advantages, including a super fast cooking time, and moist, delicious meat.

Turkey is the centerpiece of most Thanksgiving tables, yet it’s also the hardest to cook correctly. If you undercook it, food poisoning is a possibility, but if you overcook it, the breasts can be dry and unappetizing. 

My solution for the past five years or so has been trying out different forms of brining. My go to is this dry brine – I love not having to deal with a lot of liquid (as well as not having to find a large enough container for said turkey and brine). A dry brine still gives you the flavorful benefits of a brine as well as a juicy turkey. 

However, I think spatchcocking makes my recipe even better. Spatchcocking is when you remove the spine of the turkey, and roast the turkey flat. This has significant benefits, the biggest that it cooks very fast. I cooked a 16 pound turkey in a little less than an hour and a half. Wow! But it also gets the turkey’s skin delicious, crisp and brown, and even better –roasts the turkey evenly – so the legs and breasts get done at the same time. 

While you won’t be able to stuff your turkey this way (an option that many experts say not to do anyway), the benefits far outweigh that fact. 

But before I send you all scurrying to try this out yourself, I do want to honestly share our experience testing this method out. 

  1. It’s not at all hard to spatchcock a chicken with a sharp knife or kitchen shears. I had a harder time with a turkey. My husband, with his stronger hands, ended up helping me out with this part. I prefer kitchen shears, but do expect to have to use some oomph on this part. 
  2. When I pressed down on the turkey to flatten it after the backbone was removed, a large squirt of turkey juice sprayed across the kitchen floor. Oops. 
  3. Most recipes I found used a very hot oven for this method. This ended up causing a lot of smoking. For Thanksgiving, I plan on turning the oven down a bit after the first 20 minutes, and also adding water to the bottom of the pan to hopefully prevent that from reoccurring. 
  4. Our turkey was hefty at 16 pounds, so it just barely fit on our sheet pan once flattened. I would say it needs to be 16 pounds or less, so this method won’t likely work for larger birds unless you split the turkey in half and roast on two pans. 

Despite those disadvantages, our “test” turkey turned out so well cooked and delicious we all decided this was a method we simply had to do again. Paired with the salt brine? Amazing. 

I don’t want to give my own directions yet, as I still want to experiment with this method, but here are a couple of recipes showing how to spatchcock: Example one, two, and three.

And here is my dry brine recipe! 

Filed Under: AIP, Dairy Free, Egg Free, Gluten Free, Grain Free, Main Dishes, Nutrient Dense Foods

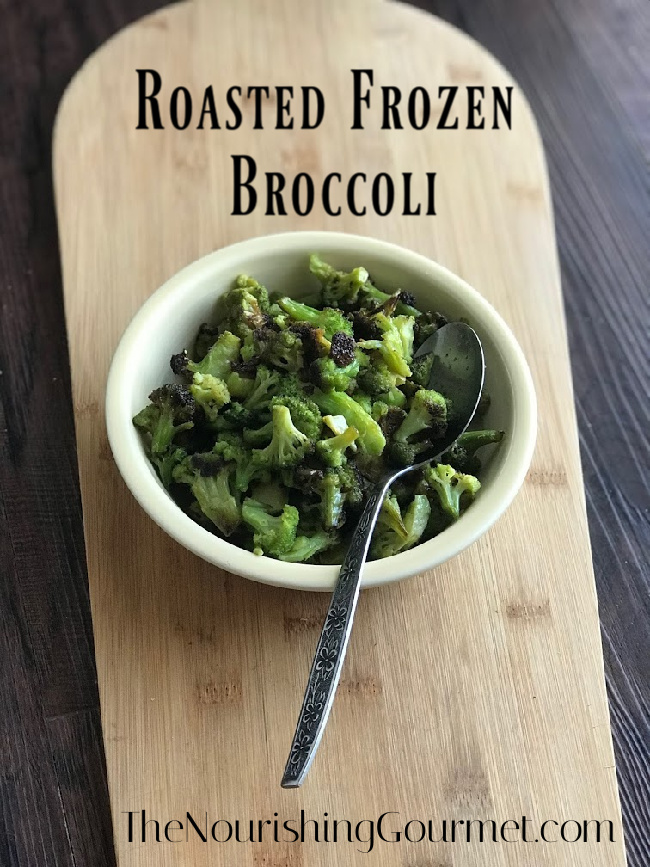
Roasted Frozen Broccoli

September 11, 2019 by KimiHarris 13 Comments

This is not only a simple recipe, but it's delicious and kid-friendly too. Yes! Even frozen vegetables can taste good!

We have a problem. If we don’t like how I prepare vegetables, they are pushed around on our plates and barely touched. This is no good, as I believe that vegetables are not only important for our health, but they can also be a delicious part of our daily diet as well. 

So when we made our big move to South Dakota, I faced a new problem. Back in Portland, Oregon, I had a large array of options for vegetables. Here? Not so much. Don’t get me wrong, there are still plenty of stores and some good options, but I found that I was eating less vegetables, they were costing a little more, and I wasn’t getting as good of a variety into our diets. Because of the climate here, we simply don’t have as many local options for produce. 

I needed to change my game plan, and that meant being willing to try more frozen vegetables. I have, admittedly, long eschewed frozen vegetables, and we mainly used them as a stop-gap. But I realized that there were many great frozen vegetables options here and I needed to figure out how to make them a little more delicious. I’m proud to say that we now eat them on a regular basis and all of us love them. Why? 

Can You Roast Frozen Vegetables?

Well, it turns out that you can roast them just like you do fresh vegetables! Why does roasting make fresh and frozen vegetables so much better? For a number of reasons: It helps crisp vegetables while they cook and if you leave them in long enough they will start to caramelize and give you a savory depth of flavor. 

Steamed frozen vegetables can sometimes have a mushy texture once cooked, or be very bland in flavor. I did find that the recipe I used for my cooking like a Roman day, using a spiced wine sauce with frozen broccoli, was really delightful. So you can absolutely have good steamed frozen vegetables. 

However, roasting them is a more fail-safe way for delicious vegetables that takes very little hands-on time. 

It’s also very versatile. We’ve done frozen Brussels sprouts, a carrots, broccoli and cauliflower mix, and both cauliflower and broccoli. The only thing we haven’t really been fans of is the frozen carrots. They were far better when roasted than steamed, but we found we preferred the other vegetables. 

Basic Method for Roasting Frozen Vegetables

Basic Method: Roasting vegetables is very easy. The basis concept is to toss frozen vegetables (don’t defrost) with oil, salt and pepper and roast in a hot oven until they are browned and crispy. I often don’t even set a timer. 

Additions: You can also toss them with dried herbs, fresh garlic before they go in the oven, or toss with a splash of balsamic vinegar and fresh herbs right after they come out of the oven. Or, roast with chopped bacon. This is the type of recipe where knowing the basic method is helpful, and then you can have fun trying a variety of vegetables and herbs and spices. 

But to get you started, here is a basic recipe for Roasted Frozen Broccoli

Roasted Frozen Broccoli

1 package of frozen broccoli (16 oz) 

2-3 tablespoons of oil or melted fat of your choice 

Salt and pepper 

  1. Preheat oven to 425F. I use parchment paper because I use sheet pans that are aluminum, but you can an unlined sheet pan as well. 
  2. Toss broccoli with oil/fat and salt and pepper. Place in oven and cook until browned to desired doneness. (between 15-35 minutes). 

Variation: My favorite variation is adding some sliced fresh onions to the broccoli before it cooks and then tossing with chopped fresh basil and a splash of balsamic vinegar once it’s out of the oven. Fabulous! 

Filed Under: $5 Dishes, 52 ways to save money on a healthy diet, AIP, Dairy Free, Egg Free, For the Kids, Gluten Free, Grain Free, Health, Sides, The Low Energy Guide to Healthy Cooking, Uncategorized, Vegan, Vegetarian

Paleo Tigernut Waffles

April 4, 2019 by KimiHarris 2 Comments

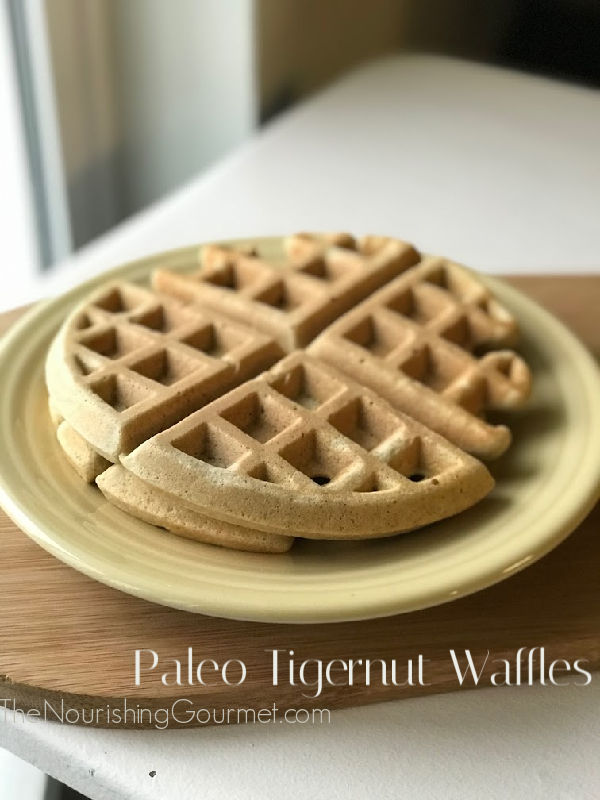
Paleo Tigernut Waffles - A wonderful baked good for a grain-free diet, and also a source of prebiotic fiber!

These gently sweet waffles are not only grain and dairy free, but they are delicious! Tigernuts have been eaten for thousands of years and are not a nut, but actually a small tuber. They are a good source of prebiotic fiber and are also a grain-free carbohydrate. I created this recipe for a couple of reasons.

  1. I temporarily am doing a grain-free diet again. I find that it helps reset my digestive system and gives me more energy (usually I eat gluten-free). Grain-free waffles are some of the fastest grain-free baked goods I can make myself and hence valuable to my time-strapped schedule.
  2. I am also experimenting with adding prebiotic fiber into my diet as a way of increasing my microbiome health. Tiger nut flour happens to be a great source of it. You can read about the possible benefits of prebiotic fiber in the following three studies: Health Effects and Sources of Prebiotic Dietary Fiber, Fiber and Prebiotics: Mechanisms and Health Benefits, Dietary fiber and prebiotics and the gastrointestinal microbiota. Note: I’m not making any health claims about the following recipe, and I have just begun my own self-experimentation in adding prebiotic fiber.
  3. When I’m eating a grain-free diet, I do have to be careful to add at least some carbs into my diet. If I go too low carb, I don’t feel well. However, I quickly get tired of sweet potatoes, so tigernut flour and cassava flour allows me to expand what I can eat.

Non-Toxic Waffle Iron?

Before I share the recipe, I also wanted to mention that I recently bought a new waffle iron, as we no longer owned one, and it has worked well for us! It has a nonstick ceramic surface and doesn’t contain PTFE or PFOA and so is considered a more non-toxic choice. I found that my gluten and grain-free waffles won’t brown well in it unless I turn the knob all the way to high, or nearly so. Waffles stick the least in this waffle iron of any I have tried. This picture was taken after making a batch of them! This is the (affiliate links following) waffle maker I bought. You could also check out the cast iron versions, like this one.

Notes on Ingredients and Recipe:

  • You can see the brands of tigernut and cassava flour I used by following the links.
  • If you used all tigernut flour in this recipe it would be very dense and fibrous, which is why I added another grain-free flour. Even with that, keep in mind that the high-fiber tigernut flour will make these waffles have a slightly more fibrous texture.

Paleo Tigernut Waffles

  • 2 large eggs
  • ½ cup water or milk of choice
  • 1 teaspoon vanilla extract
  • ¾ tigernut flour
  • ½ cup cassava flour
  • 1/8 teaspoon salt
  • 1 ½ teaspoon baking powder
  • 2 tablespoons coconut oil (plus more, as needed, for waffle pan)
  1. Plug waffle iron in and start preheating.
  2. Put the eggs, water or milk, and vanilla extract into a medium-sized bowl. Whisk.
  3. Add the flours, salt, and baking powder.
  4. If your coconut oil isn’t liquified, gently melt on the stovetop or in a cup in the microwave and add to bowl and whisk right away until smooth.
  5. Brush pan with oil/melted fat of choice, as needed, and put about ½ cup (or amount appropriate for your waffle pan). Cook until done, and lightly browned.
  6. Remove with fork, and repeat the process until done with batter.
  7. Makes between 2-4 waffles, depending on how full you fill your pan, and how large your waffle pan is. I recommend a half waffle as a serving size since this is a very fiber-rich recipe (that said, I’ve definitely eaten a whole one for dinner!) You can also reheat in the toaster oven or toaster.

Print Friendly Recipe:

Paleo Tigernut Waffles
 
Print
 
Ingredients
  • 2 large eggs
  • ½ cup water or milk of choice
  • 1 teaspoon vanilla extract
  • ¾ tigernut flour
  • ½ cup cassava flour
  • ⅛ teaspoon salt
  • 1 ½ teaspoon baking powder
  • 2 tablespoons coconut oil (plus more, as needed, for waffle pan)
Instructions
  1. Plug waffle iron in and start preheating.
  2. Put the eggs, water or milk, and vanilla extract into a medium-sized bowl. Whisk.
  3. Add the flours, salt, and baking powder.
  4. If your coconut oil isn’t liquified, gently melt on the stovetop or in a cup in the microwave and add to bowl and whisk right away until smooth.
  5. Brush pan with oil/melted fat of choice, as needed, and put about ½ cup (or amount appropriate for your waffle pan). Cook until done, and lightly browned.
  6. Remove with fork, and repeat the process until done with batter.
  7. Makes between 2-4 waffles, depending on how full you fill your pan, and how large your waffle pan is. I recommend a half waffle as a serving size since this is a very fiber-rich recipe (that said, I’ve definitely eaten a whole one for dinner!) You can also reheat in the toaster oven or toaster.
3.3.3077


Filed Under: Baked Goods, Breakfast and Brunch, Dairy Free, Gluten Free, Grain Free, Snacks, The Low Energy Guide to Healthy Cooking

« Previous Page
Next Page »

Primary Sidebar

Follow Me

  • Facebook
  • Instagram
  • Pinterest
  • RSS

Search

Please Read:

The information you find here at The Nourishing Gourmet is meant to help you become a better cook! This site is primarily for sharing family friendly recipes. It's not meant to give medical advice or to make any health claims on the prevention or curing of diseases.This site is only for informational and educational purposes. Please discuss with your own, qualified health care provider before adding in supplements or making any changes in your diet. Also, any links to sponsors or affiliates (including Amazon) may give me a percentage of the sale or a pay per click. Thank you for supporting this site.

Categories

  • $10 Main (43)
  • $5 Dishes (43)
  • 52 ways to save money on a healthy diet (53)
  • AIP (23)
  • Baked Goods (84)
  • Beverages (72)
  • Breakfast and Brunch (63)
  • Condiments (8)
  • Dairy Free (498)
  • Desserts (185)
  • Dietary Needs (6)
  • Egg Free (14)
  • Egg Free (92)
  • For the Kids (70)
  • For the Love of Food and Books (18)
  • Gluten Free (491)
  • Grain Free (98)
  • Health (75)
  • Kitchen Tools (5)
  • Main Dishes (128)
  • Nourishing Frugal Recipes (169)
  • Nourishing Frugal Tips (70)
  • Nourishing Practices (57)
  • Nutrient Dense Foods (70)
  • Q and A (16)
  • Salads (40)
  • Sides (104)
  • Snacks (126)
  • Soups (50)
  • The Healthy $1 Menu (21)
  • The Low Energy Guide to Healthy Cooking (20)
  • THM (5)
  • Trim Healthy Mama (5)
  • Uncategorized (848)
  • Vegan (243)
  • Vegetarian (363)

Recent Posts

  • Eating for Comfort and Sustenance
  • Perfect Instant Pot Black and Brown Rice
  • What Worked and What Didn’t in My Cooking Life Last Year
  • Mocha Dark Chocolate Bombs (low sugar)
  • Gingerbread Caramel Corn
  • Thyme and Garlic Potato Stacks
  • The Great Big Holiday Salad
  • 30 Favorite Kitchen Stocking Stuffers
  • Luxurious DIY Lip Balm
  • Spicy Korean Beef and Cabbage

Recent Comments

  • June on One-Pot Gluten-Free Mac and Cheese
  • Kim on Eating for Comfort and Sustenance
  • Michelle Sanders on Chile-Spiked Dark Chocolate Bark with Pepitas & Mango (Dairy Free)
  • KimiHarris on Eating for Comfort and Sustenance
  • KimiHarris on Eating for Comfort and Sustenance

Fresh: Nourishing Salads for All Seasons

Footer

Privacy

Copyright © 2026 · Foodie Pro & The Genesis Framework