• Skip to primary navigation
  • Skip to main content
  • Skip to primary sidebar
  • Skip to footer

The Nourishing Gourmet

Nourishing. Satisfying. Gourmet.

  • THM Coaching
  • About
    • Privacy
    • Contact
  • Recipes
  • Cookbooks
    • Everyday Nourishing Food
    • Salad Cookbook
    • Soup Cookbook

Nourishing Frugal Recipes

Honey Garlic Drumsticks (a simple summer crockpot meal)

July 10, 2014 by April Swiger 2 Comments

Honey Garlic Drumsticks (a simple summer crockpot meal)

By April Swiger, Contributing Writer

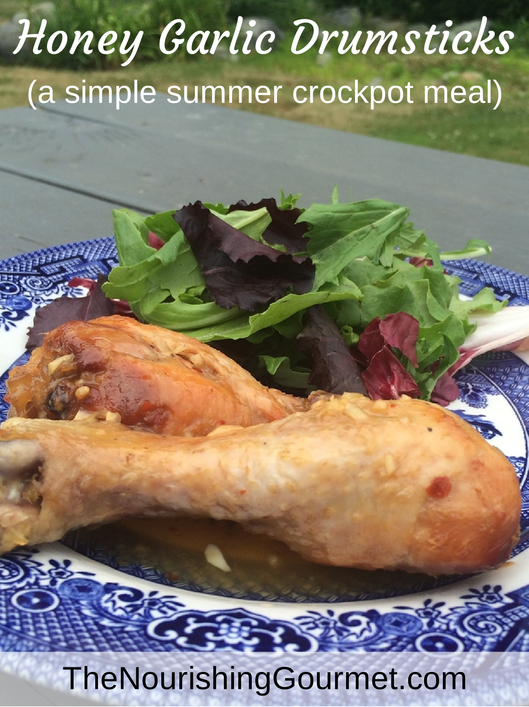
Sweet, tangy, and a little bit of red-pepper-kick, these honey garlic drumsticks are the perfect meal for a hot summer night. I love the flavorful dark meat that chicken legs have to offer. Not only are they an incredibly frugal cut of meat, but the seasoning possibilities are near endless. Add in the simplicity of a slow cooker/Crockpot, and you have a nourishing meal for the whole family, or a crowd, without much effort.

When the weather is beautiful and warm, it’s much more difficult to give up time outside for prepping meals. We don’t have central air in our home, so turning on the oven during the summer can be a little uncomfortable. It’s easy to forget that crockpots aren’t just for hearty wintertime soups, stews, and chillies! I’ve learned that it’s a great option to beat the summer heat, and a convenient way to enjoy a delicious meal after a fun day outside.

This recipe can be easily prepared in the slow cooker crock itself, minimizing the amount of dishes needed to be washed. It’s also easy to adapt based on how much “kick” you desire. You can thicken the sauce with a little cornstarch or arrowroot powder after the chicken is cooked. Pour it over the meat, or into a bowl for dipping. You definitely don’t want to skip this part as the sauce is absolutely delectable!

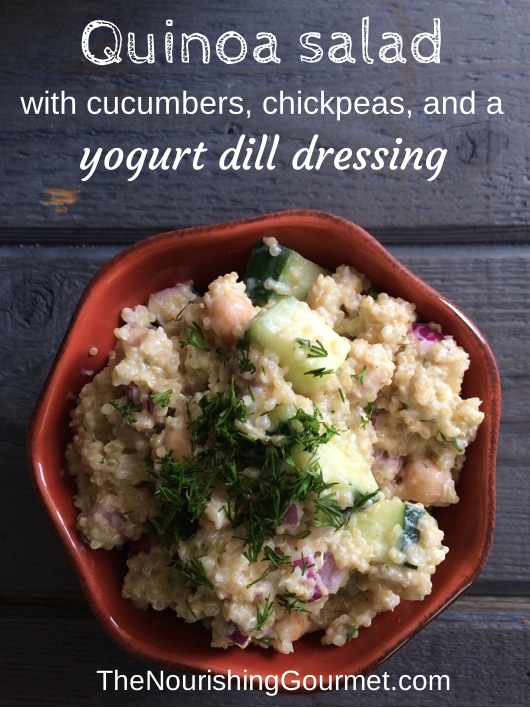
More time in the sun with family and friends, and less time in your kitchen – a win all around in my book! Keep it simple and serve these drumsticks with a side salad, carrot and celery sticks, rice or quinoa, or some sautéed veggies with butter or coconut oil.

Kimi uses this (affliate links)  slow cooker, and uses this clay cooker for making quinoa or rice on hot days.

Time at the stove: 10 minutes if you choose to sauté or steam some vegetables. 20 minutes if you make rice or quinoa. Or none if you serve it with cold vegetables or a salad.

Time at the oven: 5 minutes if you choose to broil the legs for a crispy skin.

Other drumstick/wing recipes:

  • Lemon Garlic Drumsticks
  • Teriyaki Chicken Wings

Other crockpot recipes:

  • Cook once, eat thrice with a slow cooker beef roast
  • Shawarma whole chicken in the slow cooker
  • Slow cooker baked pinto beans

Honey Garlic Drumsticks (a simple summer crockpot meal)
 
Author:
April Swiger
Recipe type: Main Dish
Print
 
These drumsticks are a perfect mixture of sweet and tangy, with a bit of kick! They are effortless to prepare and make a great summertime meal for your family, or a crowd.
Ingredients
  • 2 lbs chicken legs
  • ½ cup honey
  • 2 Tbls coconut oil, melted
  • 3 Tbls apple cider vinegar
  • 3-5 cloves of garlic, minced (garlic lovers use 5!)
  • 1 inch fresh ginger, grated, or about ¼ tsp dried
  • ⅛-1/4 tsp crushed red pepper
  • Salt and pepper
  • 1 Tbls arrowroot powder or cornstarch (used at the end to thicken the sauce)
Instructions
  1. In the crock of your slow cooker whisk together the honey, coconut oil, apple cider vinegar, minced garlic, ginger, crushed red pepper, and salt and pepper.
  2. Add the drumsticks to the crock, and toss them until they are fully coated with the sauce.
  3. Cook the drumsticks on low for 4-6 hours, or high for 2-4 hours.
  4. When the chicken legs are fully cooked, remove them from the crock, leaving the sauce inside.
  5. OPTIONAL - If desired, you can place the legs under the broiler at this point to crisp up the skin. About 5 minutes at 400 F should be sufficient.
  6. Ladle out ½ cup of the sauce into a small bowl, and whisk in the arrowroot powder or cornstarch (this step may not be necessary, but I find it's easier to get the lumps out in a smaller amount of sauce).
  7. Pour the sauce and arrowroot/cornstarch mixture back into the crock with the rest of the sauce. Whisk it in and allow it to thicken for a few minutes with the crock on 'high.'
  8. Serve the drumsticks with the sauce poured on top, or in a small bowl for dipping!
3.2.2708


Filed Under: $10 Main, Dairy Free, Gluten Free, Main Dishes, Nourishing Frugal Recipes Tagged With: Gluten Free, Grain Free, Nourishing Frugal Recipes

Quinoa Salad with Cucumbers, Chickpeas, and a Yogurt Dill Dressing

April 18, 2014 by April Swiger 8 Comments

Quinoa salad yogurt dill dressing

By April Swiger, Contributing Writer

This quinoa salad has the unmistakable taste of fresh dill, tangy yogurt, and refreshing lemon and cucumber. Quinoa is gluten-free, packed with nutrients, and fills you up without ill effects when prepared properly. When soaked with a little raw apple cider vinegar, it’s easy to digest, and can be used in countless recipes ranging from breakfast porridges to summer salads.

Cucumbers have been on sale at my little local market the past two weeks and I’ve been itching to add them to a creamy yogurt based salad. As spring has finally sprung, I’m eager to begin making hearty and nourishing salads again for the warmer months. I love the idea of a filling side dish that can easily transfer over to a simple main dish. With the addition of chickpeas to this salad, it can be both!

Quinoa is a grain-like seed (from the same family as beets and spinach) and benefits from a long soak like other grains and legumes to reduce anti nutrients. There is a distinct bitter taste to quinoa which can be reduced significantly through soaking, and a thorough rinse before cooking. I have found that as I plan my meals for the week, adding an alert to my phone to “soak quinoa” the day before I need it has proved to be an easy way to incorporate this traditional practice into my routine.

quinoa salad yogurt dill dressing2

I love the addition of a creamy and tangy dressing to this salad! It’s reminiscent of a Greek tzatziki sauce but with the delicious taste of fresh dill. I used a Russian kefir yogurt for this recipe, but any plain, full-fat yogurt will work just fine. A whisk works great to blend all the ingredients together.

If you enjoy experimenting in the kitchen, you can easily adapt this recipe with different dressings and vegetables that are available to you. Kimi has shared a fantastic list of nourishing salad dressings that are very simple to make and can be substituted in this recipe. Along with that her cookbook, Fresh: Nourishing Salads for All Seasons, includes more salad dressing recipes and a couple of quinoa salads as well. Her summer quinoa salad is one of my favorites!

Other recipes you may enjoy:

  • Mexican Quinoa Spinach Salad
  • Quinoa Orange Arugula and Beet Salad
  • Simple Mexican Quinoa Bowl
  • Quinoa Tabbouleh

Quinoa salad with cucumbers, chickpeas, and a yogurt dill dressing
 
Author:
April Swiger
Recipe type: Side, or main dish
Print
 
This tangy quinoa salad could serve 8-10 people as a side dish, or 4-6 as a nourishing main dish
Ingredients
  • FOR THE SALAD:
  • 2 cups quinoa
  • 2 cups warm filtered water for soaking
  • 2 tbls raw apple cider vinegar (you can also use yogurt, kombucha, whey or kefir)
  • 2 cups filtered water for cooking
  • 1 tsp salt
  • 1 cucumber, peeled if desired, and cubed
  • 1 small red onion, chopped
  • 1½-2 cups cooked chickpeas (or one 15 oz can)
  • FOR THE DRESSING:
  • ¼ cup extra virgin olive oil
  • ½ cup yogurt
  • Juice of 1 lemon
  • 3 small garlic cloves, minced or crushed
  • 2 tbls fresh dill, chopped
  • Salt and pepper to taste
Instructions
  1. The night before you make this dish, plan to soak your quinoa to make it more digestible. Place the quinoa in a non-reactive bowl or jar (preferably glass), and mix it with the warm filtered water and your raw ACV. Allow it to soak for at least 8 hours, and up to 24.
  2. When you're ready to make the salad, drain and rinse your quinoa in a fine sieve, allowing the water to run clear.
  3. Place your rinsed quinoa in a pot with 2 more cups of water and bring it to a boil.
  4. When it's boiling, cover the pot, and turn the heat to low, allowing it to simmer for 12-15 minutes. (These instructions are the same as Kimi's basic quinoa recipe and work for the various brands of quinoa that I've tried).
  5. When the quinoa is done, place it in a bowl to cool. You can leave it on the counter, or put it in the refrigerator.
  6. In the meantime, assemble your dressing. Whisk together the olive oil, yogurt, lemon juice, garlic cloves, fresh dill and salt and pepper.
  7. When the quinoa has cooled, gently mix in the cucumber, red onion and chickpeas.
  8. Pour the dressing over the quinoa mixture (you may not need it all), and mix thoroughly.
  9. This salad is best served at room temperature after preparing it, or lightly chilled. Top with additional dill, feta cheese, olives, or tomatoes if desired!
3.2.2265


Filed Under: Main Dishes, Nourishing Frugal Recipes, Nourishing Practices, Salads, Sides Tagged With: Main Dish, Nourishing Frugal Recipes, Quinoa, salad, Sides, Yogurt

Individual Ricotta and Spinach Omelets in a Muffin Tin (Grain-free)

February 20, 2014 by April Swiger 6 Comments

Omelet in a muffin tin

By April Swiger, Contributing Writer.

Fluffy eggs and ricotta, with a hint of garlic, and nutrient-packed spinach. These individual ricotta and spinach omelets in a muffin tin are simple to prepare, easy on the budget, and deliciously nourishing. Eggs are “a powerhouse of nutrition” and one of the most frugal ways to get important vitamins and minerals into our diets on a budget. Depending on your choice of ingredients, this meal could be made for under $10, filling the bellies of your entire family!

I love the simplicity of this meal. It’s quick and easy to prepare, but it doesn’t have to look that way. There is something beautiful about the humble egg, and when prepared with a few other complementary ingredients, it can make any occasion feel special. In fact, when my husband and I got married we had a brunch reception with a full omelet bar! It was a unique, and very memorable detail from our day.

These individual omelets would be great for a bridal or baby shower, placed on a fancy plate, or a quick weeknight dinner for a busy family. After baking, the omelets freeze really well, providing an easy make-ahead meal for any occasion. Allow them to thaw overnight in the refrigerator, and they can be reheated in minutes.

Living on one pastor’s income, I’m always eager to find creative ways to save money, and still fill up on the most nutrient dense food we can afford. It’s my goal to steward our money well, while still preparing simple and nutritious meals that will keep my family healthy and energized. These individual omelets are so versatile, and can easily bring you out of that mundane egg slump that I have personally found myself in far too often. Let your taste buds, and family preferences be your guide. The combinations are truly endless!

Notes from Kimi: What type of eggs should you buy? There are more and more options in the stores and at the farmers markets. Here’s a quick guide to buying eggs. As part of our 21 steps to a nourishing diet series, we recommend that you buy the best eggs that you can afford! Eggs are a wonderful source of nutrition, and that’s most true from chickens raised the way nature meant them to be – with plenty of greens, bugs, and lots of space. (The following guide is adapted from Eggs: A Powerhouse of Nutrition

Shopping Guide for Eggs

  • Organic eggs are from chickens who have been feed organic feed, but that doesn’t mean they are free range chickens. They can be just as confined as other chickens, but are given better feed.
  • Vegetarian eggs means that the chickens were feed no animal products, but it also means that they weren’t eating any grubs and insects and are also not free-range eggs.
  • Cage free eggs indicates that the chickens have better living quarters and aren’t jammed into small cages, but they are usually cage free and running around in a warehouse. Once again, not necessarily a huge advantage nutritionally for their eggs.
  • Even eggs labeled “free range” aren’t necessarily benefiting from abundant feeding on insects and other natural food, because they are free “ranging” in a outside yard that no longer contains anything of value for them to eat (they live off of feed instead).
  • Omega-3 eggs are given feed (including flax seeds) that increase the omega 3′s in the eggs. When organic, these may be a good choice – though that’s still up to debate.
  • The best source would be getting eggs from a local farmer who allows them to truly “free range” or “pastures” his chickens. These chickens will often be moved around in a portable wire cage that allows them to eat bugs (which, believe it not, is what makes these eggs so nutritionally superior). I have found that my eggs from one such egg farmer are so different than even the expensive eggs in the store. The yolk is much more orange in color, instead of a pale yellow. They even cook differently (they won’t dry out as quickly). You can try to find such farmers by visiting farmer’s markets, looking out for signs while driving through the countryside, check out Craig’s List, Local Harvest, or word of mouth. Make sure you ask your farmer questions as to how they are raised, however. Or you can raise them yourself!
  • To see a visual example of the difference between commercial eggs and a true free range egg, look at this picture here! 

Easy Egg Recipes to enjoy with your pastured, free-range eggs:

  • Herbed Baked Eggs
  • Decadent Scrambled Eggs Topped with Spinach and Feta
  • Savory Bacon Zucchini Frittata
  • Sweet Potato Crusted Spinach Frittata
  • Simple Deviled Eggs
  • Spicy Scrambled Eggs

Muffin Tin/Pan Recommendations:

Since we like muffins, and things made in muffin tins (like mini meatloaves and individual omelets), a few recommendations for muffin tins (Amazon is an affiliate to this blog). I try to avoid aluminum pans, so I personally own stainless steel muffin tins, and have really enjoyed using them. I am also so pleased to see that they have mini stainless steel muffin tins now too! I’ve also heard great things about clay muffin pans – which some feel is even safer than stainless steel. It’s more of a speciality item, so a little harder to track down, but well worth it. I have long admired Polish Pottery (which beautiful and  also lead and cadmium free). If you really wanted to have a beautiful kitchen item, you can check out some lovely ones like this one. I recommend them with an envious sigh.

Ricotta and Spinach Omelets in a Muffin Tin (grain-free)
 
Author:
April Swiger
Recipe type: Breakfast, Brunch, or a Main Dish
Serves: 9-12 individual omelets depending on your egg size
Print
 
These individual omelets are simple to make, incredibly frugal, and deliciously nourishing. They freeze well too, and are great for busy moms on the run!
Ingredients
  • 9 Eggs
  • ¾ Cup ricotta cheese
  • Salt and pepper to taste
  • 2 Garlic cloves, minced
  • 2-3 Handfuls of spinach
  • Butter or oil to grease your pan and muffin tin
  • Parmesan to sprinkle on top
  • *Optional: mushrooms, peppers and onions, bacon, sausage, etc (basically anything you would put in your favorite omelet)
Instructions
  1. Preheat your oven to 325 F, and grease your muffin tin with your choice of butter or oil.
  2. While the oven is heating up, mix in a large bowl the eggs, ricotta, and salt and pepper, until completely blended.
  3. In a pan on your stovetop, heat your choice of fat on medium, and sauté the garlic for about a minute. Make sure it doesn't brown. Add your spinach a handful at a time, and toss it until all the spinach has wilted. Add the wilted spinach to your egg and ricotta mixture.
  4. Spoon your egg mixture evenly into the muffin tins, and sprinkle with parmesan if desired. Fill them about ½-3/4 the way full. They will puff up in the oven!
  5. Bake the omelets for 15-20 minutes, or until the eggs have set in the middle.
Notes
These freeze really well! Store them in an airtight container, and thaw in the refrigerator overnight before reheating.
3.2.2265


Filed Under: $10 Main, Baked Goods, Breakfast and Brunch, Gluten Free, Nourishing Frugal Recipes, Nutrient Dense Foods, Vegetarian Tagged With: $10 Main, Breakfast and Brunch, Egg, Free-range Eggs, Gluten Free, Grain Free, Nourishing Frugal Recipes, Omelets, Omelette, Ricotta And Spinach, Spinach, Spinach Omelet

Whole Wheat Chocolate Chip Pancakes (Soaked)

January 16, 2014 by Anna Harris 19 Comments

January Vertical

by Anna Harris, Contributing Writer

Meet a toddler’s breakfast nirvana and a mama’s healthy breakfast solution, fluffy buttermilk-soaked pastry wheat pancakes studded with winning bits of chocolate, flavored and enriched with classic pancakes additions of vanilla, egg, and butter. (To read more about the soaking method used in this recipe, read here.)

I realize that chocolate chip pancakes are not anything close to sophisticated cuisine.  To some of us they might not even sound remotely desirable. My three-year-old son, however, would beg to differ, as these are his weekly breakfast staples. It’s likely that as mamas (and some of us have grandiose visions of what the family meal table should look like-Eggs Florentine over homemade sourdough English muffins, Spelt Crepes filled with creme fraiche and local berries, Coconut Granola with home cultured yogurt-that sort of thing) we have the highest hopes for diverging our children’s palates and to nourish every cell of their tiny, developing bodies. I know that for myself, this is indeed a fierce longing.

Post may contain affiliate links. Thanks for supporting this blog!

Additionally, I was raised in a food-centric, large,  and ravenous family where the notion was held that a cleaned plate was akin to godliness and wasting or throwing food away was practically a crime. So you can imagine my befuddlement when our second-born not  only showed little interest in food but was very (to add insult)…picky! I tried training, coaxing, allowing my toddler to get hungry, nothing much seemed to interest him in my whole-raw-milk-honey-drizzled-yogurt, or eggs,  perfectly raised yeast and sourdough breads, or even the soothing simplicity of warm oatmeal. I confess I even tempted him with store-bought cereal, the brightly packaged, fruity “kids” yogurt, and organic pop-tarts with no success at incurring a voracious manly appetite.

My whole being was perplexed and distressed because my tiny man truly is small as well, Elliot has spindly, long limbs left unpadded by even a hint of baby chub. It was as if he always had something more exciting to do, as if it were such a chore to sit down and eat. I believe the turning point was with these pancakes, being both sweet and easy to chew, something he could quickly recognize. He began to consistently eat breakfast with very rare conflict. For months at a time I fed him pancakes, with both a sigh of relief that he was being fed with the sustaining combination of whole grains and fats but also with a sigh of acceptance at his quirk of being absolutely ok with hardly any variety, something my own soul regularly craves.

It might grate on my butter-devoted nerves when Elliot balks at the sight of a golden pat melting across his single pancake, but oh! it brings me joy and relief to see him fed for the morning and his plate forked clean.  I also smile knowing that I can at least fry those pancakes in coconut oil or butter until the edges are so crisp they crackle at the bite and that he loves when we pour a trickle of real maple syrup atop. While those wonderful foods together (I am referencing my experience as a Trim Healthy Mama ) may not be the friendliest to my mama waistline, they are absolutely sublime for fueling my whippet-thin toddlers.

Practically speaking, I don’t whip up a batch of these fresh every day, becoming a veritable short-order Betty Crocker for my young ones fickle appetites, I typically will make a batch every week though, wrapping extras and storing in the fridge to pull out for the following mornings. We have a very loose rotation of simple and generally frugal breakfasts. Here are some of them.

Inexpensive & Healthy Breakfast Options

  • Overnight soaked oatmeal with toppings of butter, maple syrup, honey, raw milk, cinnamon, raisins, or walnuts.
  • I often will make of Trim Healthy pancake batter made of oats, cottage cheese, and egg whites for myself that sits in a half-gallon jar on a make-as-I-please basis.
  • Egg-based breakfasts, scrambled or fried, with or without homemade toast. (With eggs, as much as I adore them, my children just always think they taste better from our plates, which I guess is ok with me, as long as they are eating them.) Here is one of my especially nutrient dense scrambled egg recipes. 
  • Smoothies can be popular with the children when it’s warm, I can put loads of homemade yogurt, honey, and whatever frozen fruit we have, inside.
  • Super-simple favorites: A banana and peanut butter for Elliot, in particular.
  • Toast and pan-fried ham or bacon.
  • Leftovers, Eden and I are versatile and will happily eat leftover pasta (Eden) or leftover brown rice and quinoa (myself) along with leftover cooked vegetables and protein source. French toast using up odds and ends of bread fall into the yummy leftover category.
  • Just recently, my children also have been converted to enjoying vanilla-infused yogurt and toast. Perhaps this is due to the frequency yogurt is served in our house, they just can’t get away from it!

Since that critical point of my son’s toddler breakfast issues, we have come along way and he will eat what the rest of the family eats, even if it means us lending a hand in the momentous task of bringing the offending spoon to his weary mouth.

Soaked Chocolate Chip Pancakes
 
Author:
Anna Harris
Recipe type: Breakfast/Brunch
Cuisine: American
Serves: 4
Print
 
Kid-friendly and simple, chocolate chip pancakes that both offer traditionally-prepared grains and fluffy texture, fried generously in coconut oil for diner-crisp edges and deep nourishment.
Ingredients
  • 1 cup whole wheat pastry flour, sifted
  • 1 cup buttermilk
  • 1-2 eggs
  • 2 tbs. butter, melted
  • 2 tbs. coconut sugar/sucanat
  • 2 tsp. vanilla
  • 1 tsp. baking powder
  • ½ tsp. baking soda
  • ¼ tsp. fine sea salt
  • ⅓-1/2 cup chocolate chips (I used Enjoy Life brand with only 3 ingredients, also dairy-free)
  • Coconut oil, butter, ghee, peanut/sunflower oil for frying
Instructions
  1. Measure sifted flour into a bowl, mix gently with buttermilk, allow to sit overnight.
  2. Whisk together vanilla, egg, coconut sugar, melted butter, add salt, baking soda, and baking powder, pour into flour mixture. Add chocolate chips and stir gently to combine.
  3. It's helpful to let the batter rest for 10 minutes before frying. Use a ¼ cup measure to pour out onto a heated, well oiled skillet or frying pan. Cook on medium heat until bubbles begin to form around the edges, flip and cook on the other side until cooked through and browned.
3.2.2208

I will also note, that while our family seems to digest dairy with ease, this recipe is so simple to make dairy-free by substituting coconut oil and milk or almond milk and sunflower oil for the butter and buttermilk. Just be sure to include an acid medium along with your alternative milk (lemon juice, apple cider vinegar) or you could always use half yogurt and half water for nice results. Spelt, barley, or kamut flour can be substituted for the more domesticated pastry wheat as well.

Other Nourishing Gourmet Pancake Recipes: 

  • Sourdough Pancakes 
  • Basic Soaked Pancakes
  • Whole Grain Blender Pancakes (I do the gluten-, dairy-, and egg-free options)
  • Blueberry Lemon Pancakes made with sprouted flour

Filed Under: Baked Goods, Breakfast and Brunch, Nourishing Frugal Recipes Tagged With: Breakfast and Brunch, Chocolate, Chocolate Chip Pancakes, Chocolate Chips, Nourishing Frugal Recipes, Pancake Batter, Pancakes, Wheat Pancakes, Whole Grain Pancakes, Yogurt

« Previous Page
Next Page »

Primary Sidebar

ConvertKit Form

Get Every Recipe

And the insider's view from our kitchen

Success! Now check your email to confirm your subscription.

There was an error submitting your subscription. Please try again.

We won't send you spam. Unsubscribe at any time. Powered by ConvertKit

Follow Me

  • Facebook
  • Google+
  • Instagram
  • Pinterest
  • RSS

Search

Please Read:

The information you find here at The Nourishing Gourmet is meant to help you become a better cook! This site is primarily for sharing family friendly recipes. It's not meant to give medical advice or to make any health claims on the prevention or curing of diseases.This site is only for informational and educational purposes. Please discuss with your own, qualified health care provider before adding in supplements or making any changes in your diet. Also, any links to sponsors or affiliates (including Amazon) may give me a percentage of the sale or a pay per click. Thank you for supporting this site.

Categories

  • $10 Main (42)
  • $5 Dishes (43)
  • 52 ways to save money on a healthy diet (53)
  • AIP (23)
  • Baked Goods (83)
  • Beverages (72)
  • Breakfast and Brunch (61)
  • Condiments (8)
  • Dairy Free (492)
  • Desserts (184)
  • Dietary Needs (6)
  • Egg Free (11)
  • Egg Free (86)
  • For the Kids (66)
  • For the Love of Food and Books (18)
  • Gluten Free (484)
  • Grain Free (95)
  • Health (75)
  • Kitchen Tools (4)
  • Main Dishes (126)
  • Nourishing Frugal Recipes (167)
  • Nourishing Frugal Tips (70)
  • Nourishing Practices (56)
  • Nutrient Dense Foods (70)
  • Q and A (15)
  • Salads (39)
  • Sides (101)
  • Snacks (124)
  • Soups (50)
  • The Healthy $1 Menu (21)
  • The Low Energy Guide to Healthy Cooking (18)
  • THM (2)
  • Trim Healthy Mama (2)
  • Uncategorized (846)
  • Vegan (241)
  • Vegetarian (361)

Recent Posts

  • 2 Ingredient Peppermint Bark
  • Herbal Hibiscus Lemonade (Keto, THM)
  • Creamy Curry Red Lentil Soup
  • One-Pot Gluten-Free Mac and Cheese
  • Healthy Pumpkin Spice Granola
  • Crispy Pumpkin Spice Granola (oil-free)
  • Why I Use THM Principles Now
  • Vietnamese Beef Noodle Salad
  • Coconut Flour Pancakes
  • Instant Pot Mexican Shredded Chicken

Recent Comments

  • Dorene St G on Cracker Toffee (Easy Peasy Christmas Candy)
  • Nadia Kriston on Finding a Toaster Oven Without Nonstick
  • KimiHarris on How to make heavenly coconut milk whipped cream (with an isi dispenser)
  • KimiHarris on Autumn Beef Stew (Tomato Free)
  • KimiHarris on How to make heavenly coconut milk whipped cream (with an isi dispenser)

Fresh: Nourishing Salads for All Seasons

Get Every Recipe

And the insider's view from our kitchen

Success! Now check your email to confirm your subscription.

There was an error submitting your subscription. Please try again.

We won't send you spam. Unsubscribe at any time. Powered by ConvertKit

Footer

Privacy

Copyright © 2023 · Foodie Pro & The Genesis Framework