• Skip to primary navigation
  • Skip to main content
  • Skip to primary sidebar
  • Skip to footer

The Nourishing Gourmet

Nourishing. Satisfying. Gourmet.

  • THM Coaching
  • About
    • Privacy
    • Contact
  • Recipes
  • Cookbooks
    • Everyday Nourishing Food
    • Salad Cookbook
    • Soup Cookbook

Super-Easy Homemade Peanut Butter Chips

October 8, 2014 by Natalia Gill 24 Comments

Thanks for stopping by! If you're interested in healthy eating check out my free gifts! and subscribe to get regular email updates. *Some links may be affiliate.*

Super-Easy Homemade Peanut Butter Chips - The Nourishing Gourmet

By Natalia Gill, from An Appetite For Joy

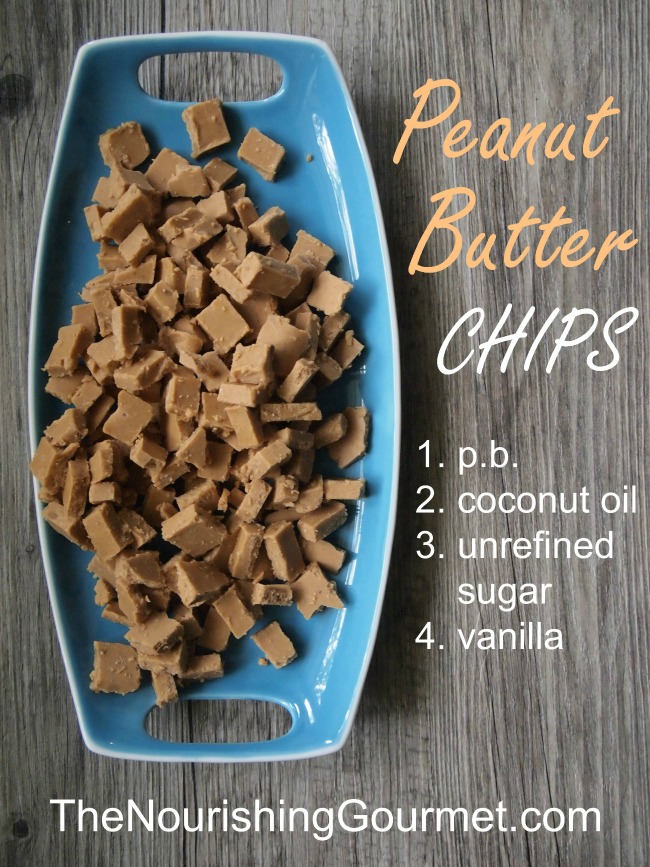
Peanut butter, unrefined sugar, coconut oil and vanilla are combined, hardened in the freezer then sliced into bite-sized morsels of bliss. These silky, sweet & salty little chips taste divine on their own, but this is a dangerous path to tread! I try to reserve them for a special treat atop ice cream or in cookies and other baked goods.

You may also want to check out the many other mouth-watering peanut butter recipes on this blog!

It was my 3-year old daughter who first opened the door to peanut butter chips. We were shopping at Trader Joe’s when she made the decision to place a bag into her kid-sized cart. My knee-jerk reaction was to quickly and nicely veto it, then redirect her to the dried mango. But I paused and skimmed the ingredients. Could have been worse. I decided to stroke her confidence and bring them home.

Last time she did this I ended up with 5 cans of sardines! I got a little creative them them.

Super-Easy Homemade Peanut Butter Chips - The Nourishing Gourmet

How these chips act in baking (it’s a little different)

When you take out the additives, and use unprocessed ingredients, peanut butter chips melt at a lower temperature. So you have to store these in the freezer then take them out immediately before you use them.

  • In cookies and scones they work perfectly, leaving little pockets of gooey goodness.
  • In muffins they leave somewhat concentrated pockets of peanut butter but they get absorbed by the muffin so there is no change in texture. Could be a good thing, but I’m just letting you know what to expect. (I’ve only tried them in coconut flour muffins, so they might act differently with less spongy flours.)
  • In waffles & pancakes – I haven’t tried this yet but I’m assuming they will work similar to the cookies since they are cooked quickly.
  • Over ice cream they are absolutely delicious!

Super-Easy Homemade Peanut Butter Chips - The Nourishing Gourmet

Using unrefined powdered sugar

You’ll need to use powdered sugar in these. Thankfully making your own unrefined powdered sugar is easy!

I have also tried a different method, leaving the sugar un-powdered and melting all the ingredients over the stove. For whatever reason, I had a surprisingly difficult time getting the coconut sugar to melt so powdering your sugar first is definitely the way to go.

UPDATE: I think melting the ingredients gently on the stove-top then cooling would work. I thought the coconut sugar wasn’t melting but now I realize that the graininess I was tasting was the texture in the natural peanut butter – it was more prominent when it was melted. I think the  graininess would be unnoticeable when cooled!

I hope you enjoy them!
Super-Easy Homemade Peanut Butter Chips - The Nourishing Gourmet

Super-Easy Homemade Peanut Butter Chips
 
Author:
Natalia Gill
Recipe type: Dessert
Cuisine: Topping, Add-In
Serves: about 4 cup
Print
 
These simple and delicious peanut butter chips come in handy for many purposes.
Ingredients
  • 1 cup peanut butter
  • ¼ cup coconut oil
  • ¼ cup powdered coconut palm sugar or powdered sucanat (it's easy to make your own)
  • 1 teaspoon vanilla extract
  • Sea salt, to taste (if your peanut butter is not salted)
Instructions
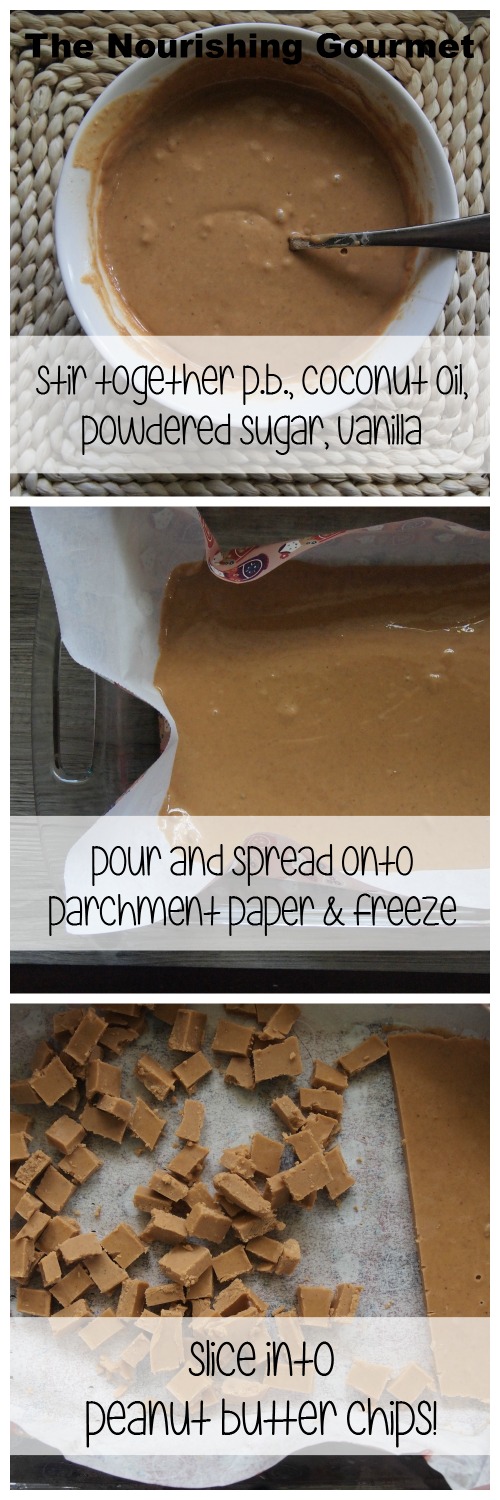
  1. Stir together the ingredients until smooth.
  2. Pour into a parchment paper lined baking pan (mine was 9x13)
  3. Freeze for 1 hour
  4. Slice up into chips (for best results, place the pan on cooling packs when doing this)
  5. Store in the freezer until immediately before use
Notes
You can certainly reduce the sugar! I put in a fair amount because we usually make our baked goods not-too-sweet so we like a sweet chip inside them.

Almond and sunflower seed butters would also work well.
3.2.2807
The following two tabs change content below.
  • Bio
  • Latest Posts

Natalia Gill

Hello! My name is Natalia and I live in the “City in a Forest” (Atlanta, GA) with my husband and two children. I’ve been drawn to nutrition and natural healing since I was a child, growing up in a Russian and Dutch home. I remember my dad theatrically convincing me to love head cheese (with horseradish and lemon!) and learning to make herbal tinctures with my mom. Formerly a project engineer in corporate, I've been working in health and wellness since 2001 as a Pilates and yoga teacher, content developer for a functional MD and nutritional consultant for "The 21-Day Belly Fix". You can follow me at AnAppetiteForJoy.com

Latest posts by Natalia Gill (see all)

  • “Busy Day” Asian Veggie Noodle Soup (Gluten & Grain-Free Options) - December 1, 2016
  • Greek Sweet Potato Hash – $15 Meal from Trader Joe’s - March 31, 2016
  • Apple Pastila (A Honey-Sweetened Confection) - December 9, 2015
Filed Under: Baked Goods, Dairy Free, Desserts, Gluten Free, Uncategorized, Vegan, Vegetarian

Previous Post: « Pennywise Platter Thursday 10/2
Next Post: Pennywise Platter Thursday 10/9 »

Reader Interactions

Comments

  1. Magda

    October 8, 2014 at 9:25 am

    I wonder if using cocoa butter instead of CO in the recipe will make them work out better in baked goods….

    Reply
  2. Natalia Gill

    October 8, 2014 at 10:03 am

    Magda, that is a great idea! So far I’ve been happy with the way these work in baked goods except for the coconut flour muffins. I think the cocoa butter might do the trick!

    Reply
  3. Alison D.

    October 8, 2014 at 11:39 am

    Uh oh. I’m pretty sure I should forget I ever saw this recipe. On the other hand, I wouldn’t want to deprive my son, would I? I’ll make them for HIS sake. Ahem.

    Reply
    • Natalia

      October 9, 2014 at 8:51 am

      Ha! Stay strong Alison. Unfortunately, the freezer doesn’t create much of a barrier since it only makes them yummier. Maybe stick them way in the back. 🙂

      Reply
  4. Dina-Marie @ Cultured Palate

    October 9, 2014 at 7:59 am

    These look delicious and healthier than the store-bought version – thanks for sharing!

    My children will definitely be glad you did. I appreciate the link to homemade unrefined powder sugar because so many sweet tooth recipes call for powdered sugar and every step we take to make a healthier version makes me feel better about serving them to my family!

    Reply
    • Natalia

      October 9, 2014 at 8:52 am

      Thank you Dina-Marie! I agree. Every little step helps.

      Reply
  5. Julie

    October 10, 2014 at 7:57 am

    What brand of peanut butter do you use?

    Reply
    • Natalia

      October 10, 2014 at 10:11 am

      Hi Julie. Any natural brand peanut butter would work. With this batch I used 365 (Whole Foods) brand. If you have a high speed blender you could also make peanut butter (so delicious!) I’m not sure about Jif/Skippy type brands because they are less runny. But extra coconut oil would probably soften the p.b. mixture enough to make it pourable.

      Reply
  6. Sheri Winkler

    October 10, 2014 at 10:40 am

    I wonder if you could use stevia instead of the powdered sugar? I try to stay away from any type of sugar since it gives me headaches.

    Reply
    • Natalia

      October 10, 2014 at 10:50 am

      Sheri, I don’t see any reason why stevia wouldn’t work. Actually I think it would work well! You could start with just a bit and then keep adding to taste. Thanks for the idea!

      Reply
  7. Brooks

    October 14, 2014 at 1:11 pm

    Do you think these would taste good with a different nut or seed butter? I wish I could have peanut butter cause I loved PB chips! 😉

    Reply
    • KimiHarris

      October 14, 2014 at 9:10 pm

      Brooks,

      I think so for sure! Just use your favorite nut butter. 🙂

      Reply
  8. Christina Carnoy

    October 18, 2014 at 7:33 pm

    I’ve made them twice now with Stevia and a little agave/maple syrup-YUM!!!! Now can you give us a recipe for Butterscotch Chips????? Please?????!!!

    Reply
    • Natalia

      October 20, 2014 at 6:31 am

      Christina, so glad you like them and thanks for the tip on how you modified the recipe! Butterscotch chips – mmmm!

      Reply
  9. zosia

    February 14, 2015 at 1:35 pm

    do you think these would still hold together WITHOUT any sweetener?

    Reply
  10. Martha

    June 21, 2015 at 6:00 pm

    I might have to make these since I just found out tonight at Trader Joe’s they will no longer be available. (gasp!!!)

    Reply
  11. titi

    October 26, 2016 at 1:46 am

    Thanks for this but can it remain firm permanently after removing from freezer

    Reply
  12. JJ

    November 2, 2016 at 2:27 am

    Can you just add granulated sugar? What’ll happen to it if i do?

    Reply
  13. Stephanie

    April 7, 2019 at 10:45 am

    Thanks for the recipe. How long will these keep for?

    Reply
  14. Su

    November 6, 2020 at 2:09 am

    Can these be added to granola and kept out of the freezer?

    Reply
  15. Su

    November 6, 2020 at 2:12 am

    Can these be added to granola and will they melt/ go,sodt kept out of the freezer?

    Reply
  16. Dominiq Clark

    January 26, 2021 at 4:51 pm

    What is a good coconut oil substitute?

    Reply
  17. Dominiq Clark

    January 26, 2021 at 4:56 pm

    What are the measurements to the ingredients?

    Reply
  18. Bruce Gruy

    March 20, 2021 at 9:52 am

    i wonder what happened?! went dark after 2014. hope you and yours are all ok, Natalia.

    Reply

Leave a Reply to Brooks Cancel reply

Your email address will not be published. Required fields are marked *

This site uses Akismet to reduce spam. Learn how your comment data is processed.

Primary Sidebar

ConvertKit Form

Get Every Recipe

And the insider's view from our kitchen

Success! Now check your email to confirm your subscription.

There was an error submitting your subscription. Please try again.

We won't send you spam. Unsubscribe at any time. Powered by ConvertKit

Follow Me

  • Facebook
  • Google+
  • Instagram
  • Pinterest
  • RSS

Search

Please Read:

The information you find here at The Nourishing Gourmet is meant to help you become a better cook! This site is primarily for sharing family friendly recipes. It's not meant to give medical advice or to make any health claims on the prevention or curing of diseases.This site is only for informational and educational purposes. Please discuss with your own, qualified health care provider before adding in supplements or making any changes in your diet. Also, any links to sponsors or affiliates (including Amazon) may give me a percentage of the sale or a pay per click. Thank you for supporting this site.

Categories

  • $10 Main (42)
  • $5 Dishes (43)
  • 52 ways to save money on a healthy diet (53)
  • AIP (23)
  • Baked Goods (83)
  • Beverages (72)
  • Breakfast and Brunch (61)
  • Condiments (8)
  • Dairy Free (491)
  • Desserts (183)
  • Dietary Needs (6)
  • Egg Free (11)
  • Egg Free (85)
  • For the Kids (66)
  • For the Love of Food and Books (18)
  • Gluten Free (484)
  • Grain Free (95)
  • Health (75)
  • Kitchen Tools (4)
  • Main Dishes (126)
  • Nourishing Frugal Recipes (167)
  • Nourishing Frugal Tips (70)
  • Nourishing Practices (56)
  • Nutrient Dense Foods (70)
  • Q and A (15)
  • Salads (39)
  • Sides (101)
  • Snacks (123)
  • Soups (50)
  • The Healthy $1 Menu (21)
  • The Low Energy Guide to Healthy Cooking (18)
  • THM (2)
  • Trim Healthy Mama (2)
  • Uncategorized (846)
  • Vegan (240)
  • Vegetarian (360)

Recent Posts

  • Herbal Hibiscus Lemonade (Keto, THM)
  • Creamy Curry Red Lentil Soup
  • One-Pot Gluten-Free Mac and Cheese
  • Healthy Pumpkin Spice Granola
  • Crispy Pumpkin Spice Granola (oil-free)
  • Why I Use THM Principles Now
  • Vietnamese Beef Noodle Salad
  • Coconut Flour Pancakes
  • Instant Pot Mexican Shredded Chicken
  • Tender Instant Pot Carnitas (shredded pork for tacos)

Recent Comments

  • KimiHarris on How to make heavenly coconut milk whipped cream (with an isi dispenser)
  • KimiHarris on Autumn Beef Stew (Tomato Free)
  • KimiHarris on How to make heavenly coconut milk whipped cream (with an isi dispenser)
  • Milia on Our Experience Using Activated Charcoal When We had the ‘Stomach Bug’
  • Sharon on How to make heavenly coconut milk whipped cream (with an isi dispenser)

Fresh: Nourishing Salads for All Seasons

Get Every Recipe

And the insider's view from our kitchen

Success! Now check your email to confirm your subscription.

There was an error submitting your subscription. Please try again.

We won't send you spam. Unsubscribe at any time. Powered by ConvertKit

Footer

Privacy

Copyright © 2022 · Foodie Pro & The Genesis Framework