By Chloe, from How We Flourish
Here’s the thing: I have a very small kitchen. I’m also on a tight budget. I don’t have the option of having a kitchen filled with small appliances. However, I had heard a lot about the benefits of juicing. A morning carrot juice is also an important about of the GAPS Intro Diet, so I learned how to make carrot juice with a blender.
If you ask most people, they will tell you that you need a real juicer for juicing. To truly receive the benefits of juicing, commercial juice is not an option as it is pasteurized. Juices must be freshly pressed to preserve the enzymes and nutrients that makes vegetable juices so good for us. But not everyone can afford a big fancy masticating juicer! I’d love to have one, of course, as it is certainly less work than making juice with a blender. But when that is not an option, you do not need to worry. You can still get the benefits of juicing for a lot less money.
Why Juicing
I was never a fan of juice before GAPS. But I learned that juicing can help support detoxification, and the vitamins and minerals from the juiced vegetables can be quickly absorbed. It can be a great remedy for constipation! This might be TMI, but that is why I have taken such a liking to juicing. It helped for me very much, so it’s a tool I like to keep in my back pocket.
Interested? If you would like to test the benefits of juicing without the investment, read on to learn how to juice without a juicer.
How to Juice without a Juicer
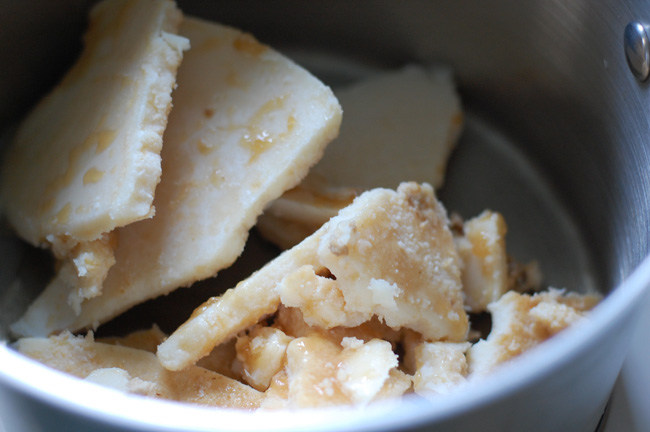
The following tutorial is for 100% fresh carrot juice, which is the starting point for juicing on GAPS Intro. How many carrots you need will depend on how much juice you want – 2-3 carrots usually makes a decent sized glass for me. This method of making juice in a blender will also work for all types of juices!
- Wash and chop the carrots.
- Add them to the blender. Any type of blender should work fine.
- Add a small amount of filtered water. With more watery vegetables, you may not need any. If you like your juices more dilute, add more. For carrot juice, add enough water to come slightly less that halfway up the carrots. It just needs to be enough to help get things moving.
- Blend on medium until the ingredients are well pulverized.
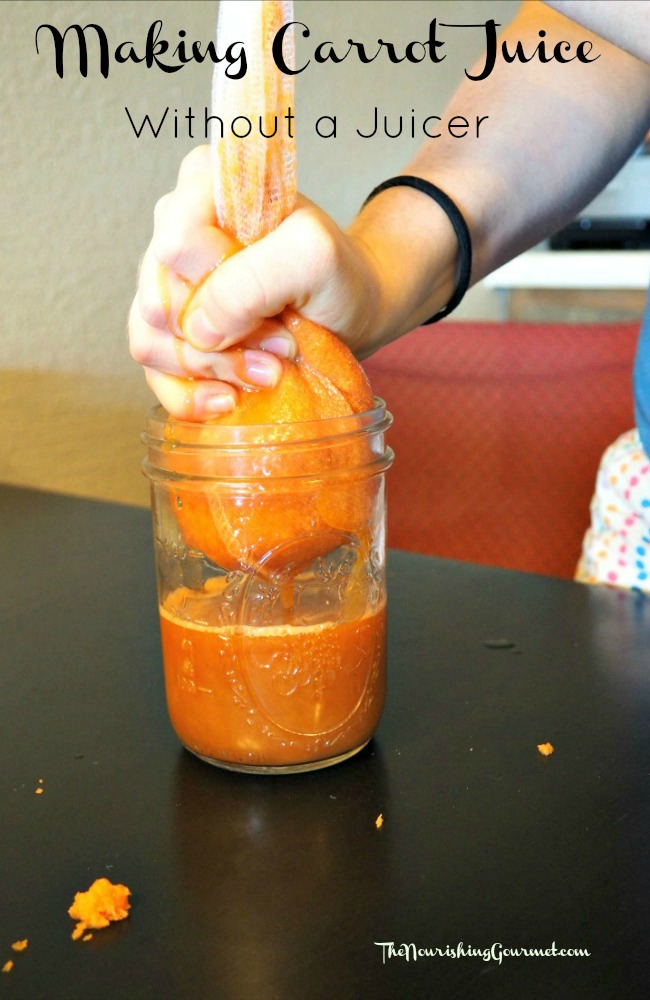
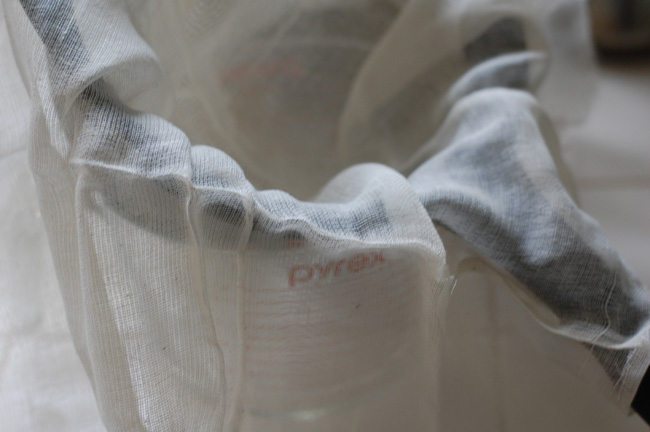
- Place a nut milk bag in your desired cup/container and pour in the blended ingredients.
- Squeeze as much liquid out of the nut milk bag as possible. Save the leftover pulp in the freezer to be used in other recipes.
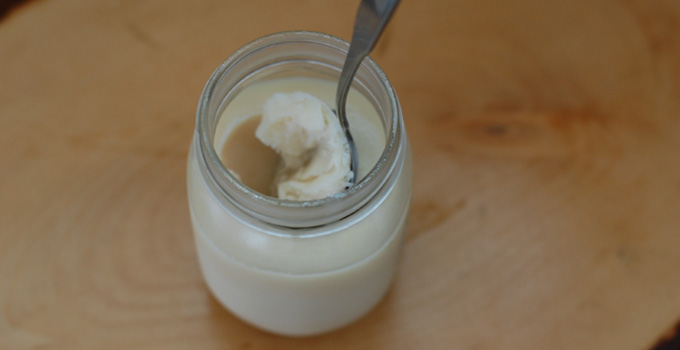
- Enjoy your juice! It is best to drink on an empty stomach, such as first thing in the morning before breakfast.
Tip: If you enjoy the benefits of juicing, but find that it spikes your blood sugar, try adding fat and protein to your juice. One of my favorite ways to do this with with the so-called “GAPS Milkshake.”
Want to make a large batch? It is recommended to always drink juice fresh. However, I believe that if you are experiencing benefits with juicing, less-than-optimal juice may be better than no juice at all. Try freezing the juice immediately and thawing it in a water bath when you want it.
Are you interested in learning more about healing your gut with GAPS Intro? Learn more about how I did just that (without going crazy!) in my book Healing Patiently.
- 2-3 carrots
- Wash and chop the carrots.
- Add them to the blender. Any type of blender should work fine.
- Add a small amount of filtered water. With more watery vegetables, you may not need any. If you like your juices more dilute, add more. For carrot juice, add enough water to come slightly less that halfway up the carrots. It just needs to be enough to help get things moving.
- Blend on medium until the ingredients are well pulverized.
- Place a nut milk bag in your desired cup/container and pour in the blended ingredients.
- Squeeze as much liquid out of the nut milk bag as possible. Save the leftover pulp in the freezer to be used in other recipes.
- Enjoy your juice! It is best to drink on an empty stomach, such as first thing in the morning before breakfast.
Do you juice? What is your favorite type of juice to make?

 Lee holds a Masters in Music Education from Florida State and was a band director in her past life. Married to her college sweetheart for over 27 years, she has been homeschooling their two children for the last 9 years. A lifelong foodie, her real food journey got a kickstart when her sister took her to hear Sally Fallon speak on Nourishing Traditional Foods in 2007. Together with her sister, she produced a DVD on making nourishing traditional breads using the